User Guide: Call Center Solution Powered by Hoory AI
Introduction
Hoory AI's Call-Based Channel is designed to revolutionize how businesses manage customer interactions by integrating voice support into your workflow. It allows you to connect international and country-specific phone numbers to your Hoory AI account and effectively manage customer calls through an advanced Call Center Solution.
The purpose of the call-based channel is to centralize your voice support operations, allowing you to handle inbound and outbound calls, assign tasks to your AI assistant, and streamline customer support processes with real-time communication.
Creating a Call-Based Channel
To set up a call-based channel, follow these steps:
-
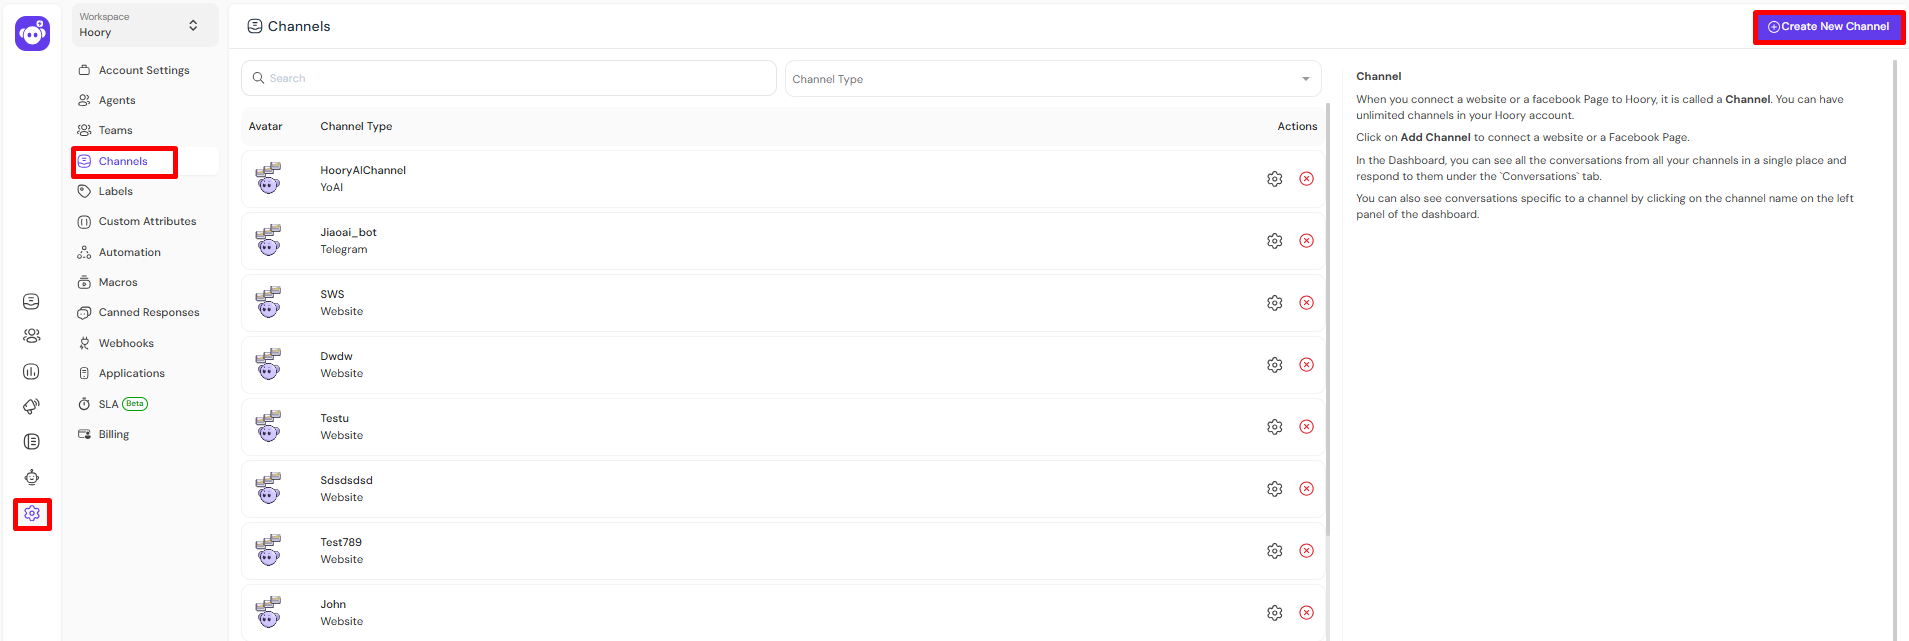
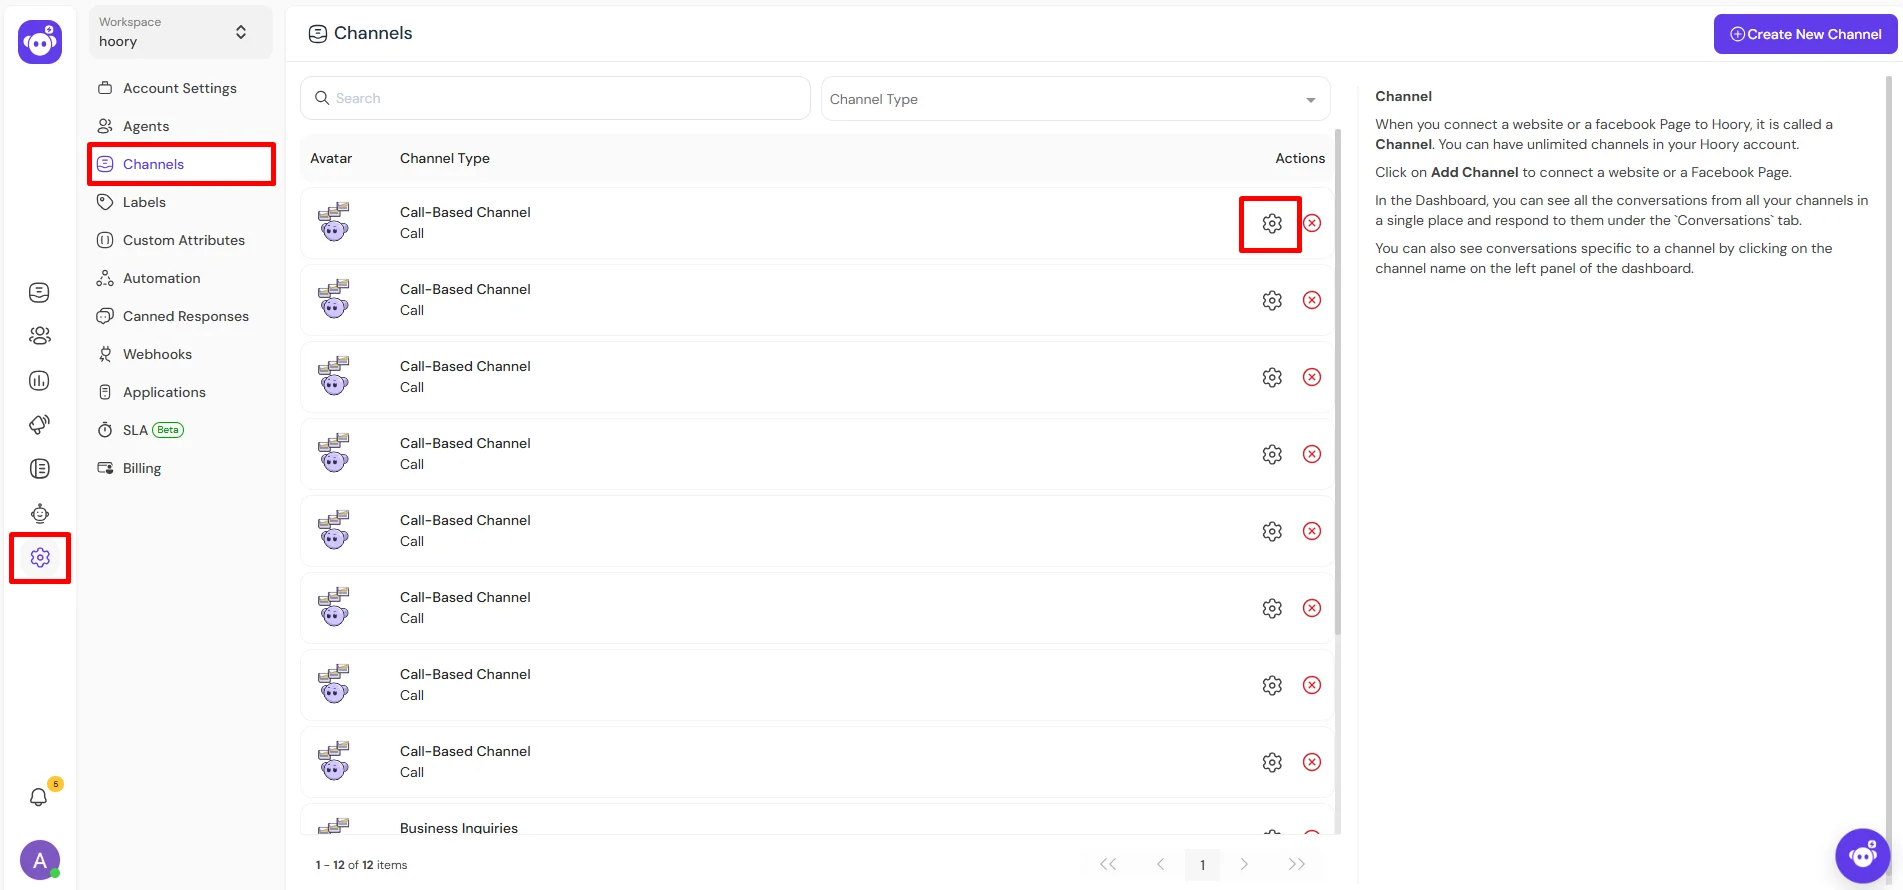
Navigate to Settings.
-
Select Channels.
-
Click Add Channel in the top right corner.
-
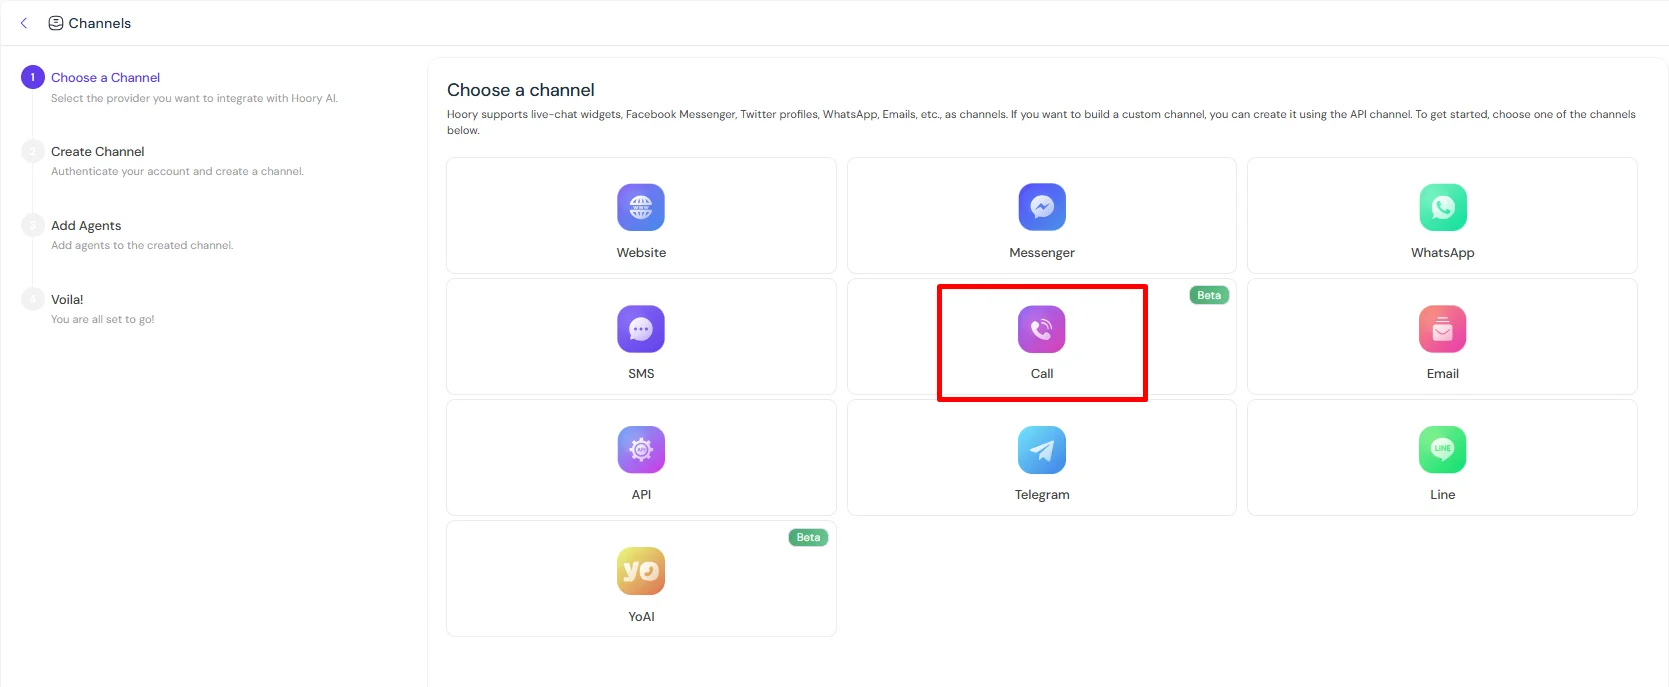
Select Call from the list of available channels.
-
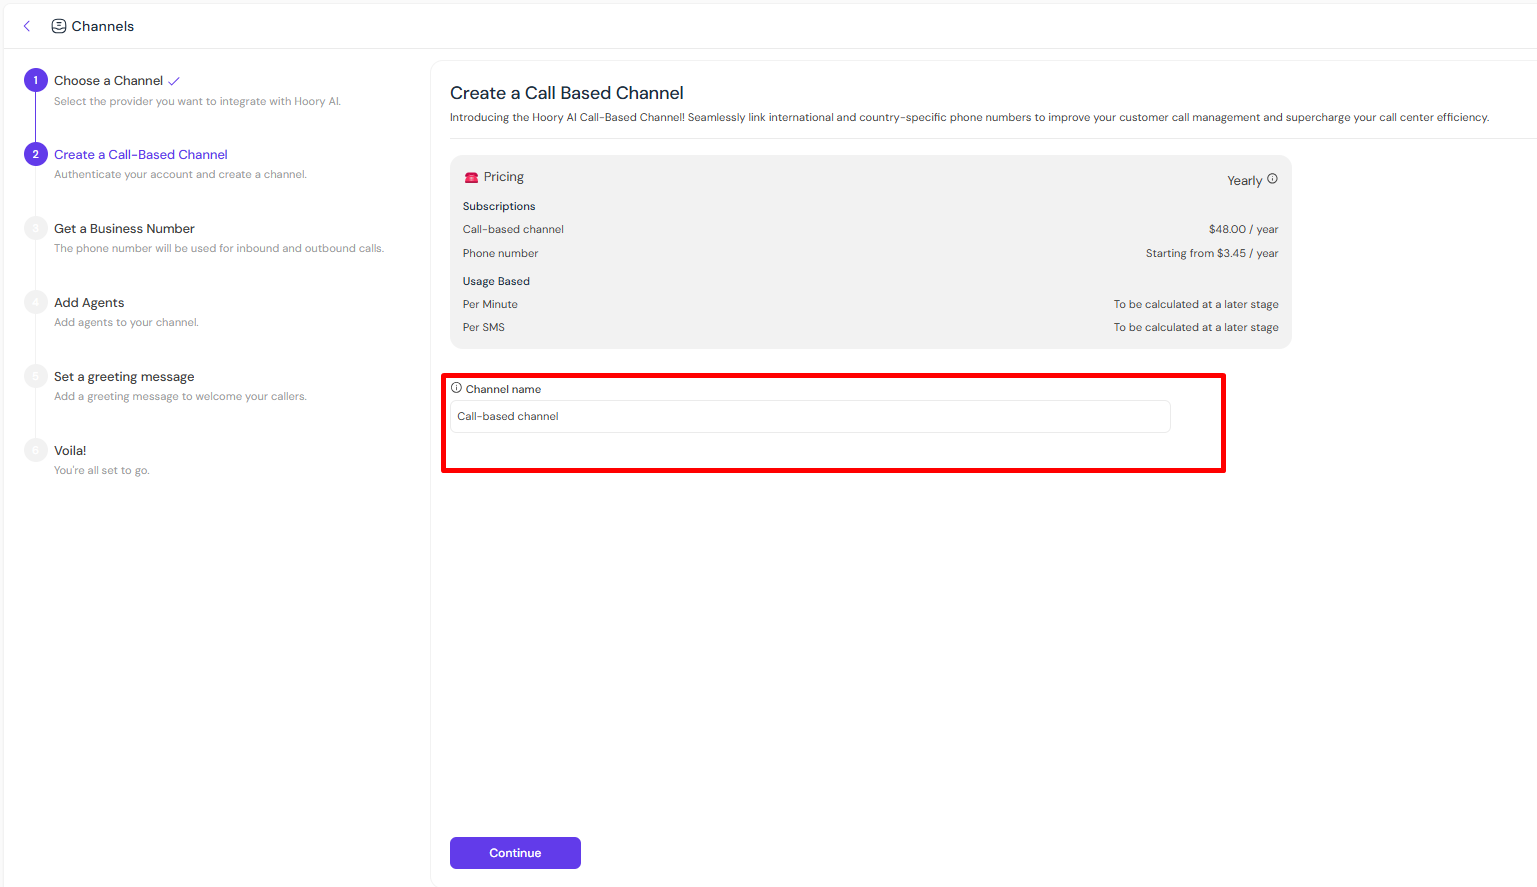
Enter a name for your call-based channel and click Continue.
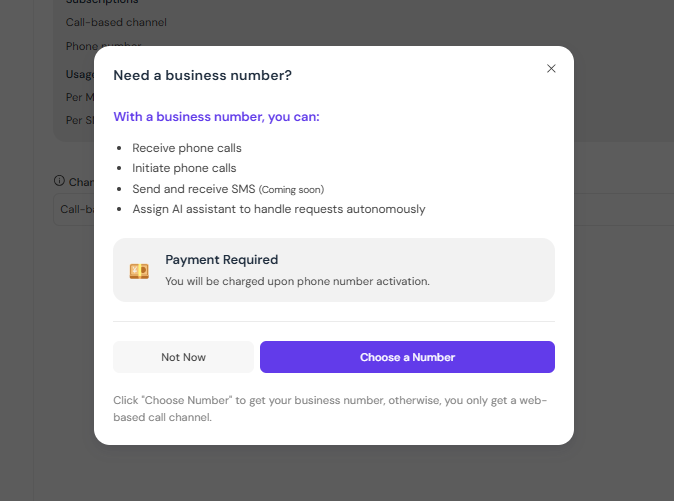
- A popup will appear asking if you need a business number.
-
Click Choose Number to obtain a phone number. Having a phone number enables you to receive and initiate calls, send and receive SMS, and assign your AI Assistant to autonomously handle customer requests.
- If you don't need a phone number, click Not Now. This will skip the phone number selection step, taking you directly to adding agents. However, note that the web-based call channel cannot be used separately. So, you will need to add a phone number later.
Obtaining Your Business Number
After clicking Choose Number, follow these steps to get your business number for inbound and outbound calls:
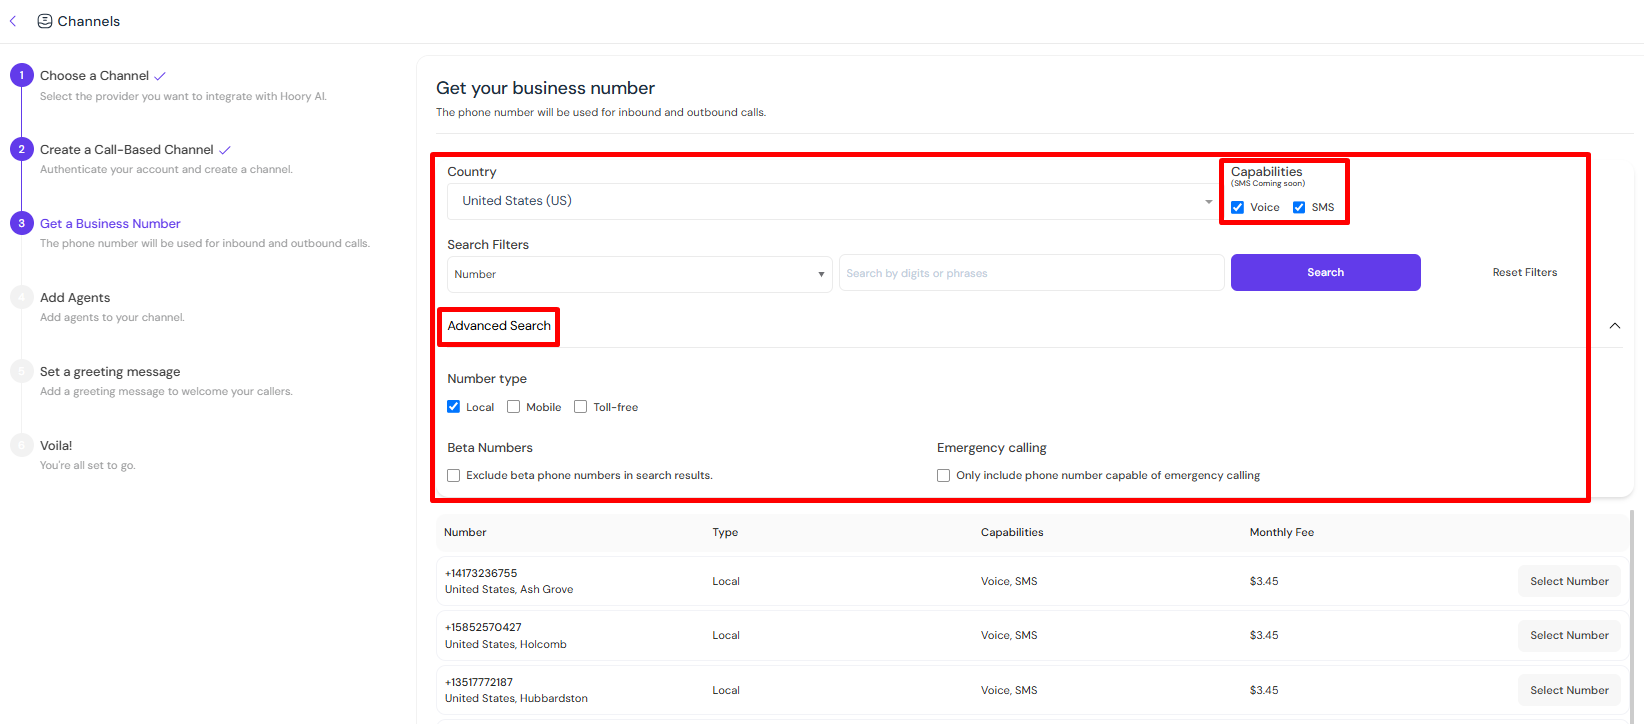
-
Select Capabilities Choose the capabilities you want for your number:
- Voice
- SMS
- Both
-
Apply Filtering and Advanced Search Utilize the filtering and advanced search functionalities to find the desired phone number. You can filter phone numbers by:
- Country
- Number or Locality
- Digits or Phrases
Advanced Search Options allow you to:
- Define the number type: local, mobile, or toll-free (toll-free numbers allow calls from landlines at no charge to the caller.
- Include or exclude beta phone numbers (designated for testing).
- Include or exclude phone numbers capable of emergency calls.
-
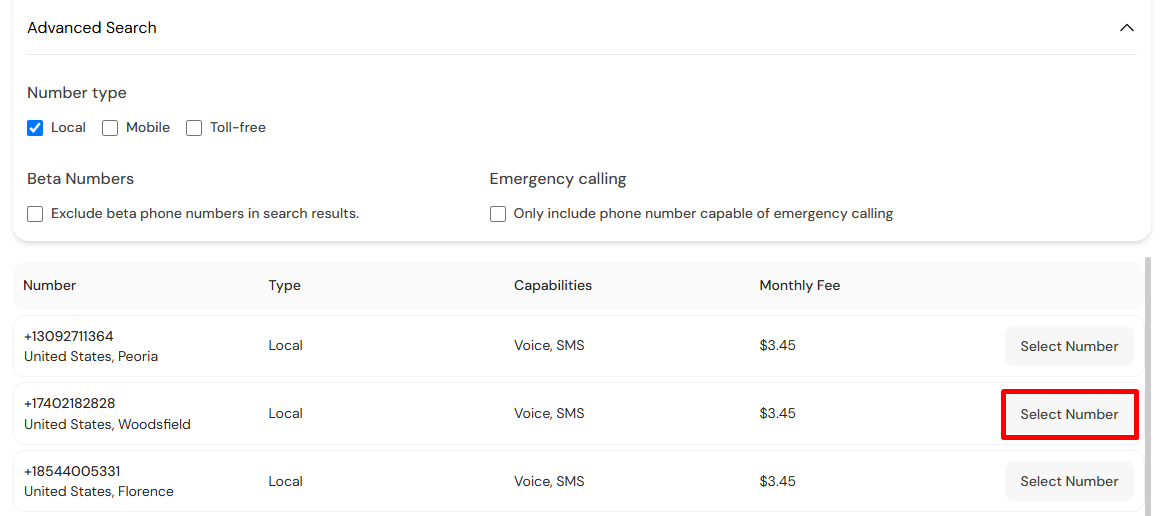
Once you have defined your preferences for the phone number, click Search. The list below will display all numbers matching your filters, along with their monthly fees.
-
Find the number you want and click Select Number.
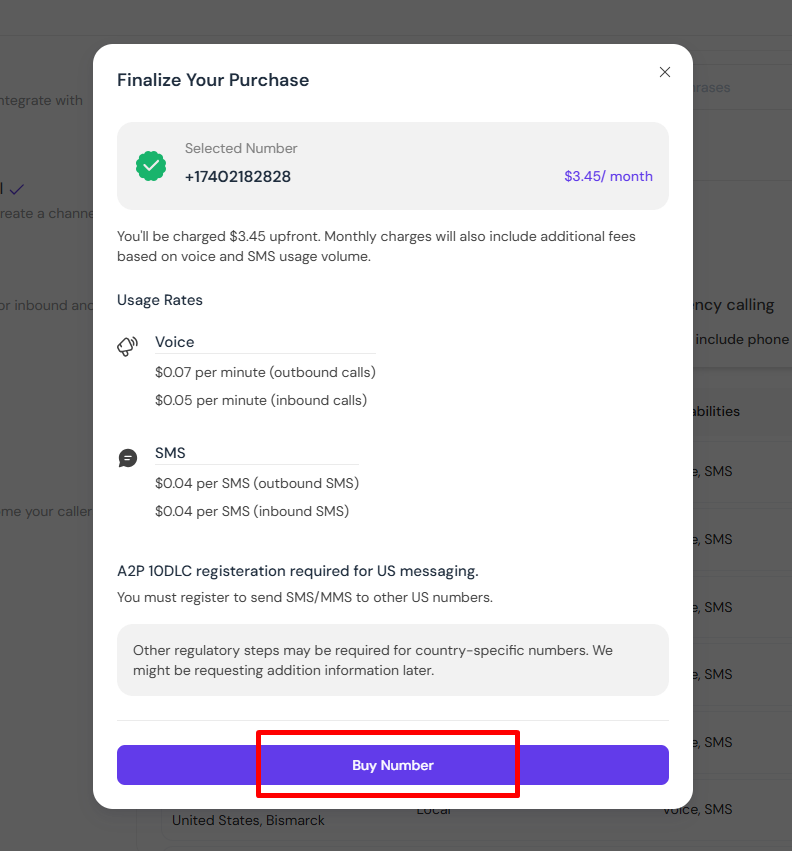
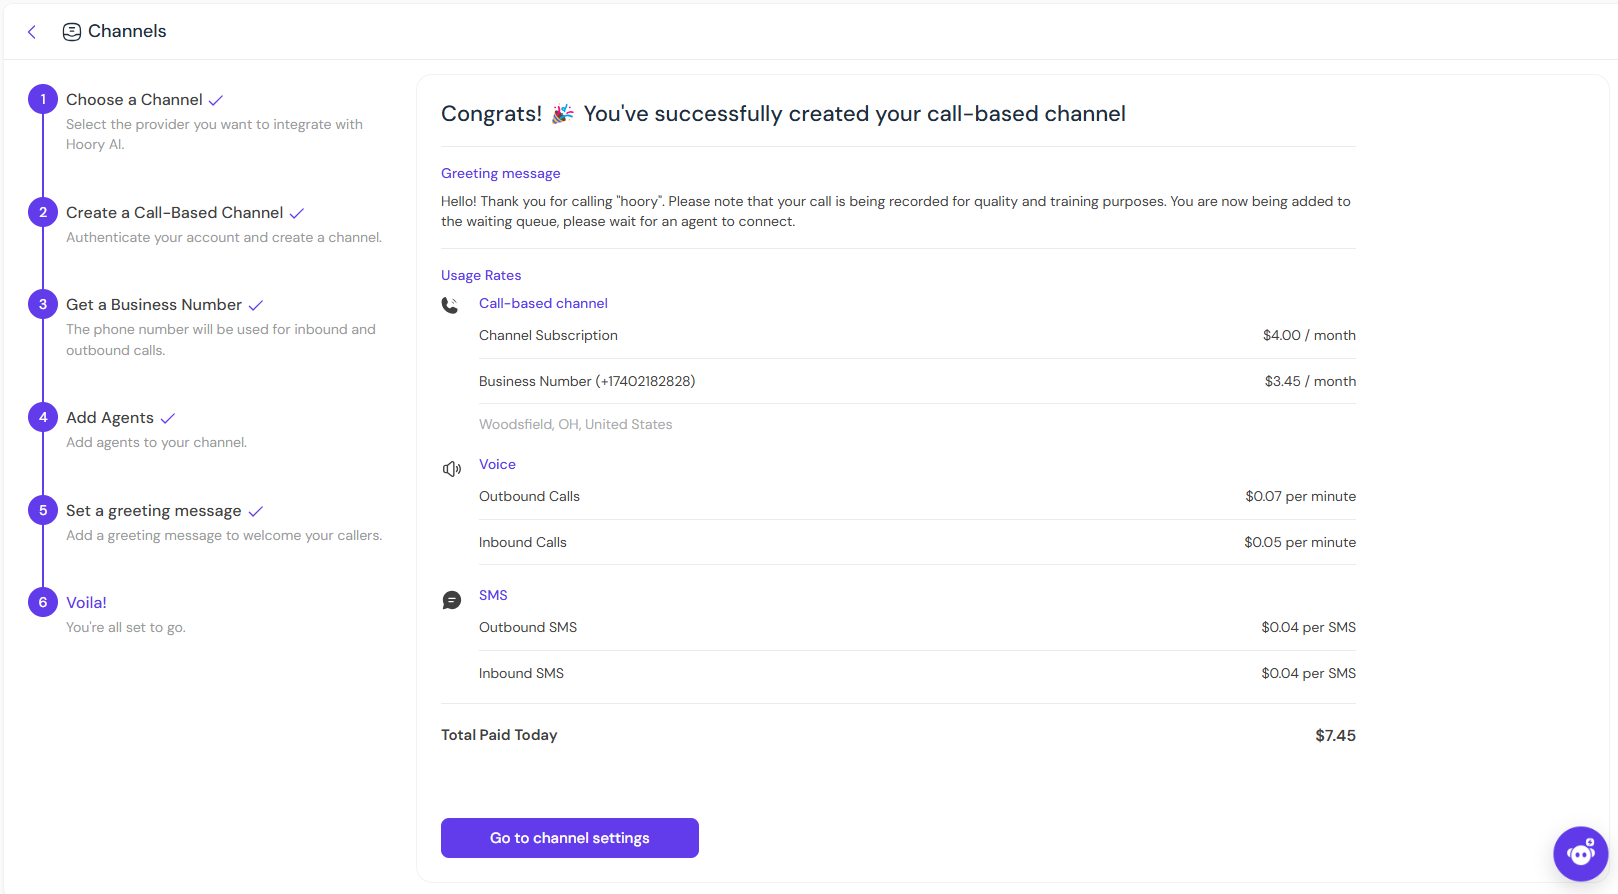
- A popup window will open up with additional information about the pricing. Note that the cost of the phone number, as well as inbound and outbound calls, is not included in your Hoory AI subscription package. These are additional costs that will be charged as they occur.
-
To finalize your purchase, click Buy Number.
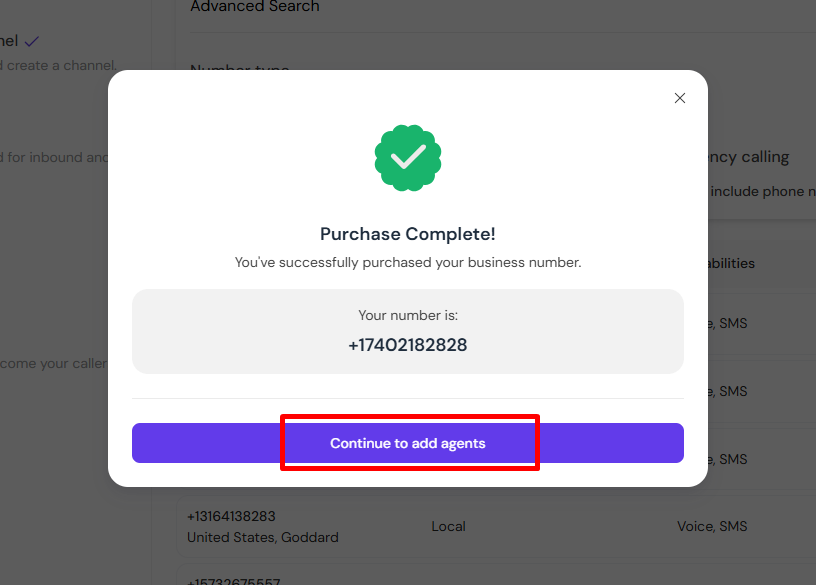
Case 1: If you have a credit card attached to your account, a success message will confirm that your number has been purchased and is ready for use. You will be charged immediately for the business number, with additional charges applied later based on your usage volume.
Case 2: If you don't have a credit card attached, the system will redirect you to the Billing page to add one. Once completed, you will automatically be taken back to the channel setup flow, where a purchase confirmation message will be displayed.
-
To continue with the channel creation process, click Continue to Add Agents.
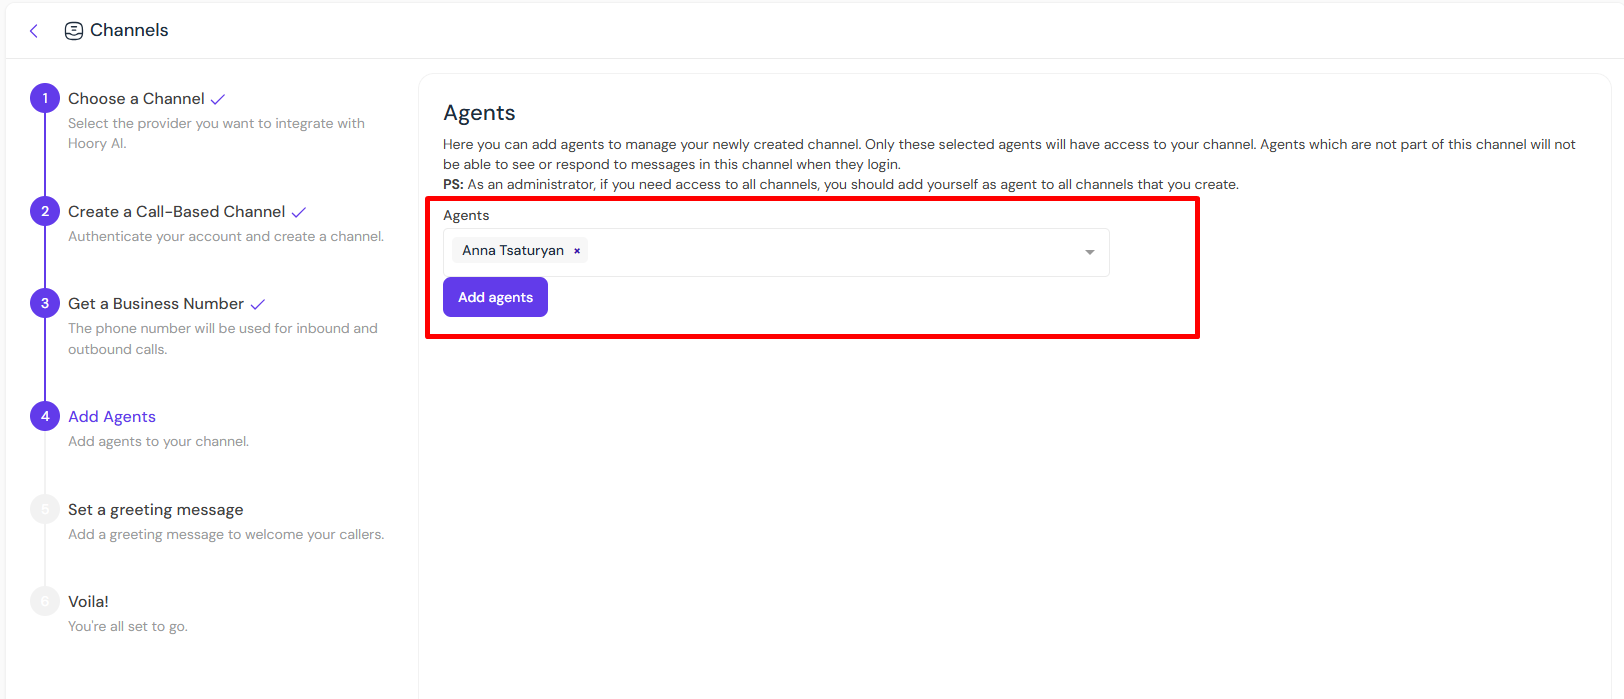
-
By default, the system adds you as an agent. If you want to add more agents, select their names from the dropdown and click Add Agents.
-
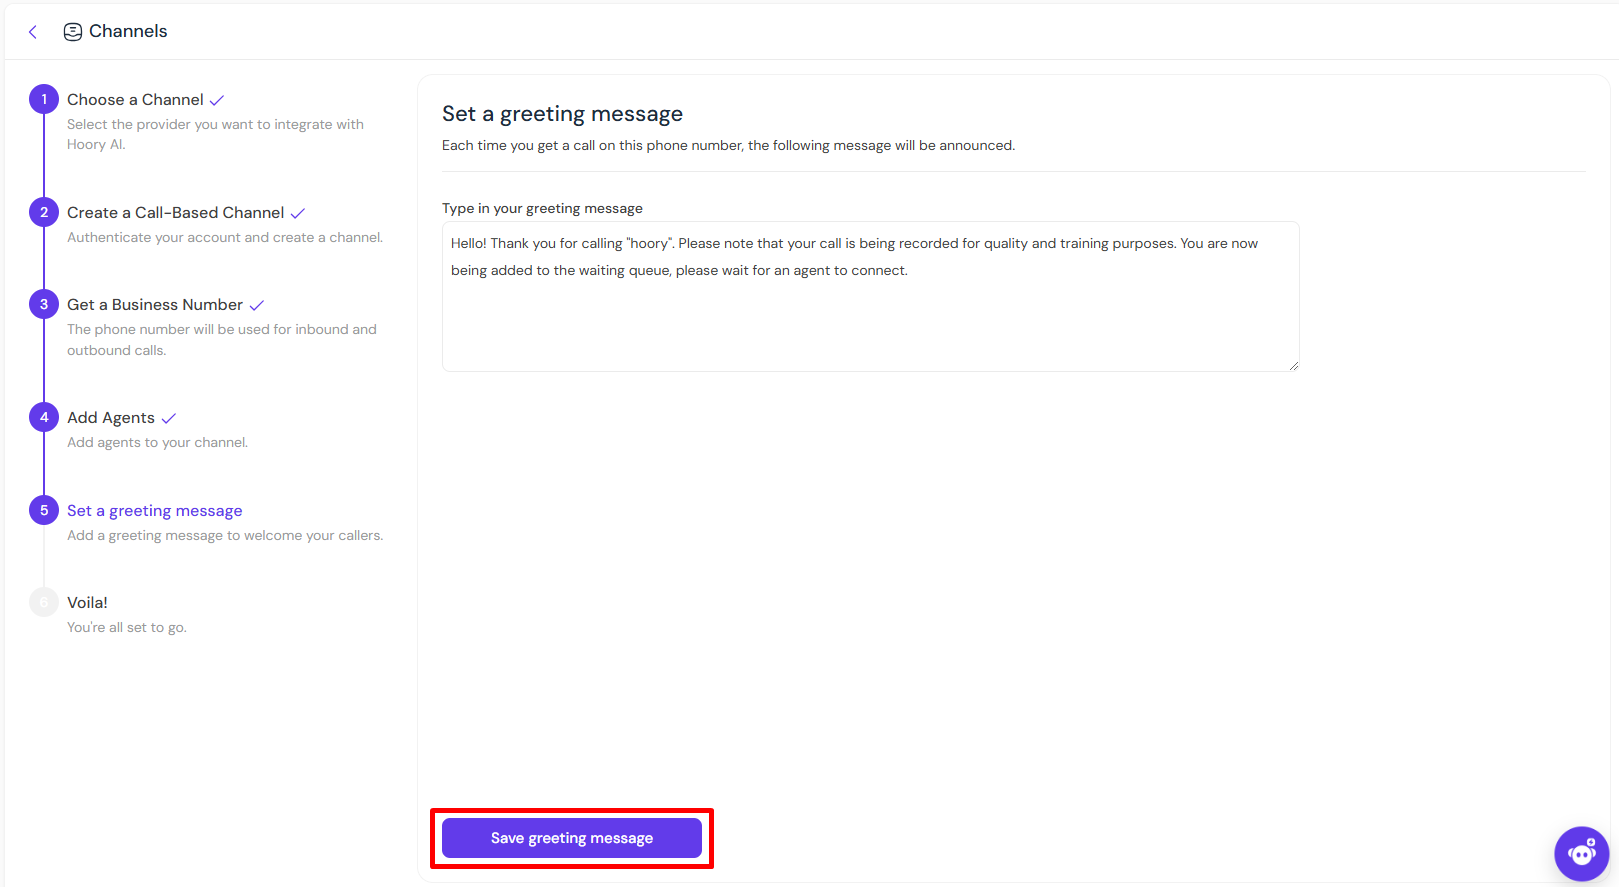
Type in a greeting message, which will be announced each time you get a call on the given phone number. Click Save Greeting Message.
That's it! Your call channel is successfully set up.
Connecting Your Call-Based Channel to an AI Assistant
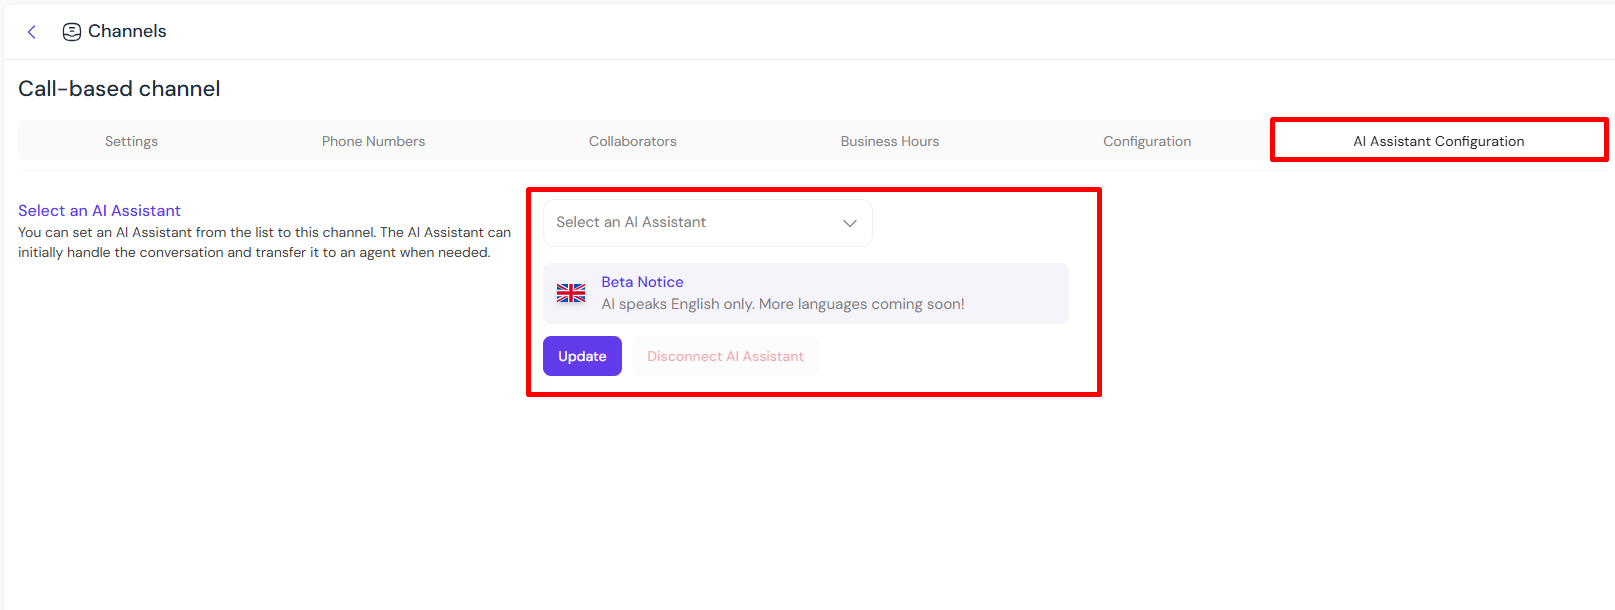
Like any other channel in Hoory AI, the call-based channel can also be attached to an AI Assistant. It suggests having the AI Assistant initially handle the conversation with the customer and transfer it to an agent when necessary.
To connect your call-based channel to an AI Assistant:
-
Navigate to Settings ⮕ Channels ⮕ Channel Settings.
-
Open the AI Assistant Configuration tab.
-
From the dropdown list of AI Assistants, select the one you want to connect to your call-based channel. Beta Notice: AI speaks English only. More languages are coming soon!
-
Click Update.
-
If you no longer need AI assistance, click Disconnect AI Assistant, and it will be disconnected instantly.
Sending and Receiving Calls
To send and receive calls on your call-based channel, you must enable Accepting Calls from Profile Settings.
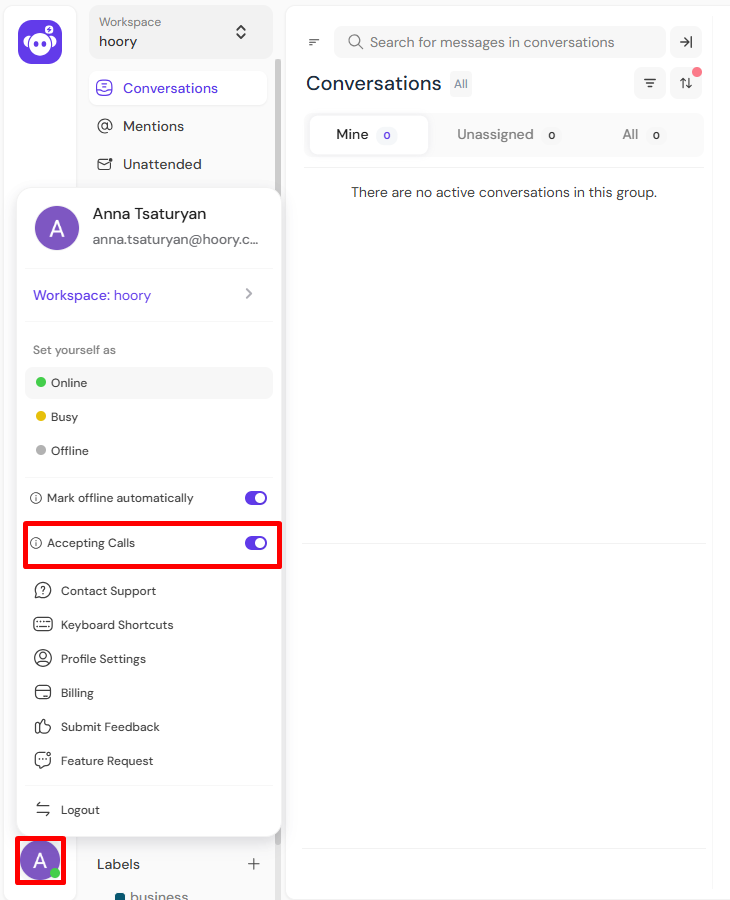
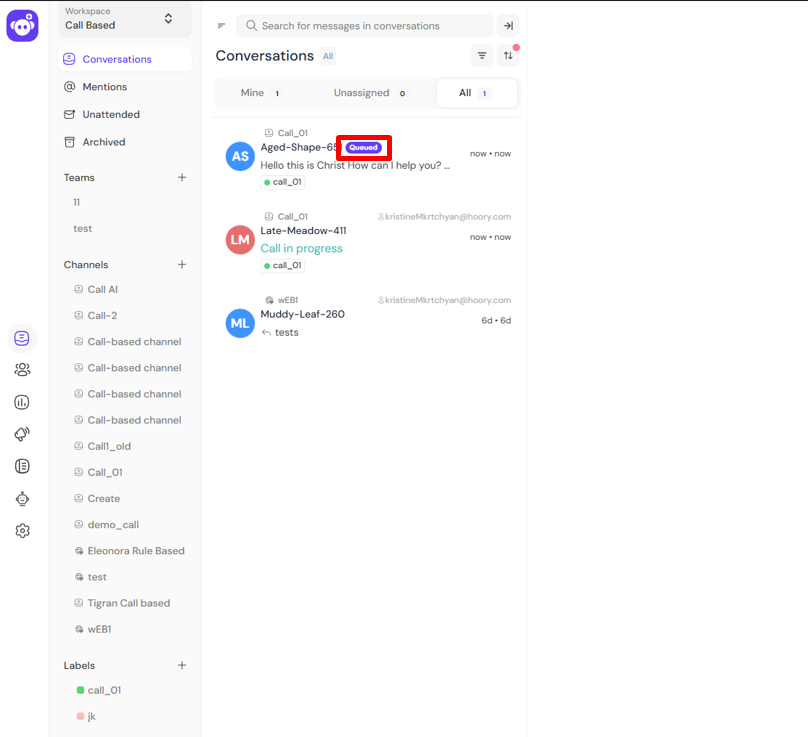
It is enabled by default, but when unavailable, agents can deactivate it to stop the incoming calls. In that case, the calls will be redirected to other agents. If there is only one agent on duty, and they've turned off Accepting Calls, all incoming calls will be queued for a later follow-up.
When a customer calls, a call banner will appear on your screen. Here's what it looks like.
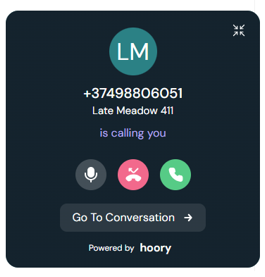
This is the minimized version of the banner, which you can easily move by dragging it around.
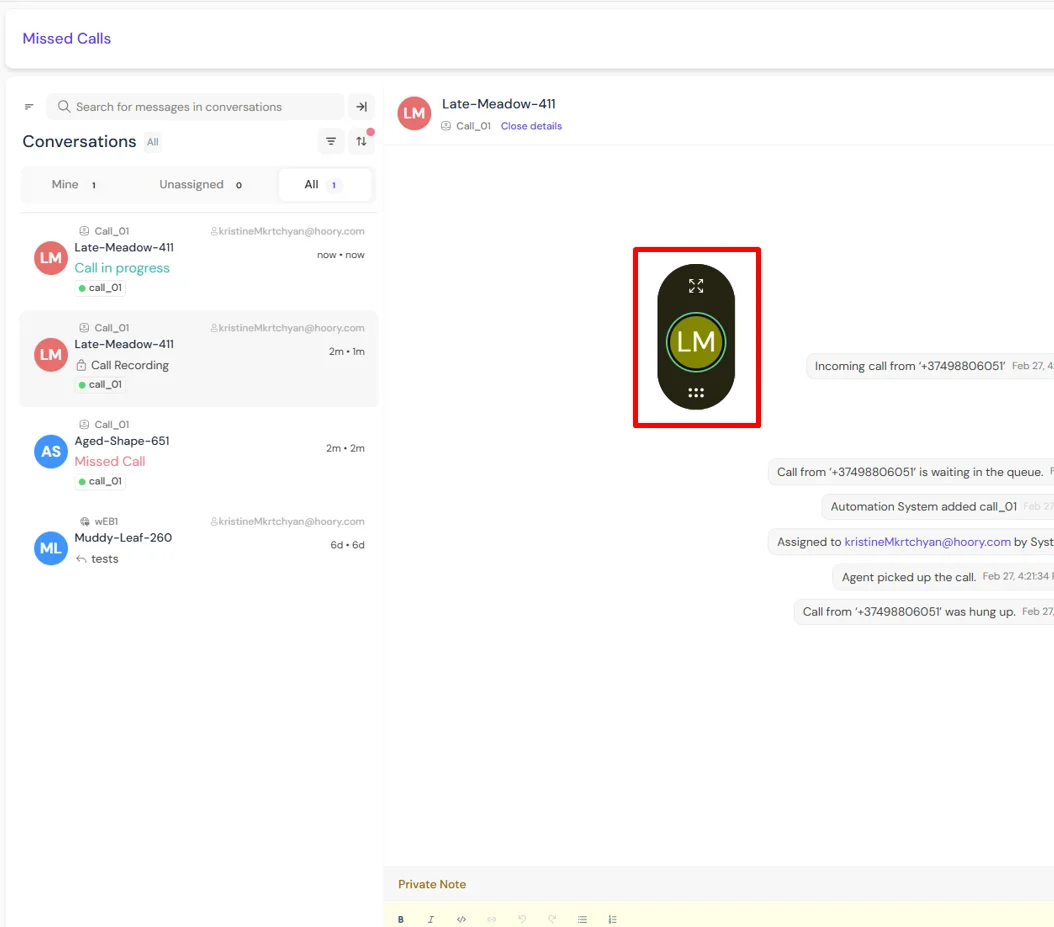
Before accepting a call, the pre-defined greeting message will be automatically played.
After that, the support agent can begin communicating with the customer.
If there is an AI Assistant connected to your call-based channel, it will answer the call and engage with the customer, delivering high-quality assistance.
But if, along the way, the customer requests to speak with a support agent, the AI Assistant will seamlessly transfer the call to an available agent, who will then get an incoming call to take over the conversation.
After the call, key details such as the date, time, and duration will appear in your inbox.
If the call was handled by a support agent, you'll also receive a full recording.
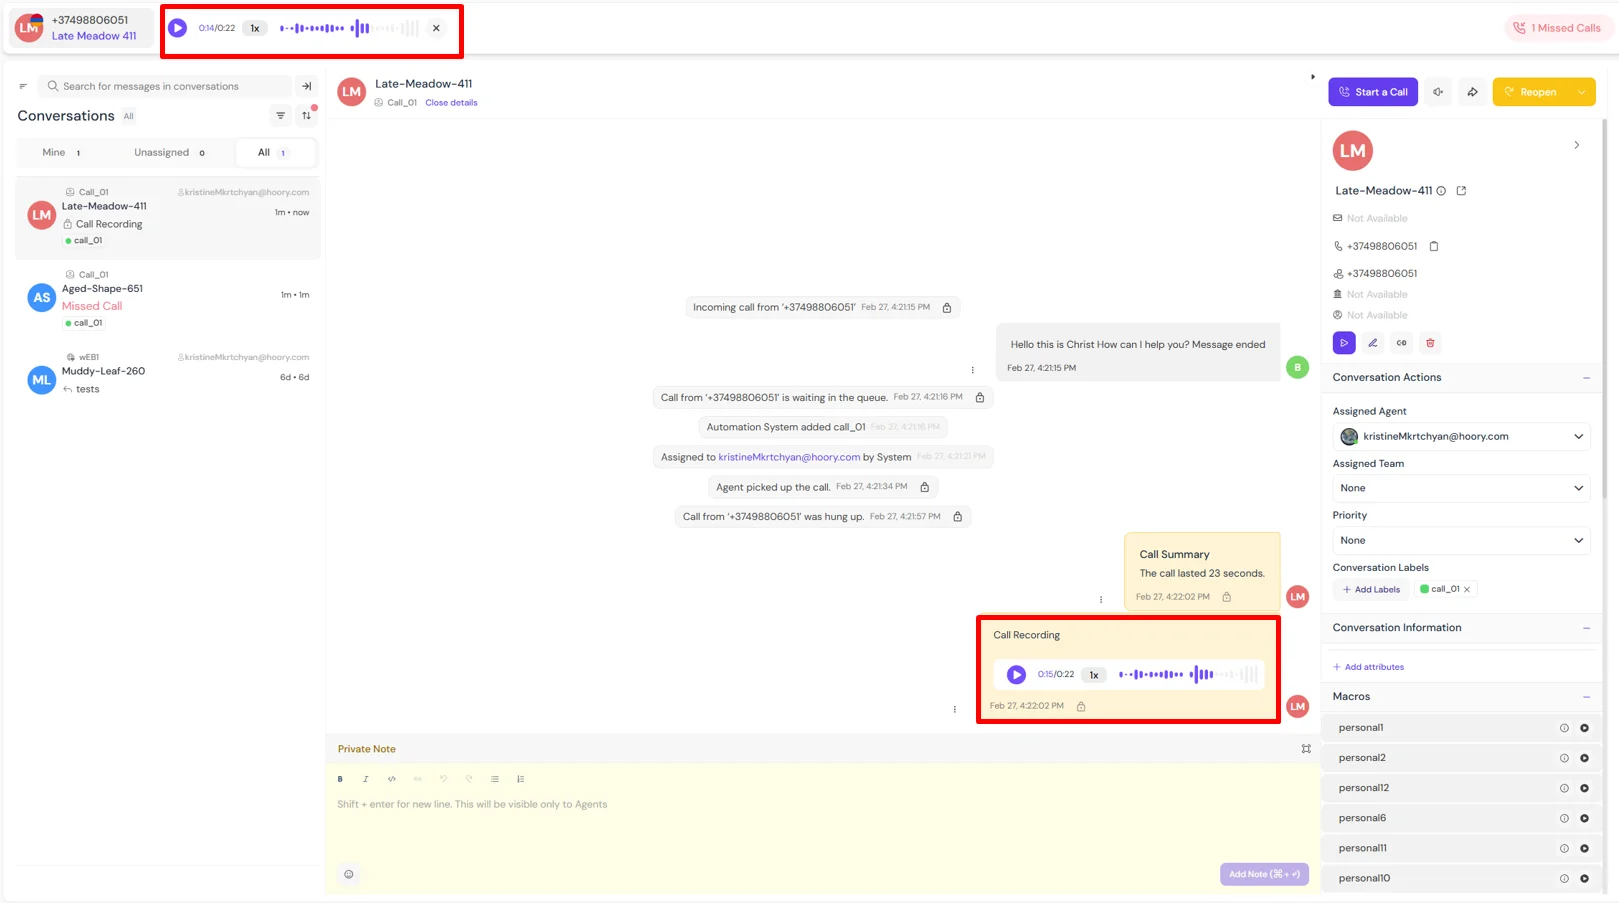
If the call was done by the AI Assistant, you will be provided a concise summary of the call.
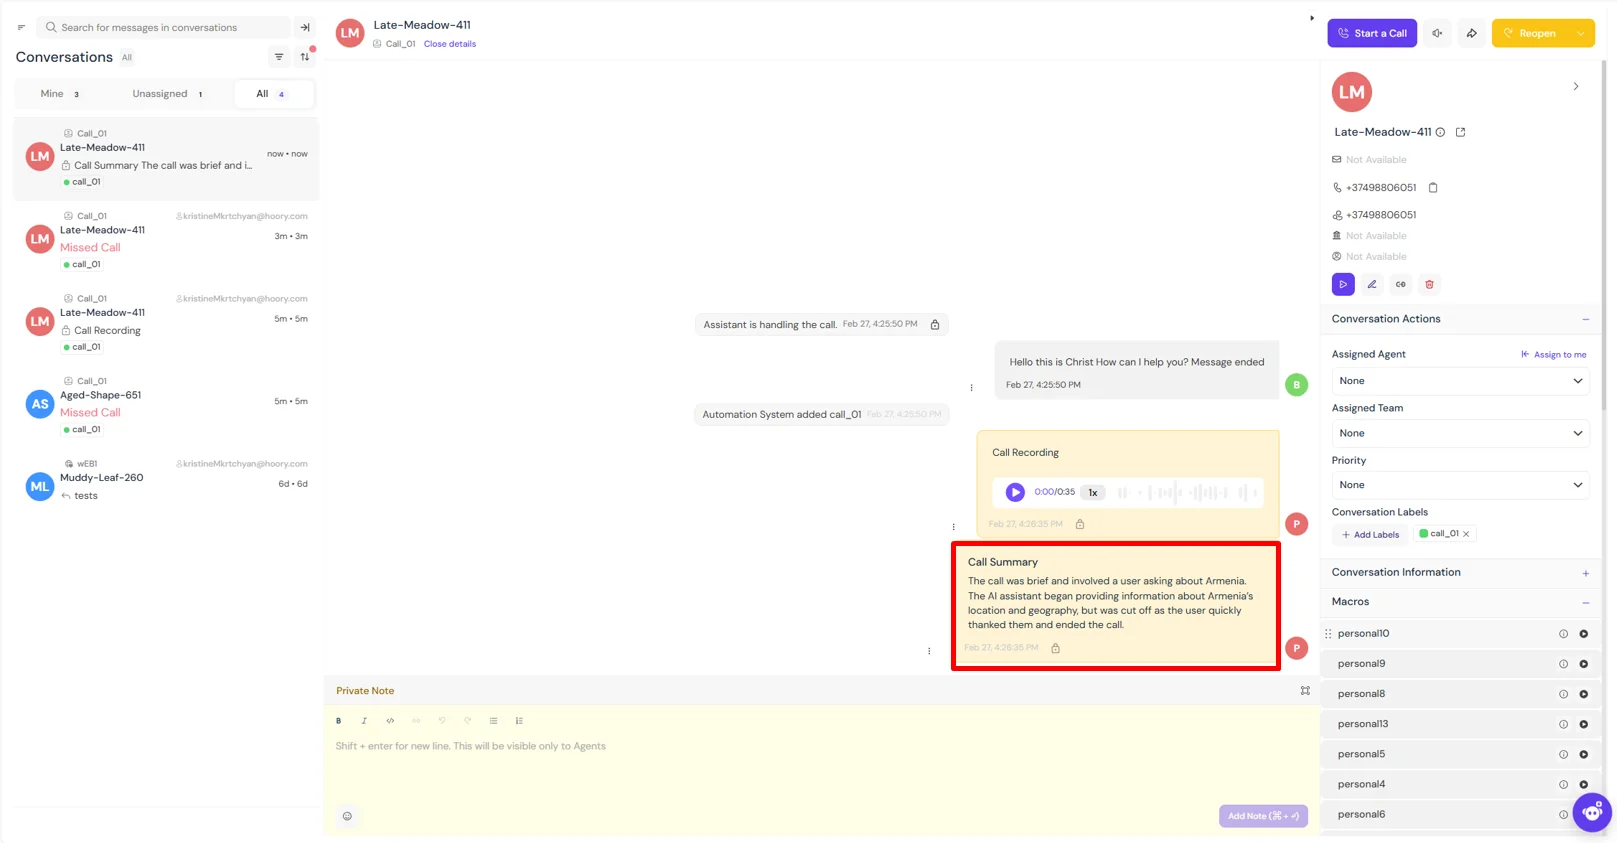
NOTE: Call Summary currently is not available temporarily as we are working on improvements on this part.