Setup Your Email Channel
Step 1. Open your Hoory AI dashboard. Go to Settings → Channels → Add Channel.
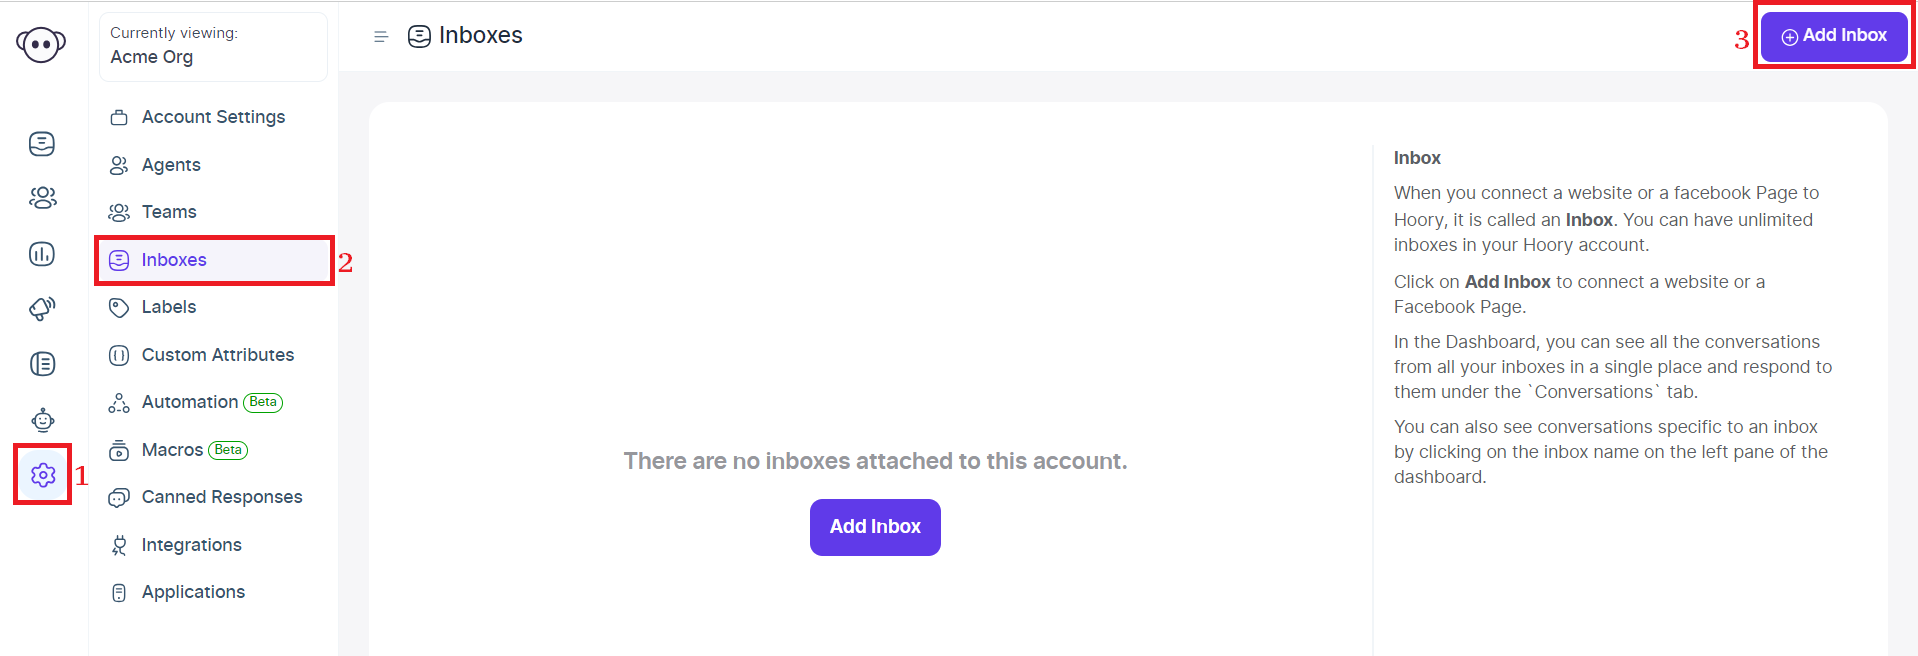
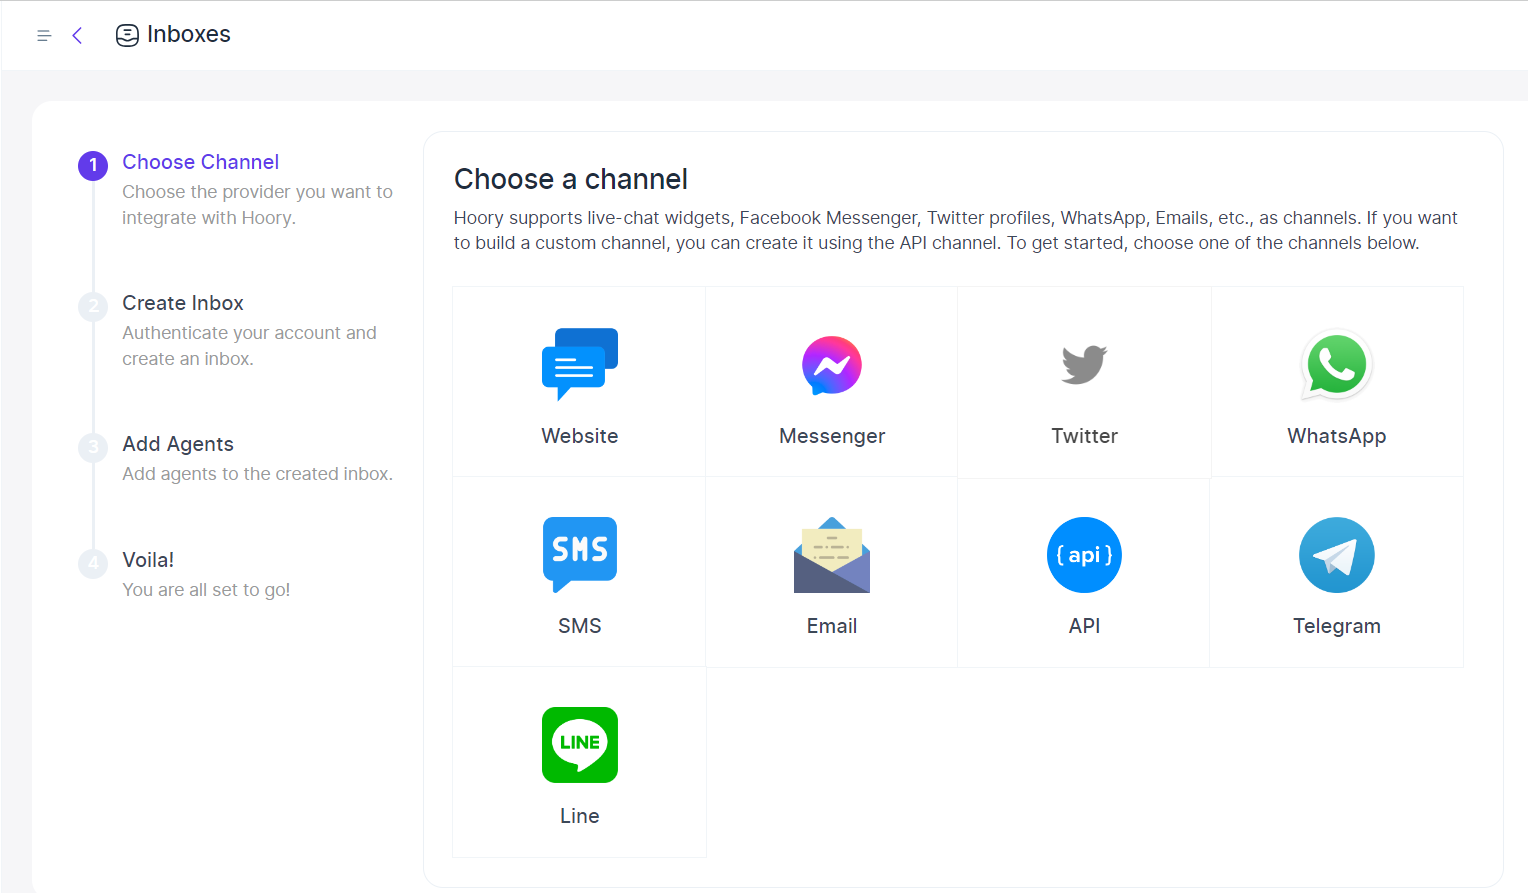
Step 2. Click the "Email" icon.
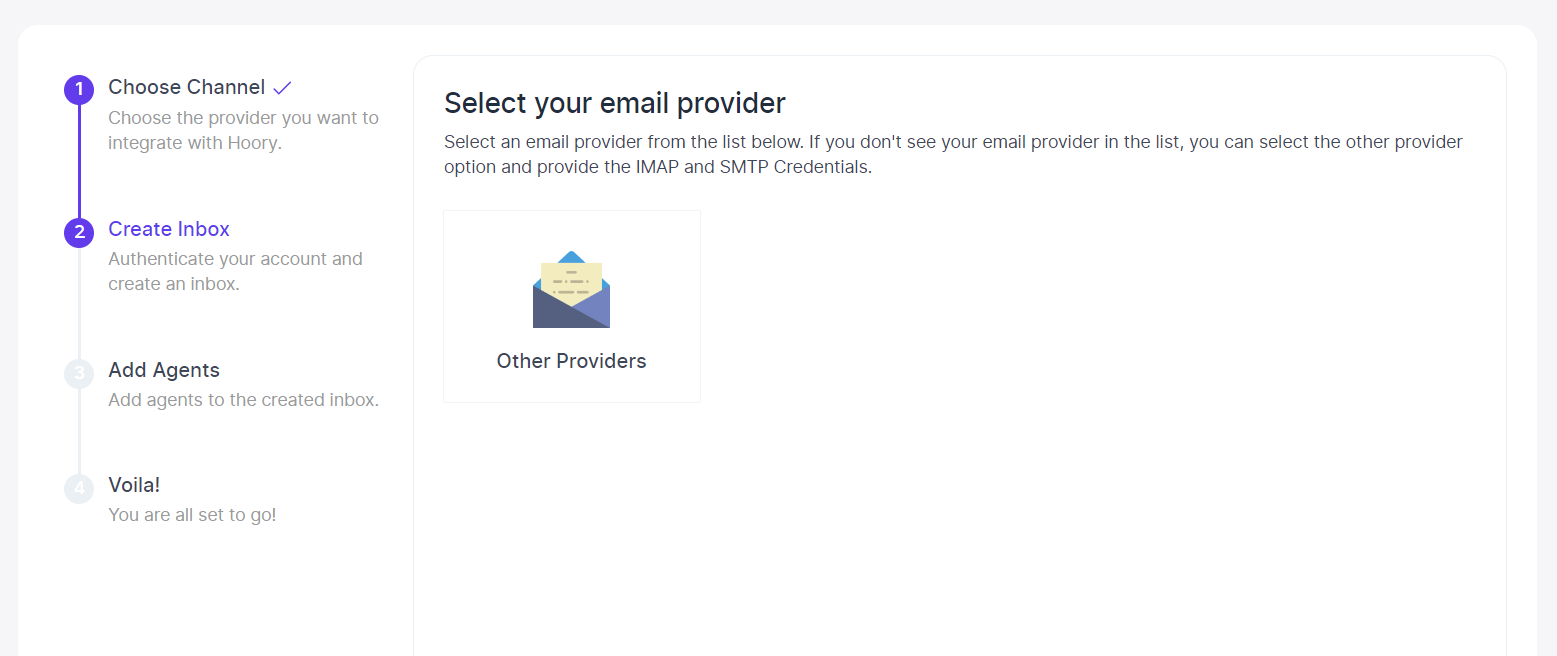
Step 3. Click the "Other Providers" icon.
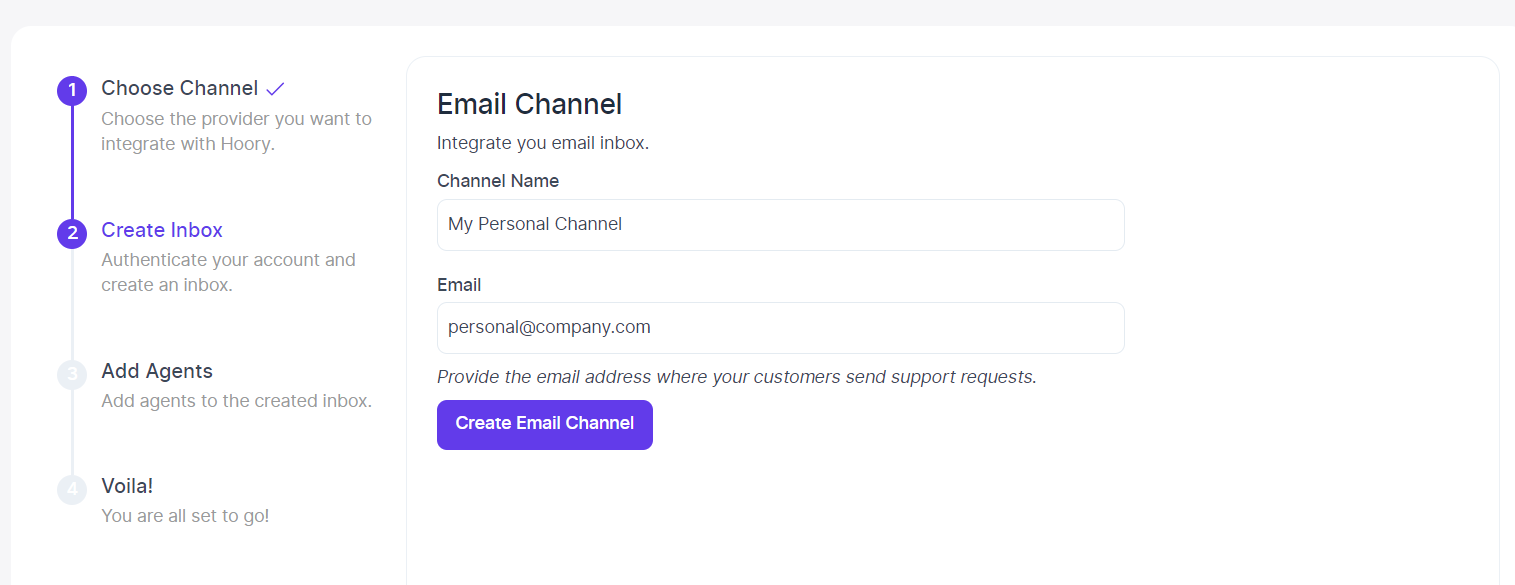
Step 4. Enter the channel name (how you’d like to address this channel), your support email, and click the Create Email Channel button.
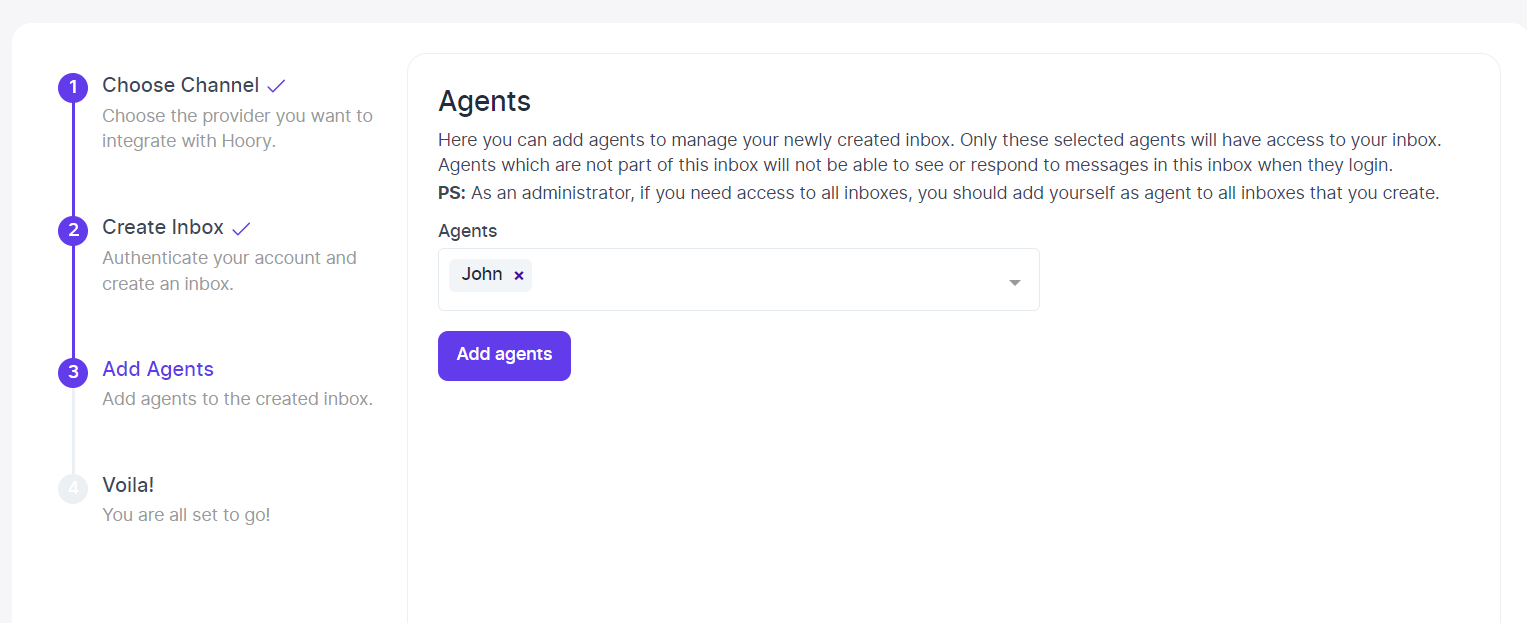
Step 5. "Add agents" to your email channel.
Step 6. Hooray! You have successfully created an email channel.
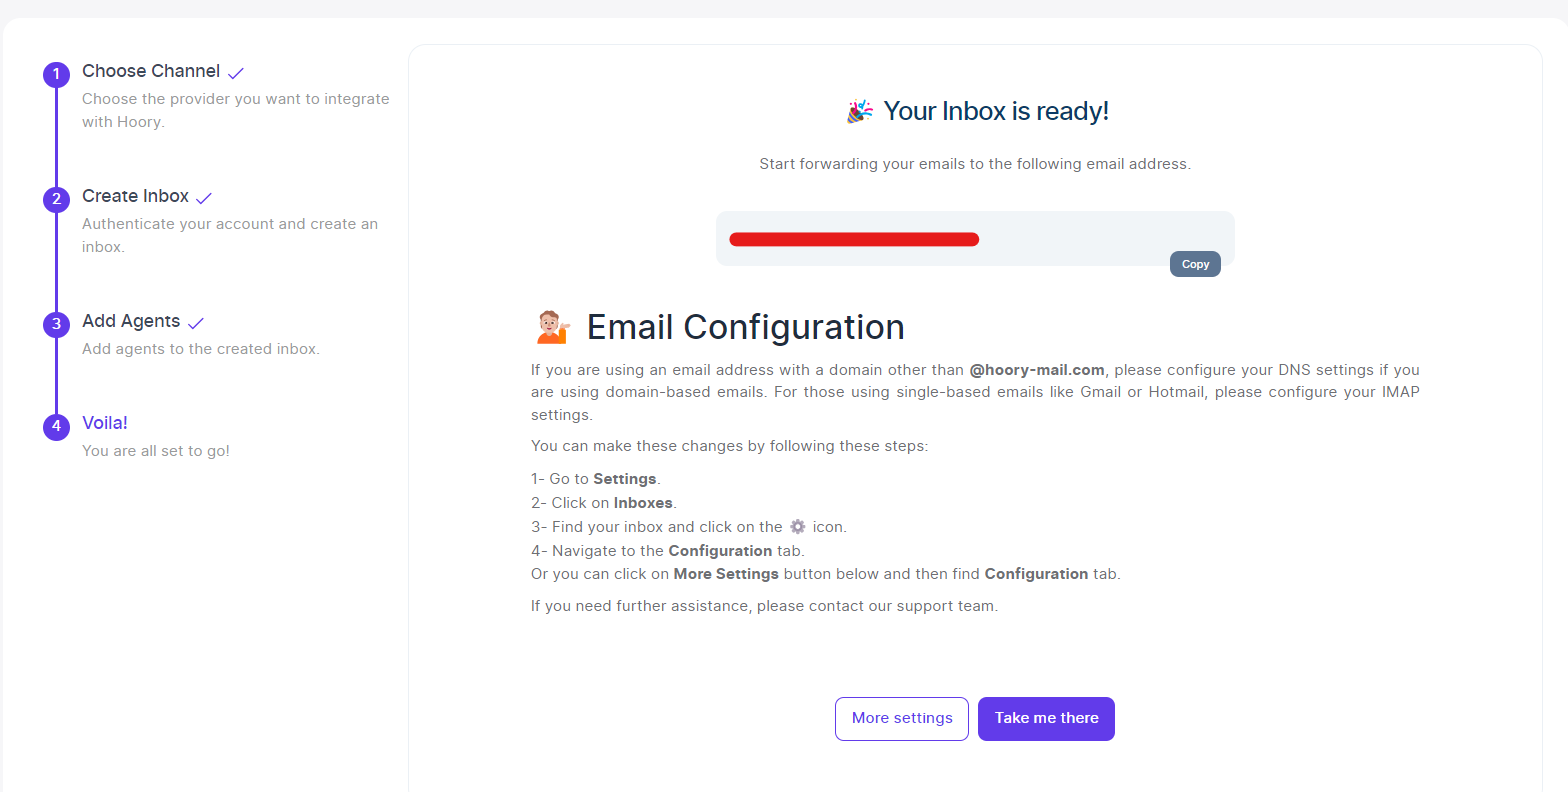
Step 7. Configure your email settings.
If you are using an email address with a domain other than @hoory-mail.com, please configure your DNS settings if you are using domain-based emails. For those using single-based emails like Gmail or Hotmail, please configure your IMAP settings.
You can make these changes by following these steps:
1- Go to Settings.
2- Click on Channels.
3- Find your channel and click on the ⚙️ icon.
4- Navigate to the Configuration tab.
Or you can click on More Settings button below and then find Configuration tab.
If you need further assistance, please contact our support team.

You can configure your Hoory AI email channel in two ways.