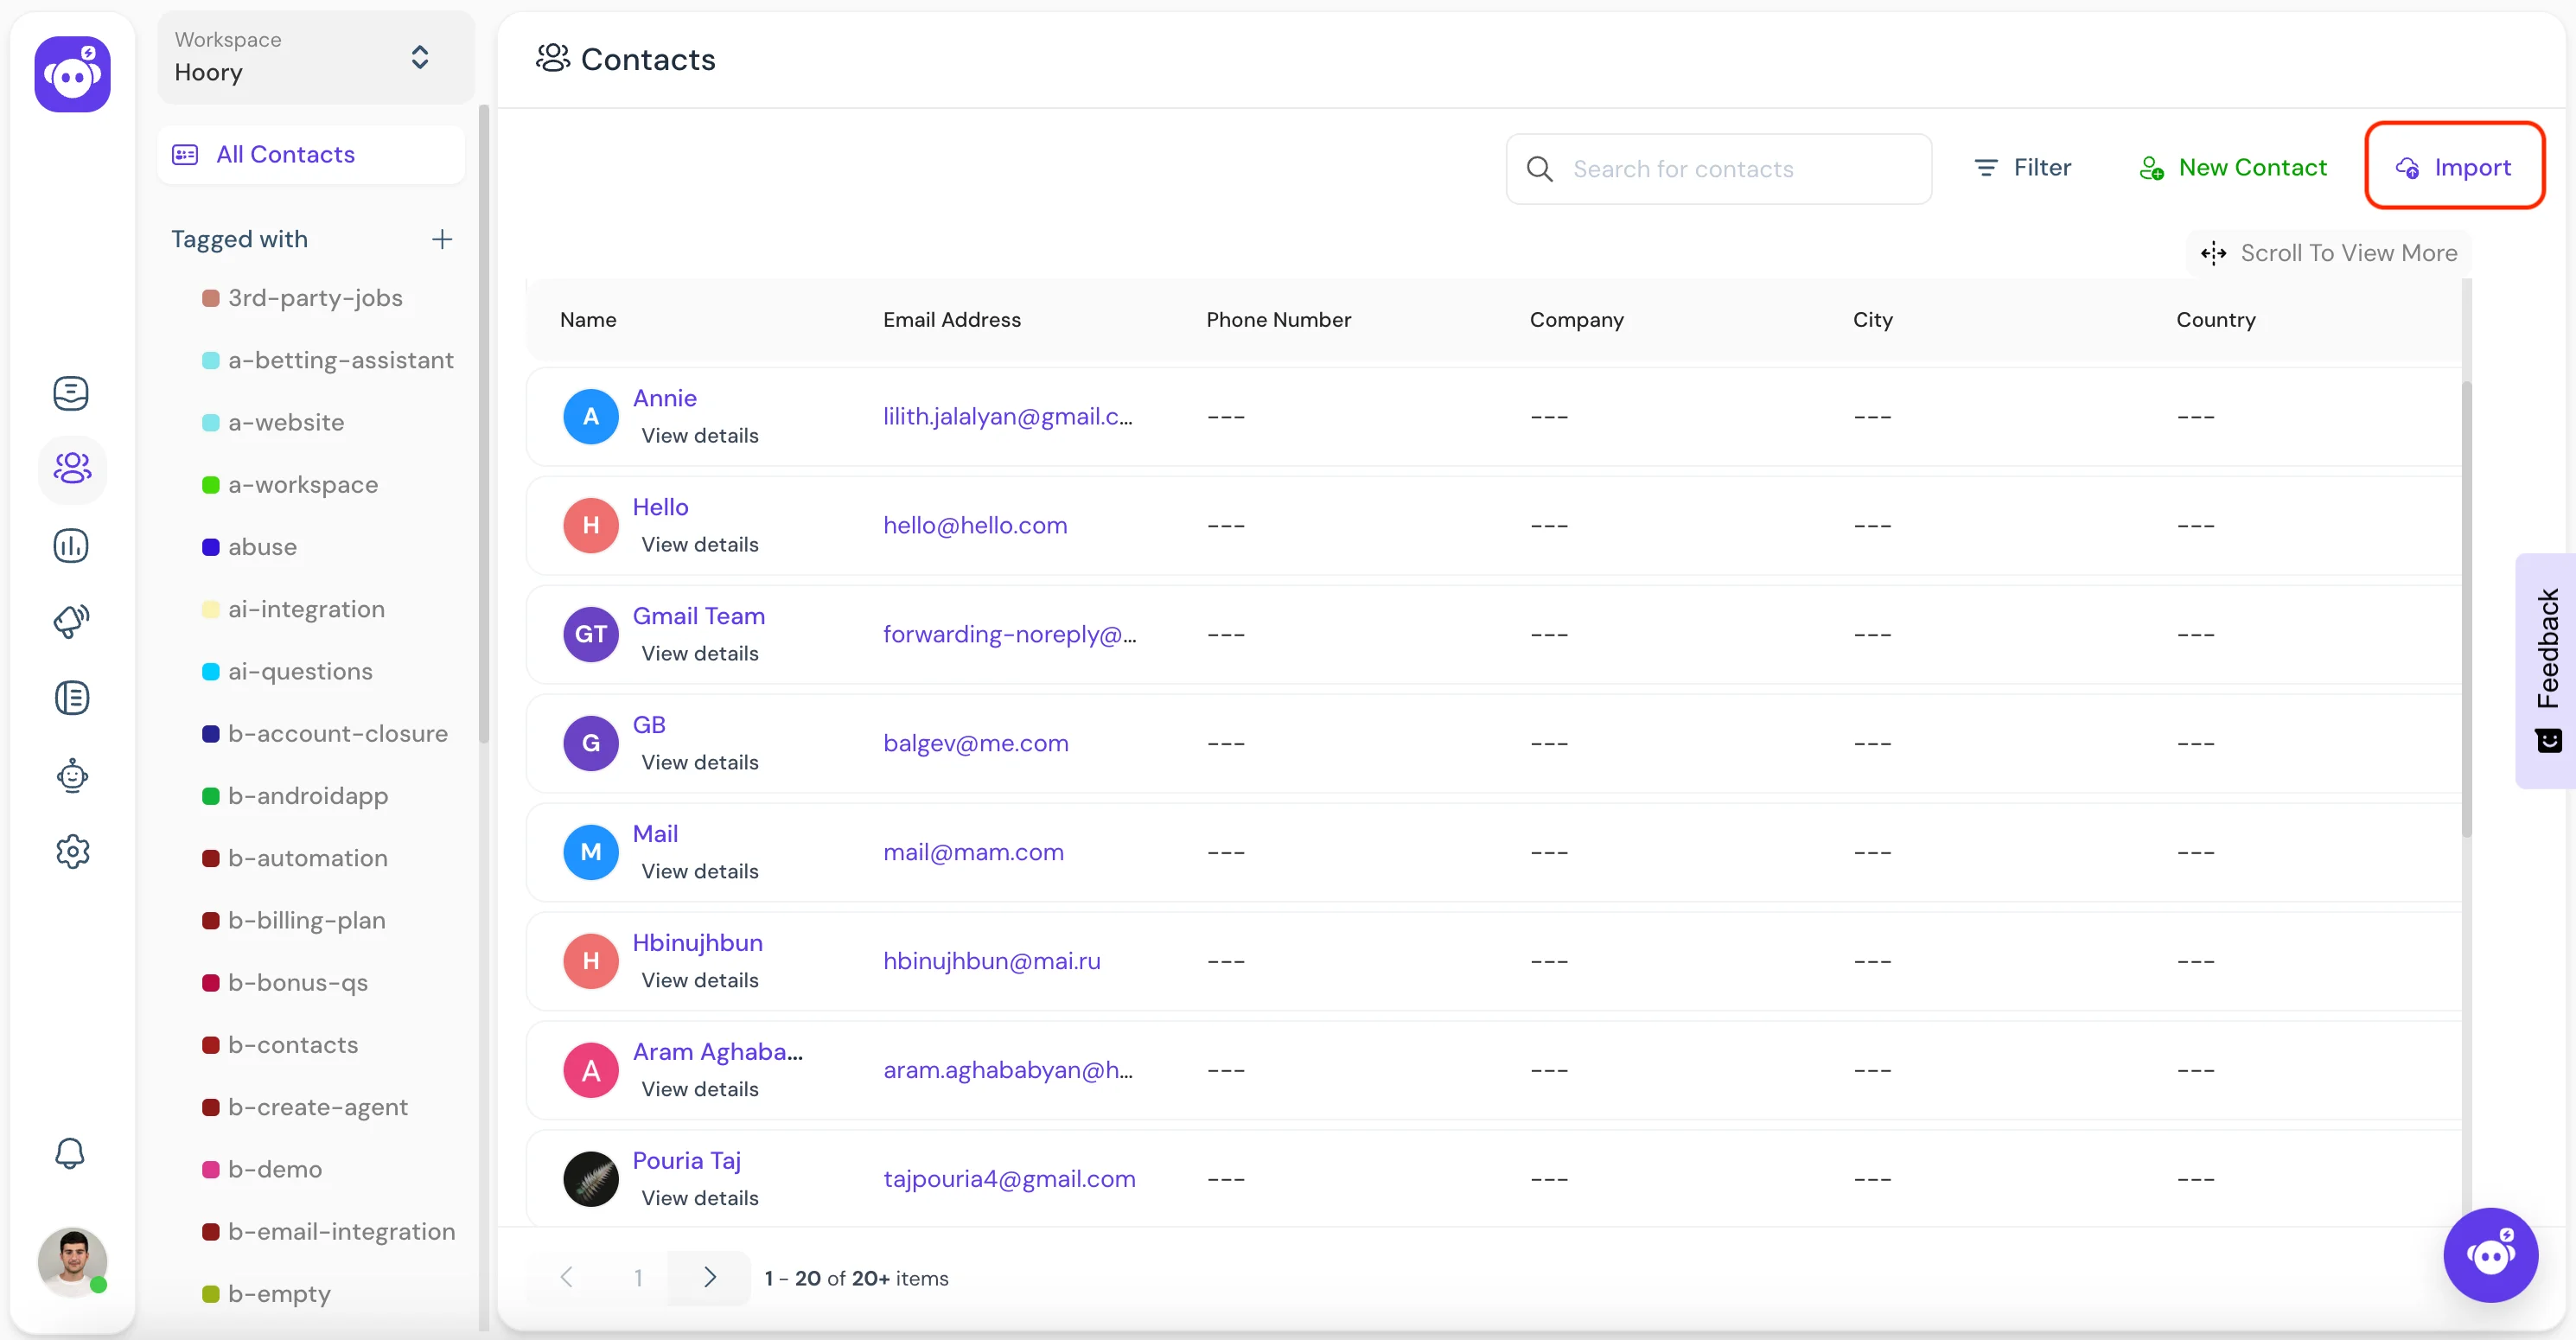
Contacts
Contacts section in Hoory AI contains the details of end users/customers that you have interacted with using the Hoory AI widget. You can consider it as customer data base.
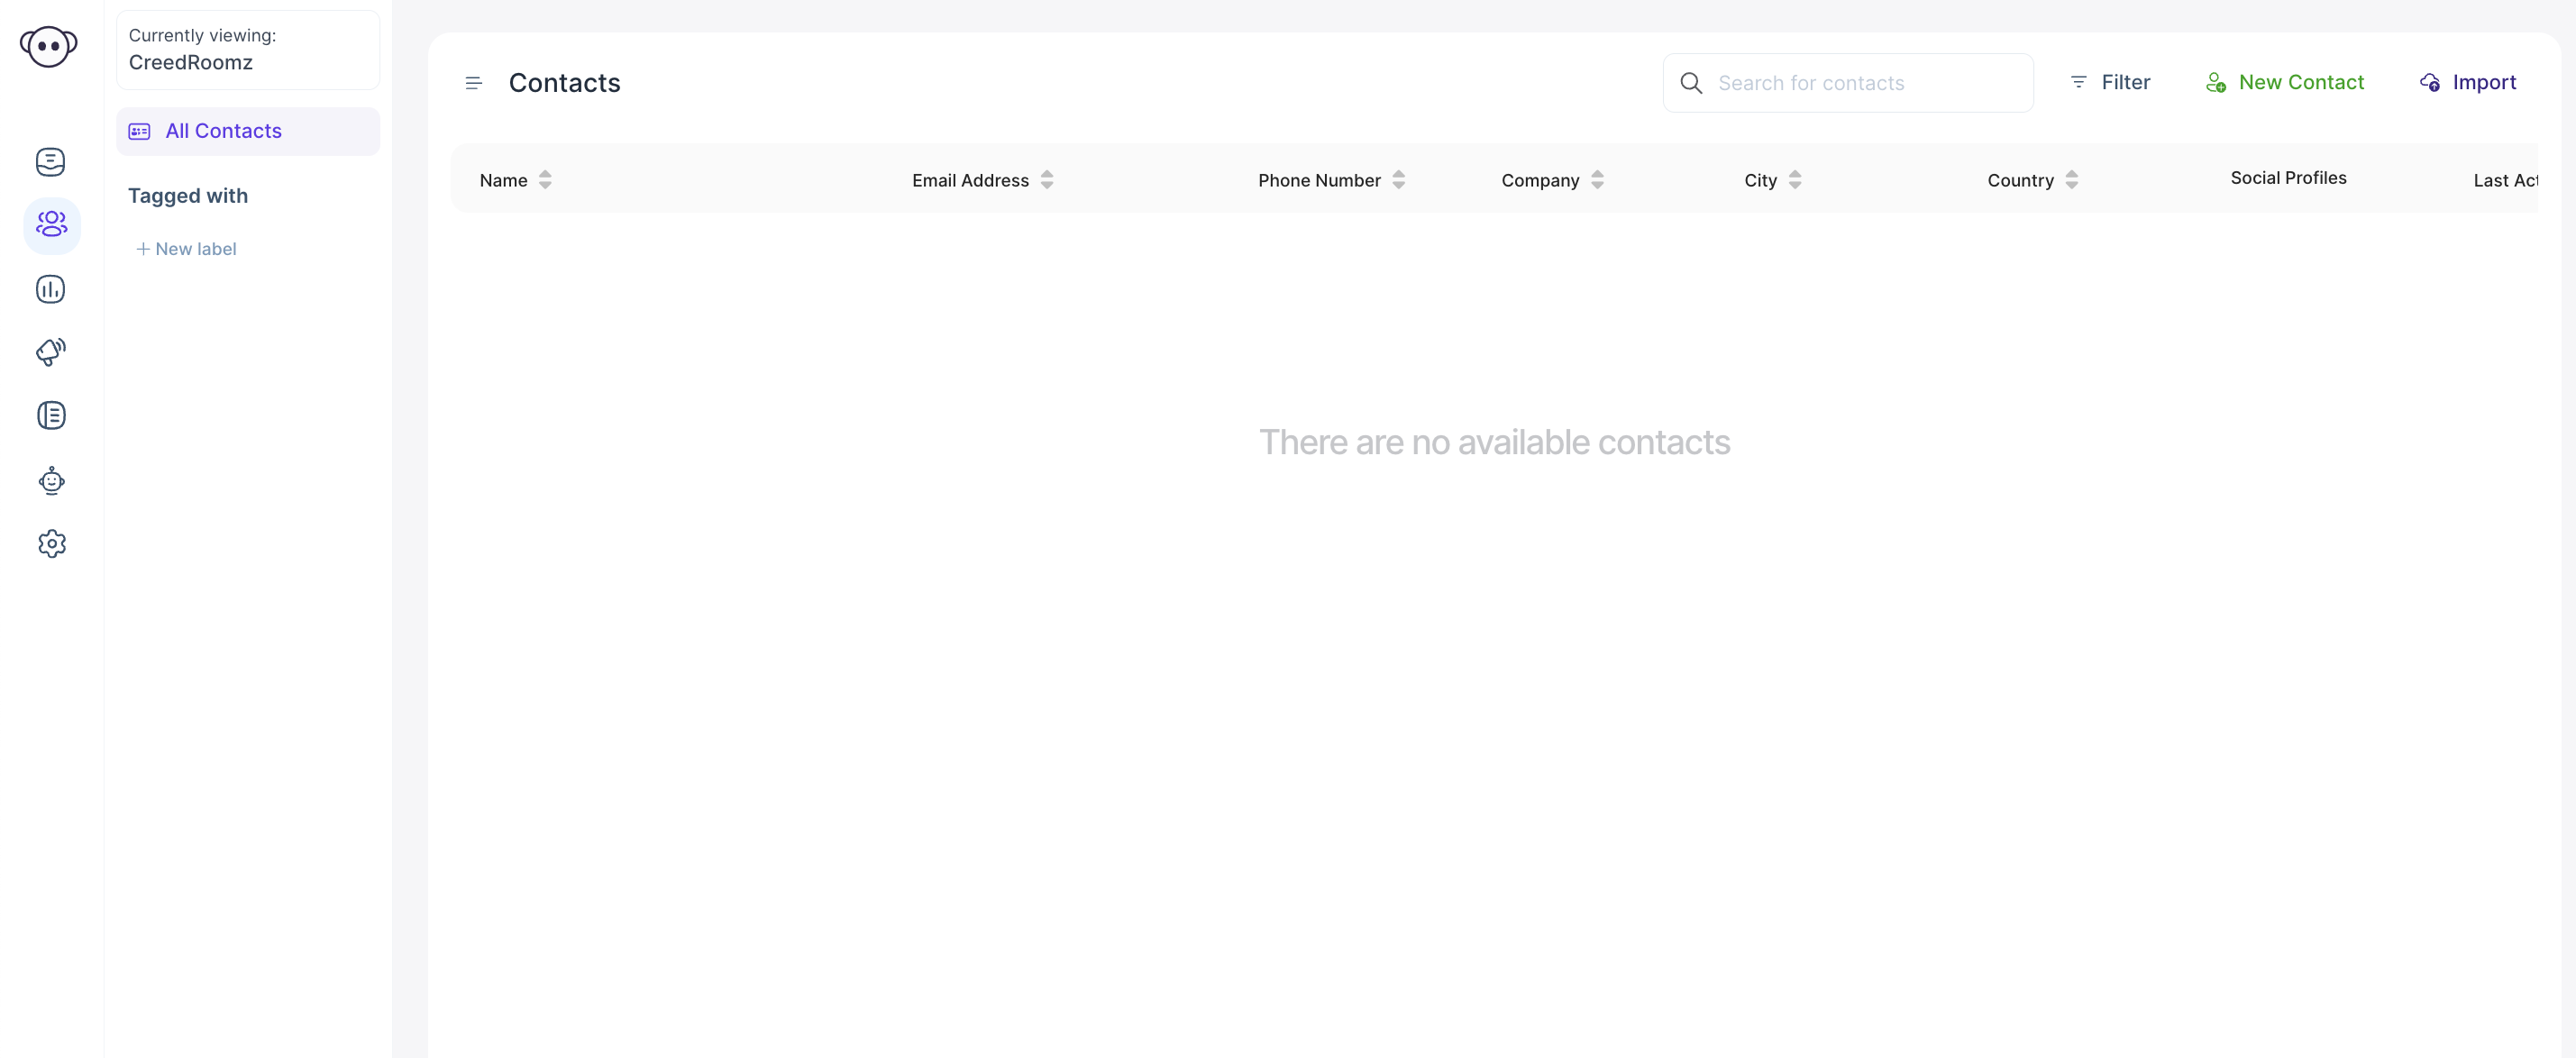
Click Contacts on Home Screen.
A screen will open which will include all the contacts added. Or else, you will see a blank screen.
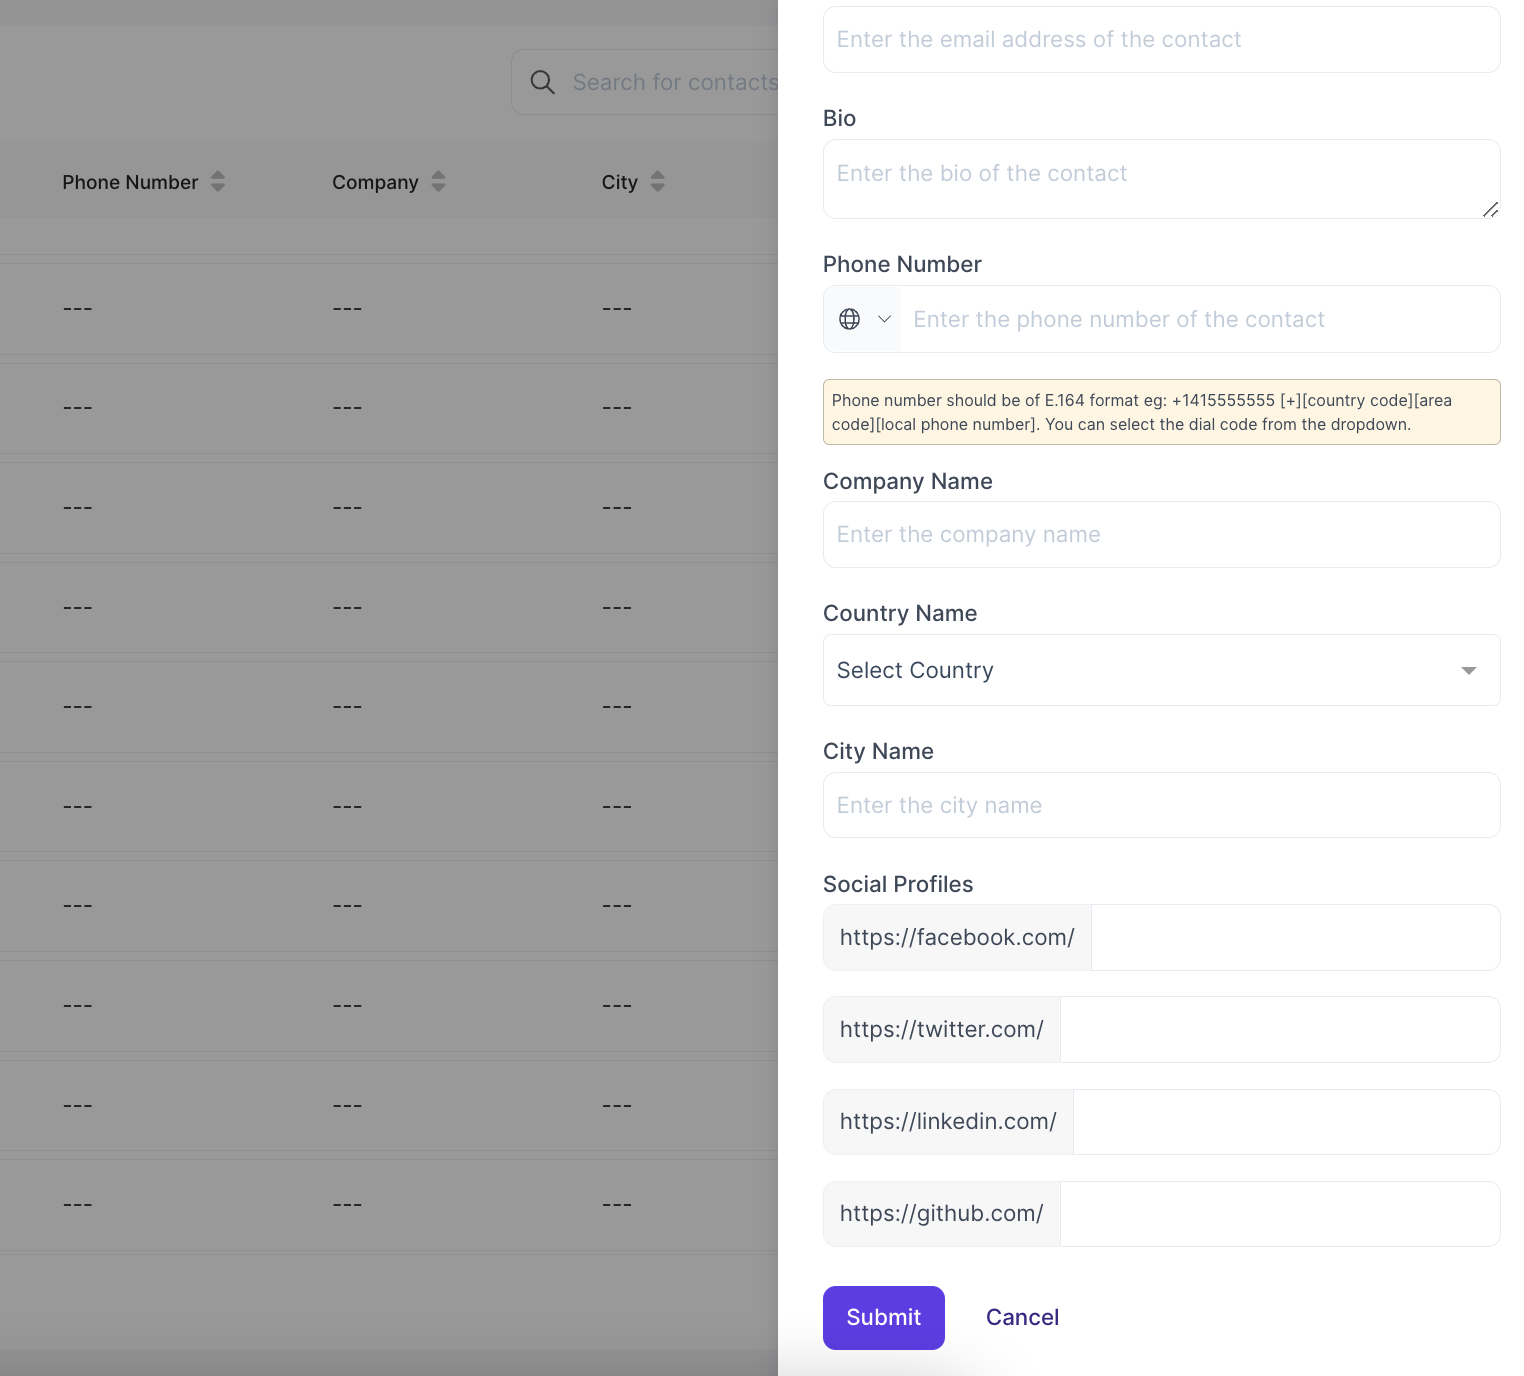
Contacts can be added to the list in 3 ways. The first way is to add the contact yourself by clicking the New Contact button on the right-hand side.
The second way is to collect the contact information through pre-chat forms.
You can find more details about configuring pre-chat forms through this guide
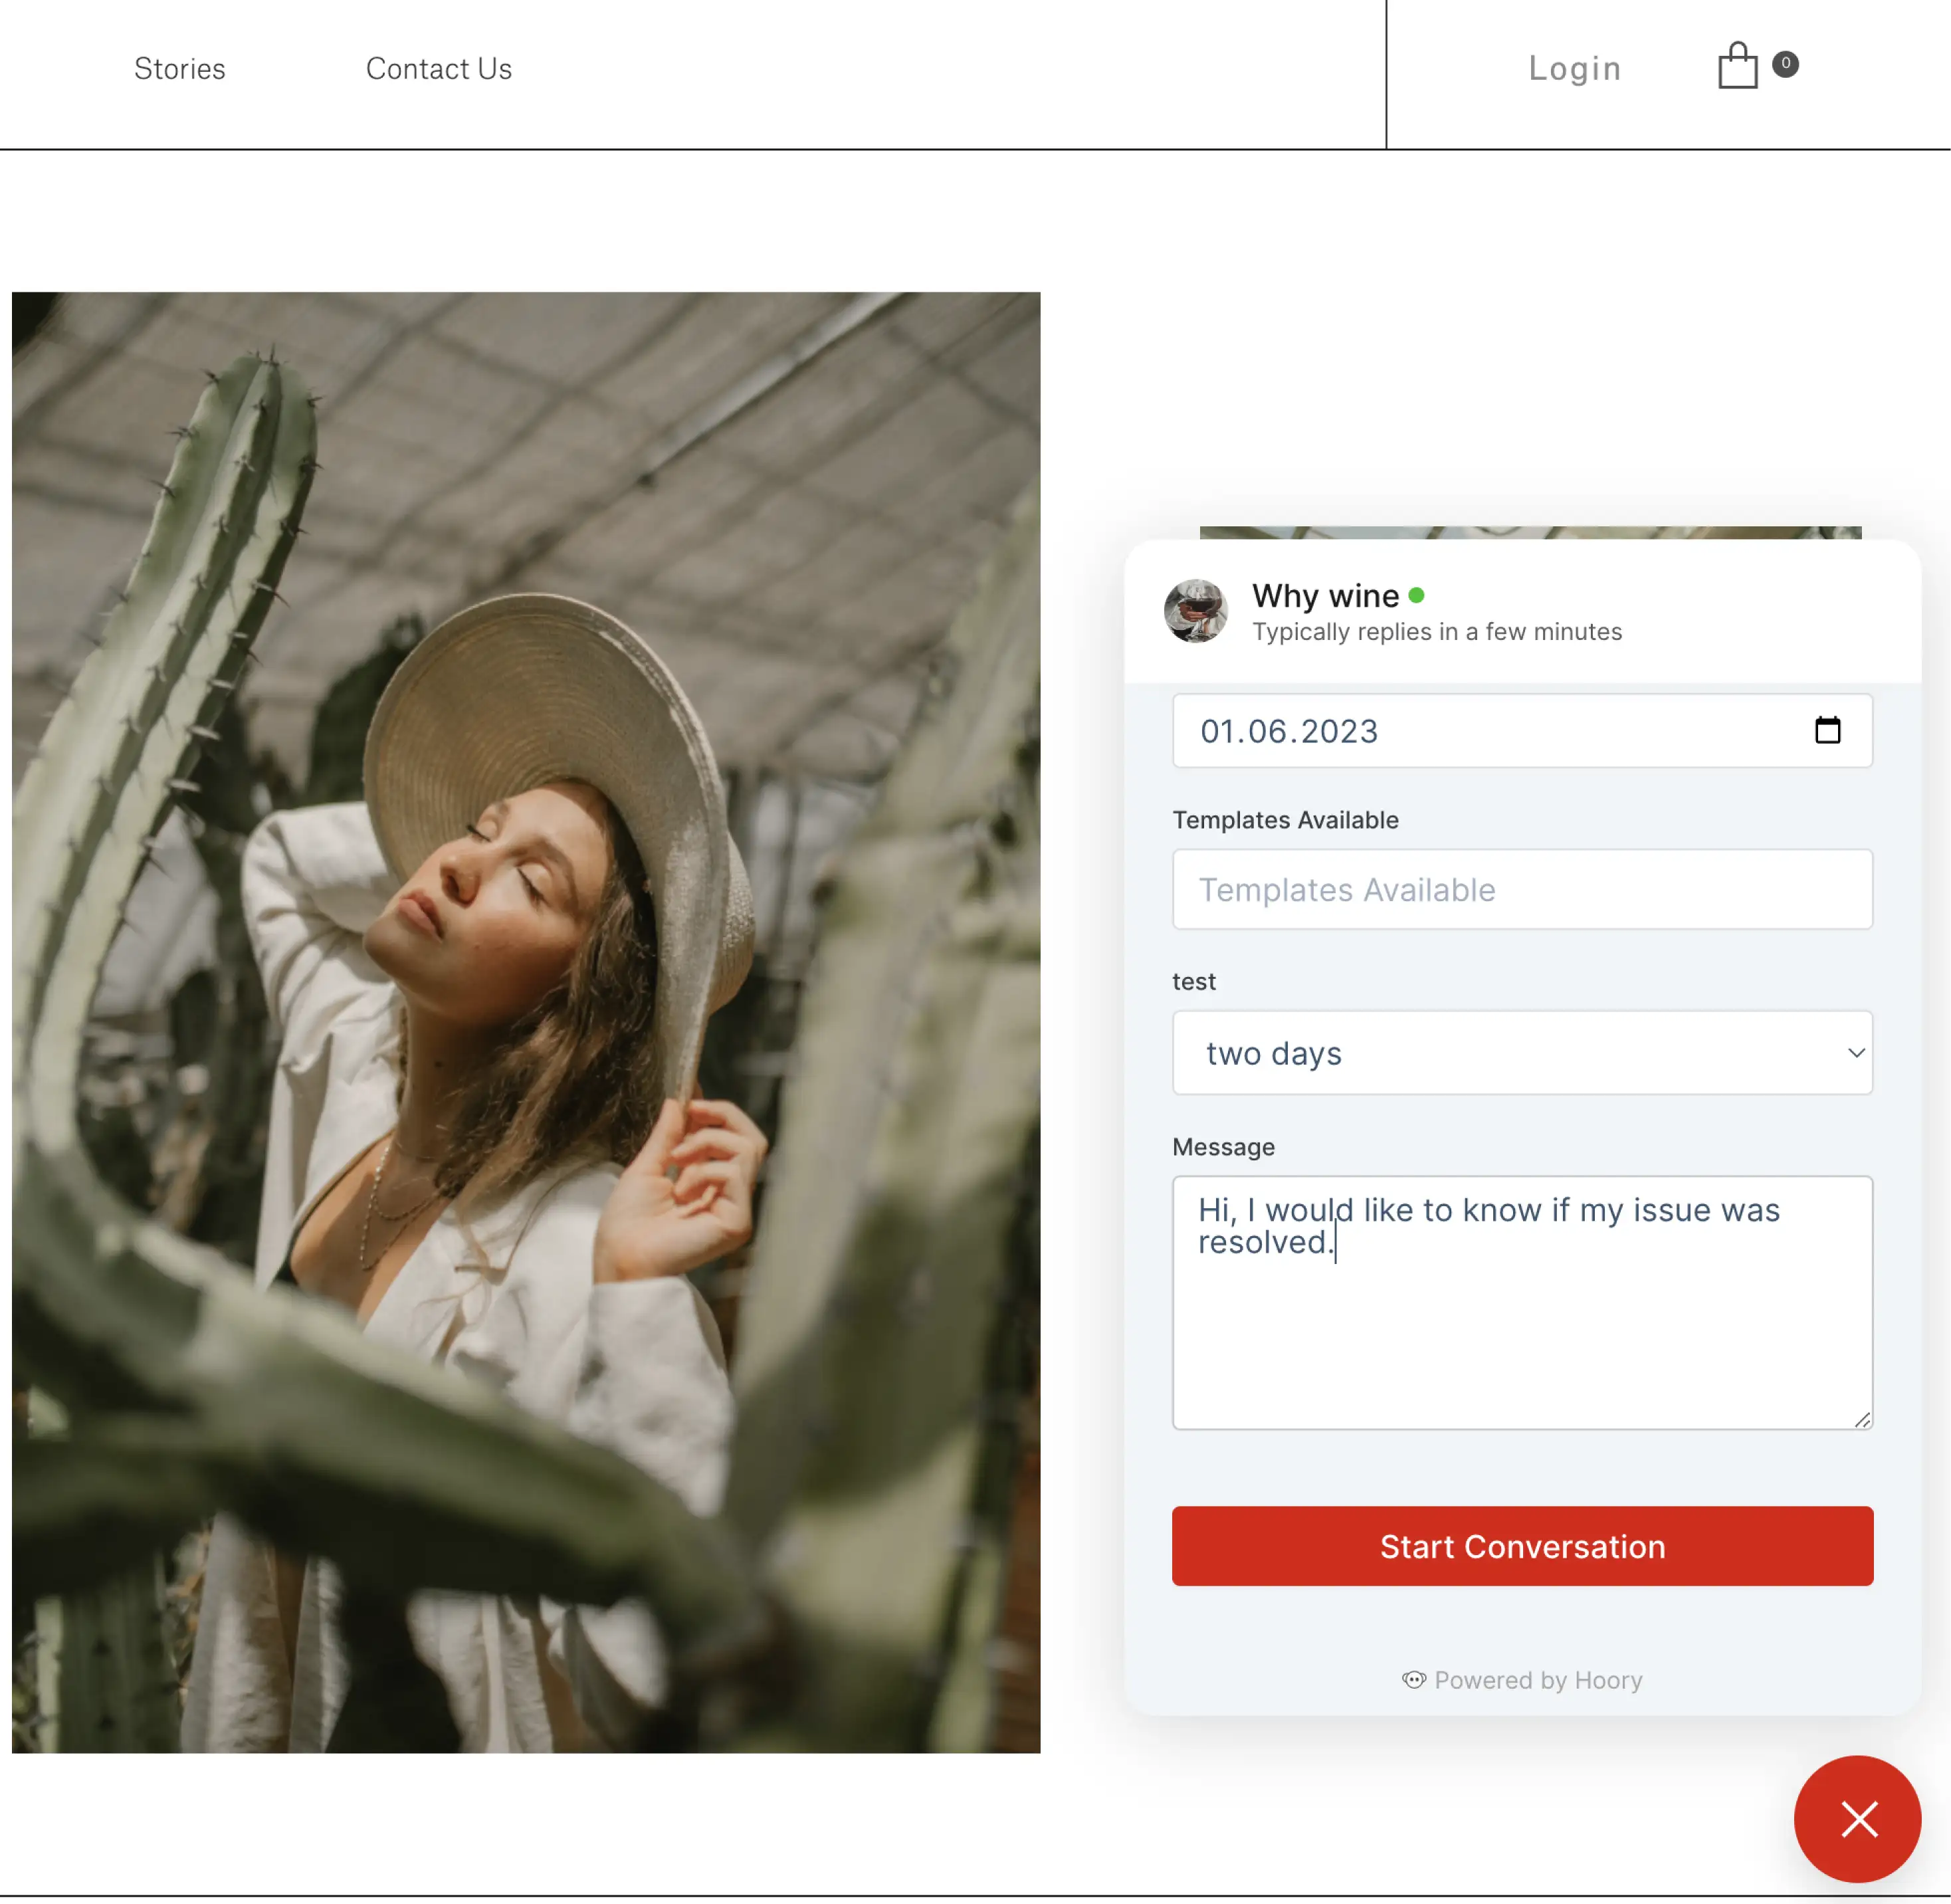
The third way is when the customer enters the email ID in the channel greeting message.
Once the contacts are available in your contacts list, you can edit the details as and when needed.
Contacts Notes
Hoory AI has a dedicated page for adding notes to each contact in your directory. This allows you to add notes and important information to a specific contact. You can use this to manually log a call, email, or meeting you had with the customer.
How to Add a Note to a Contact?
- Click Contacts menu item from the Hoory AI Dashboard.
- Select a Contact from the list. (Click the contact name)
- Write down your note.
- Click the "Add" button or press
Cmd + Enter.
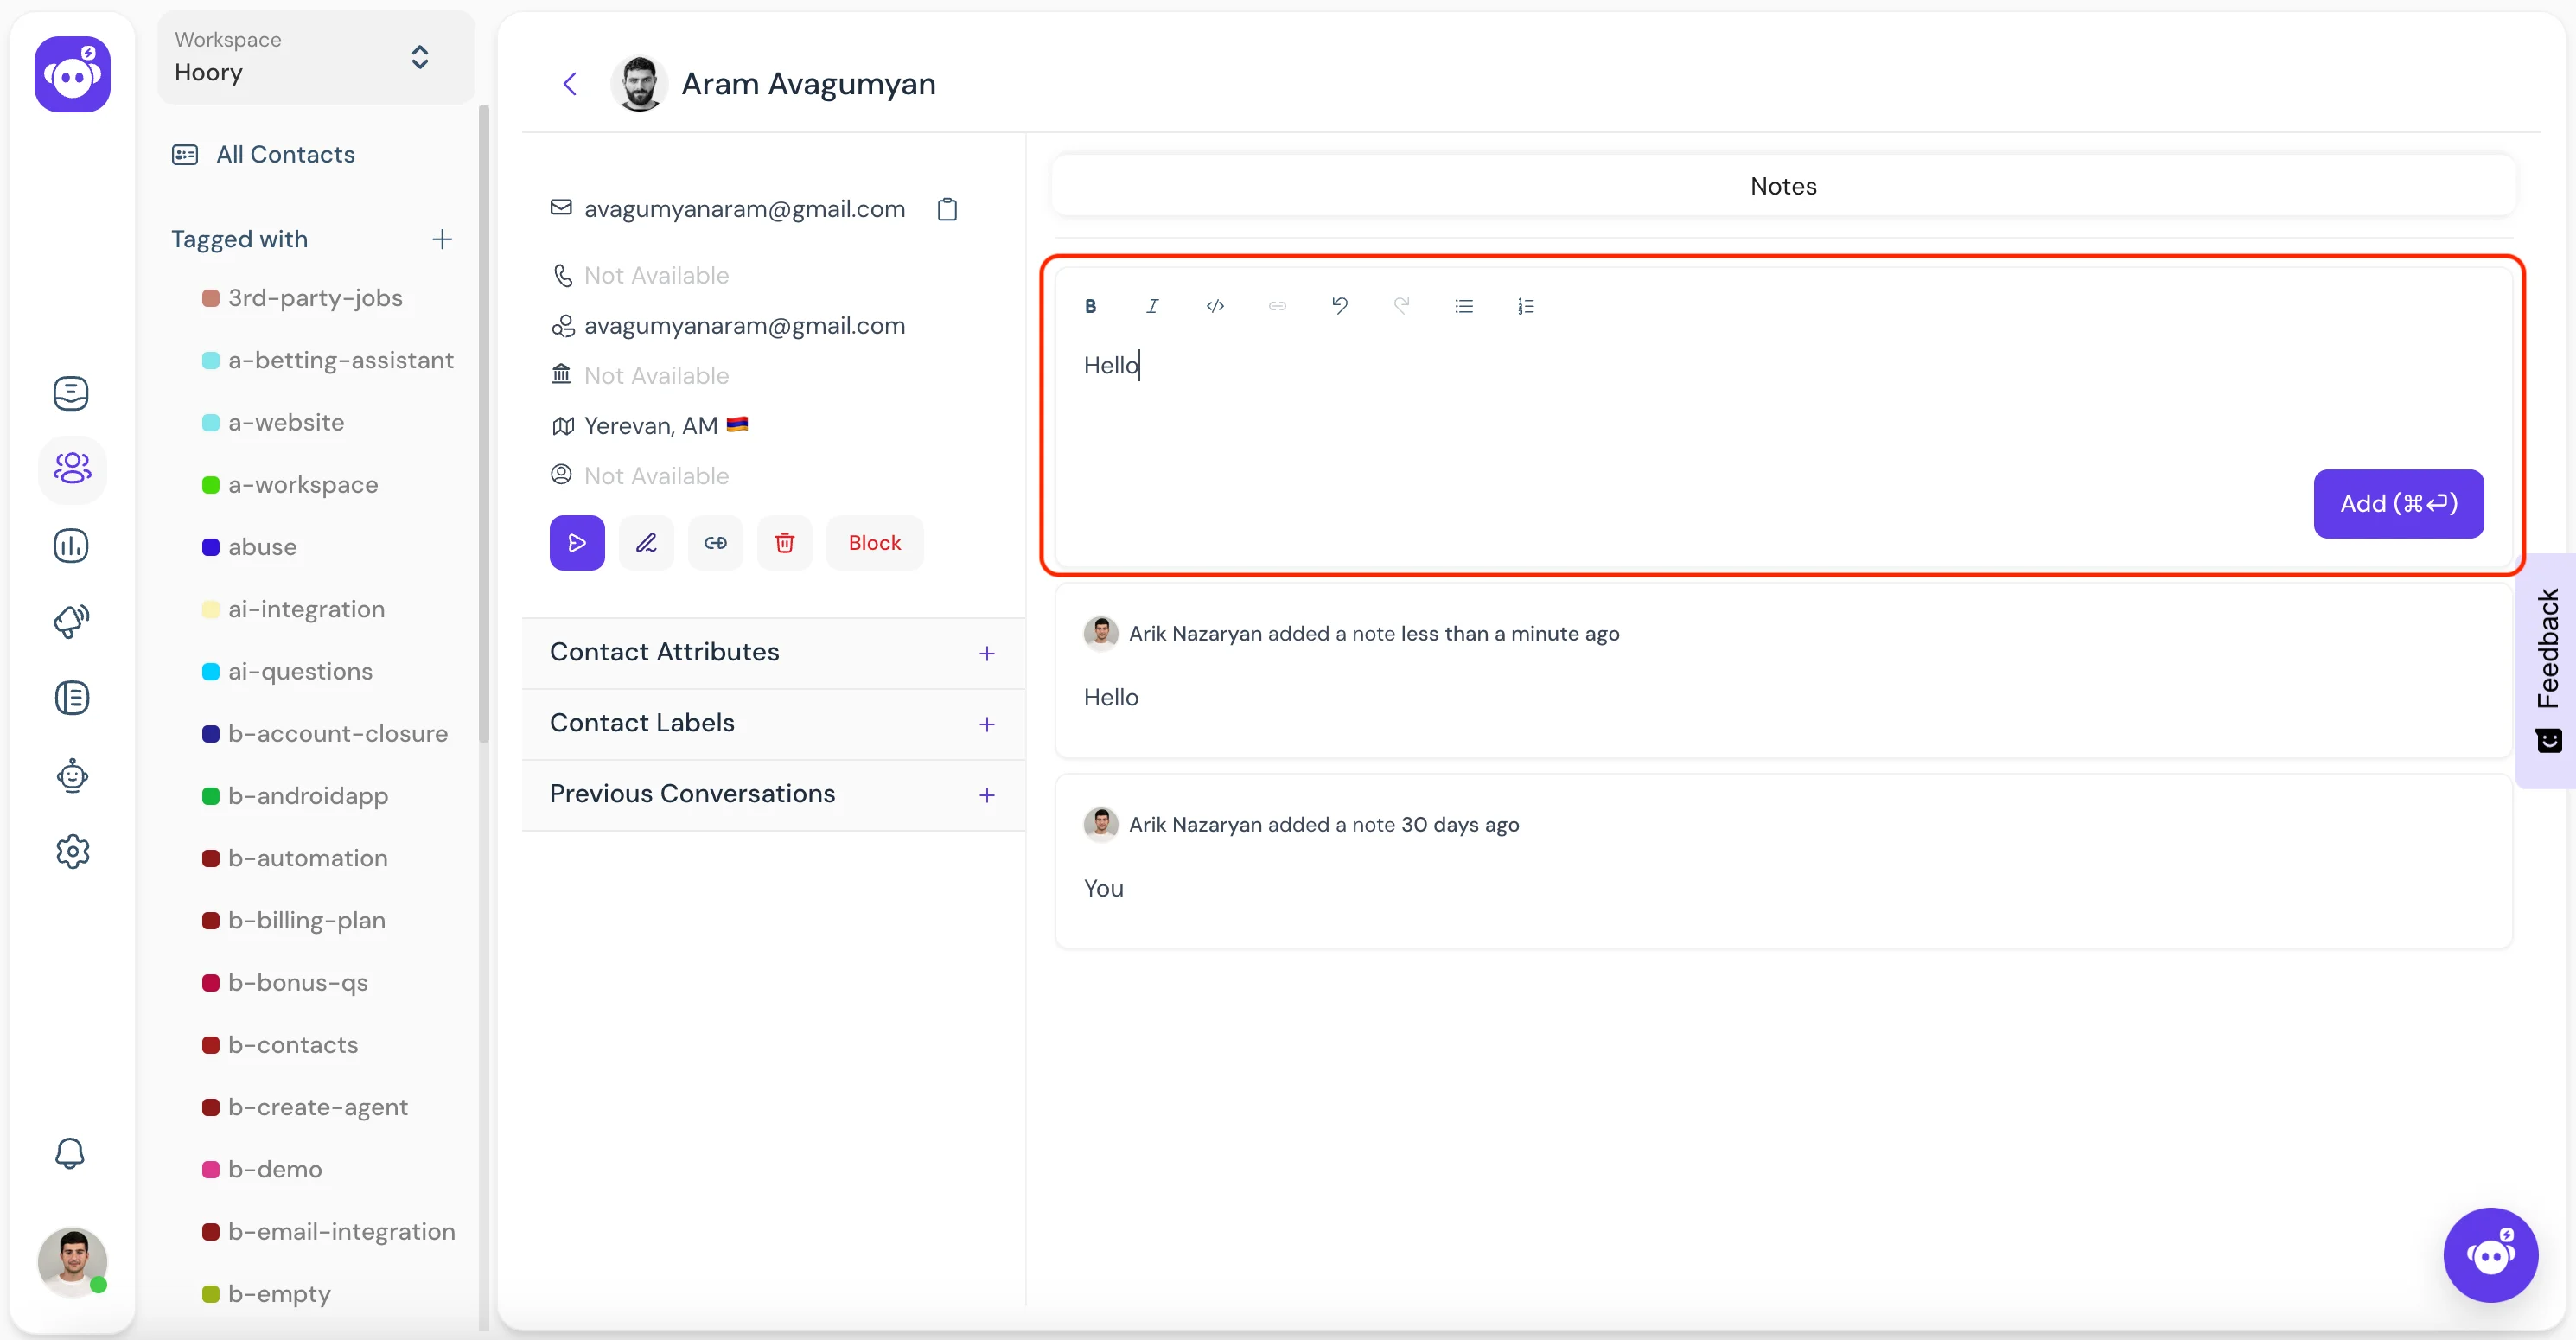
Hoory AI allows you to format and highlight your notes with bold, italic and all the other other basic formatting options. You can even add numbered or unordered lists.
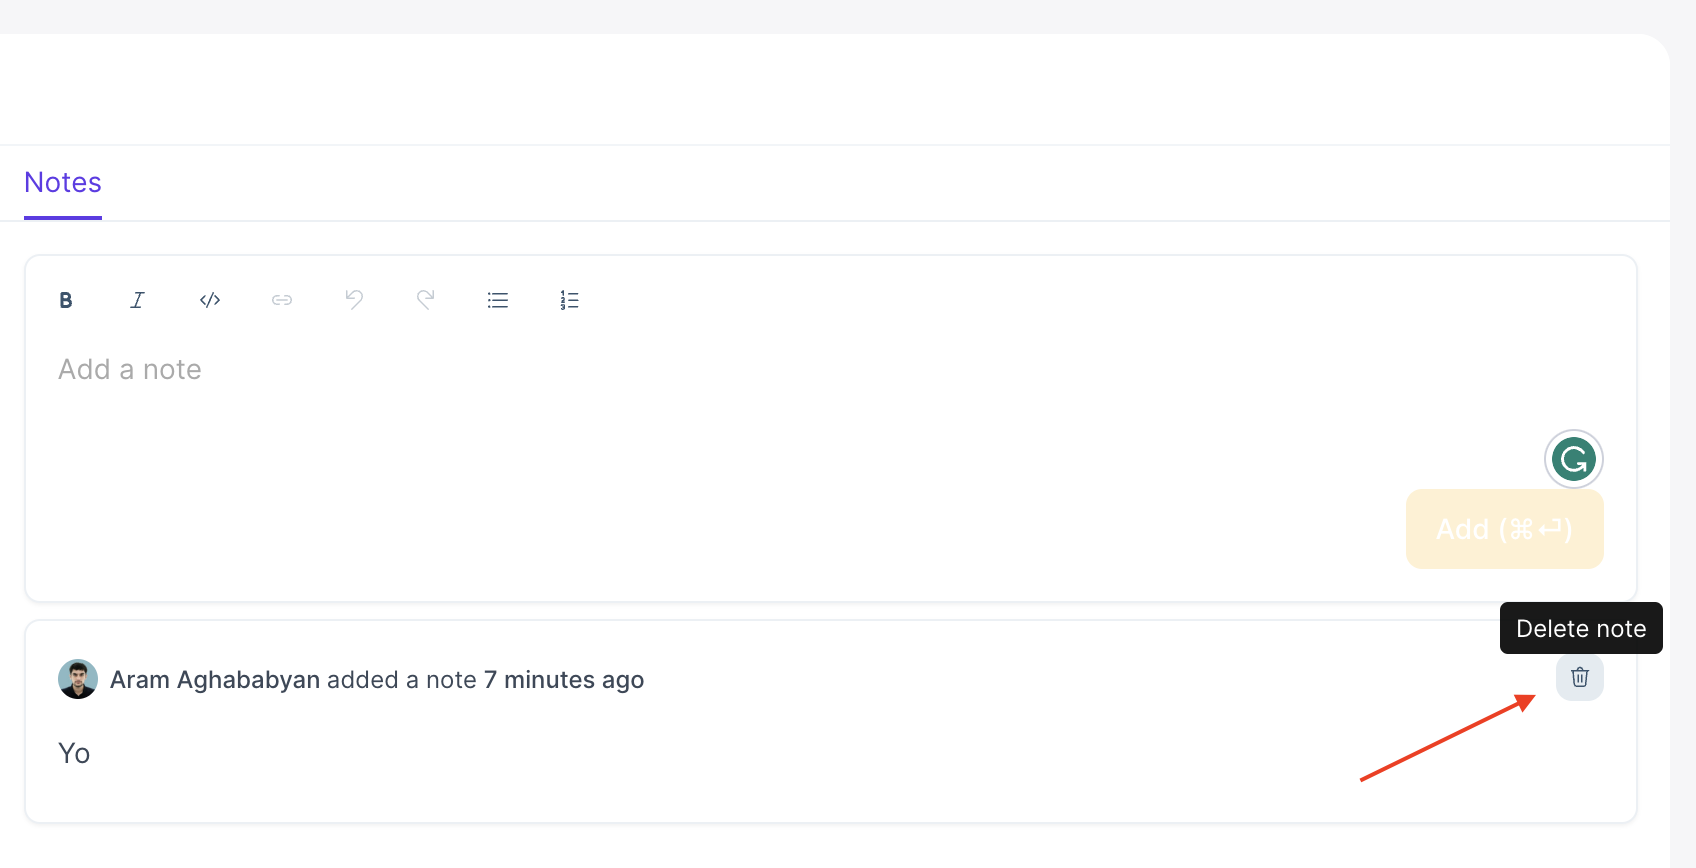
How to Delete a Contact Note?
Simply click the delete icon on the right side of the note.
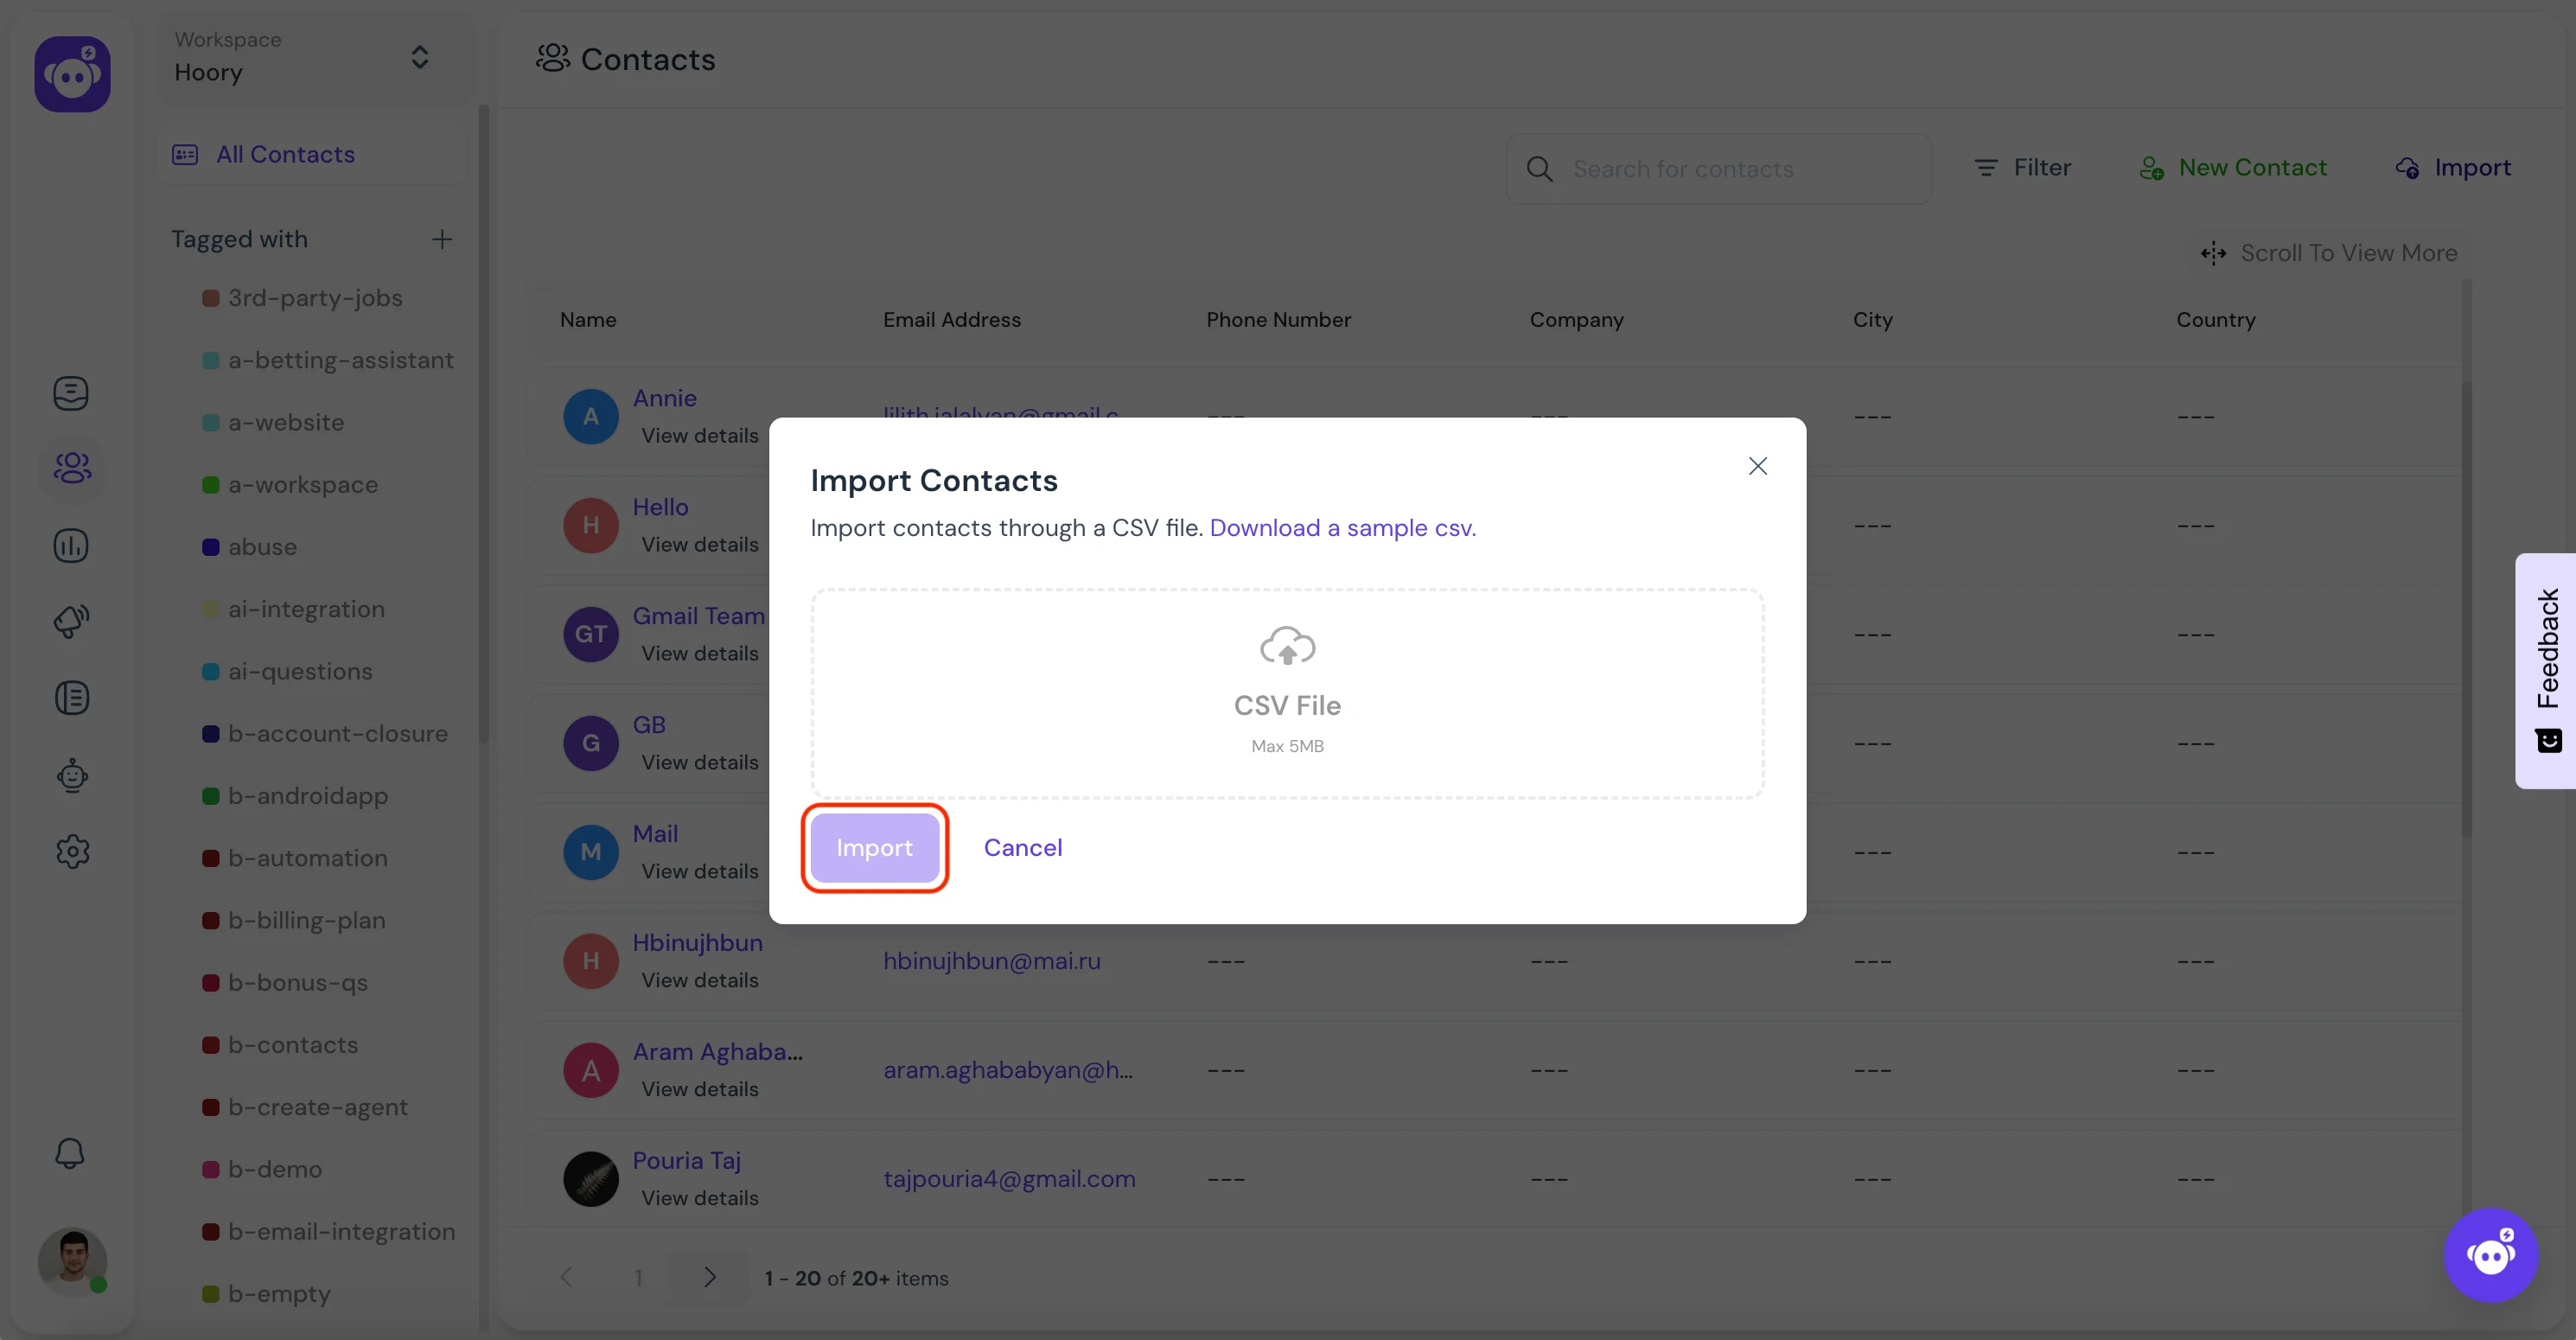
Import Contacts
Hoory AI allows you to bulk import contacts from a CSV file. To import contacts, follow these steps:
- Navigate to Contacts page from the sidebar.
- Click the Import button on the top right corner.
- Select the CSV file you would like to import to Hoory AI.
- Click the Import button to upload the csv file to complete the process.
Here's a quick demo of how the import works.
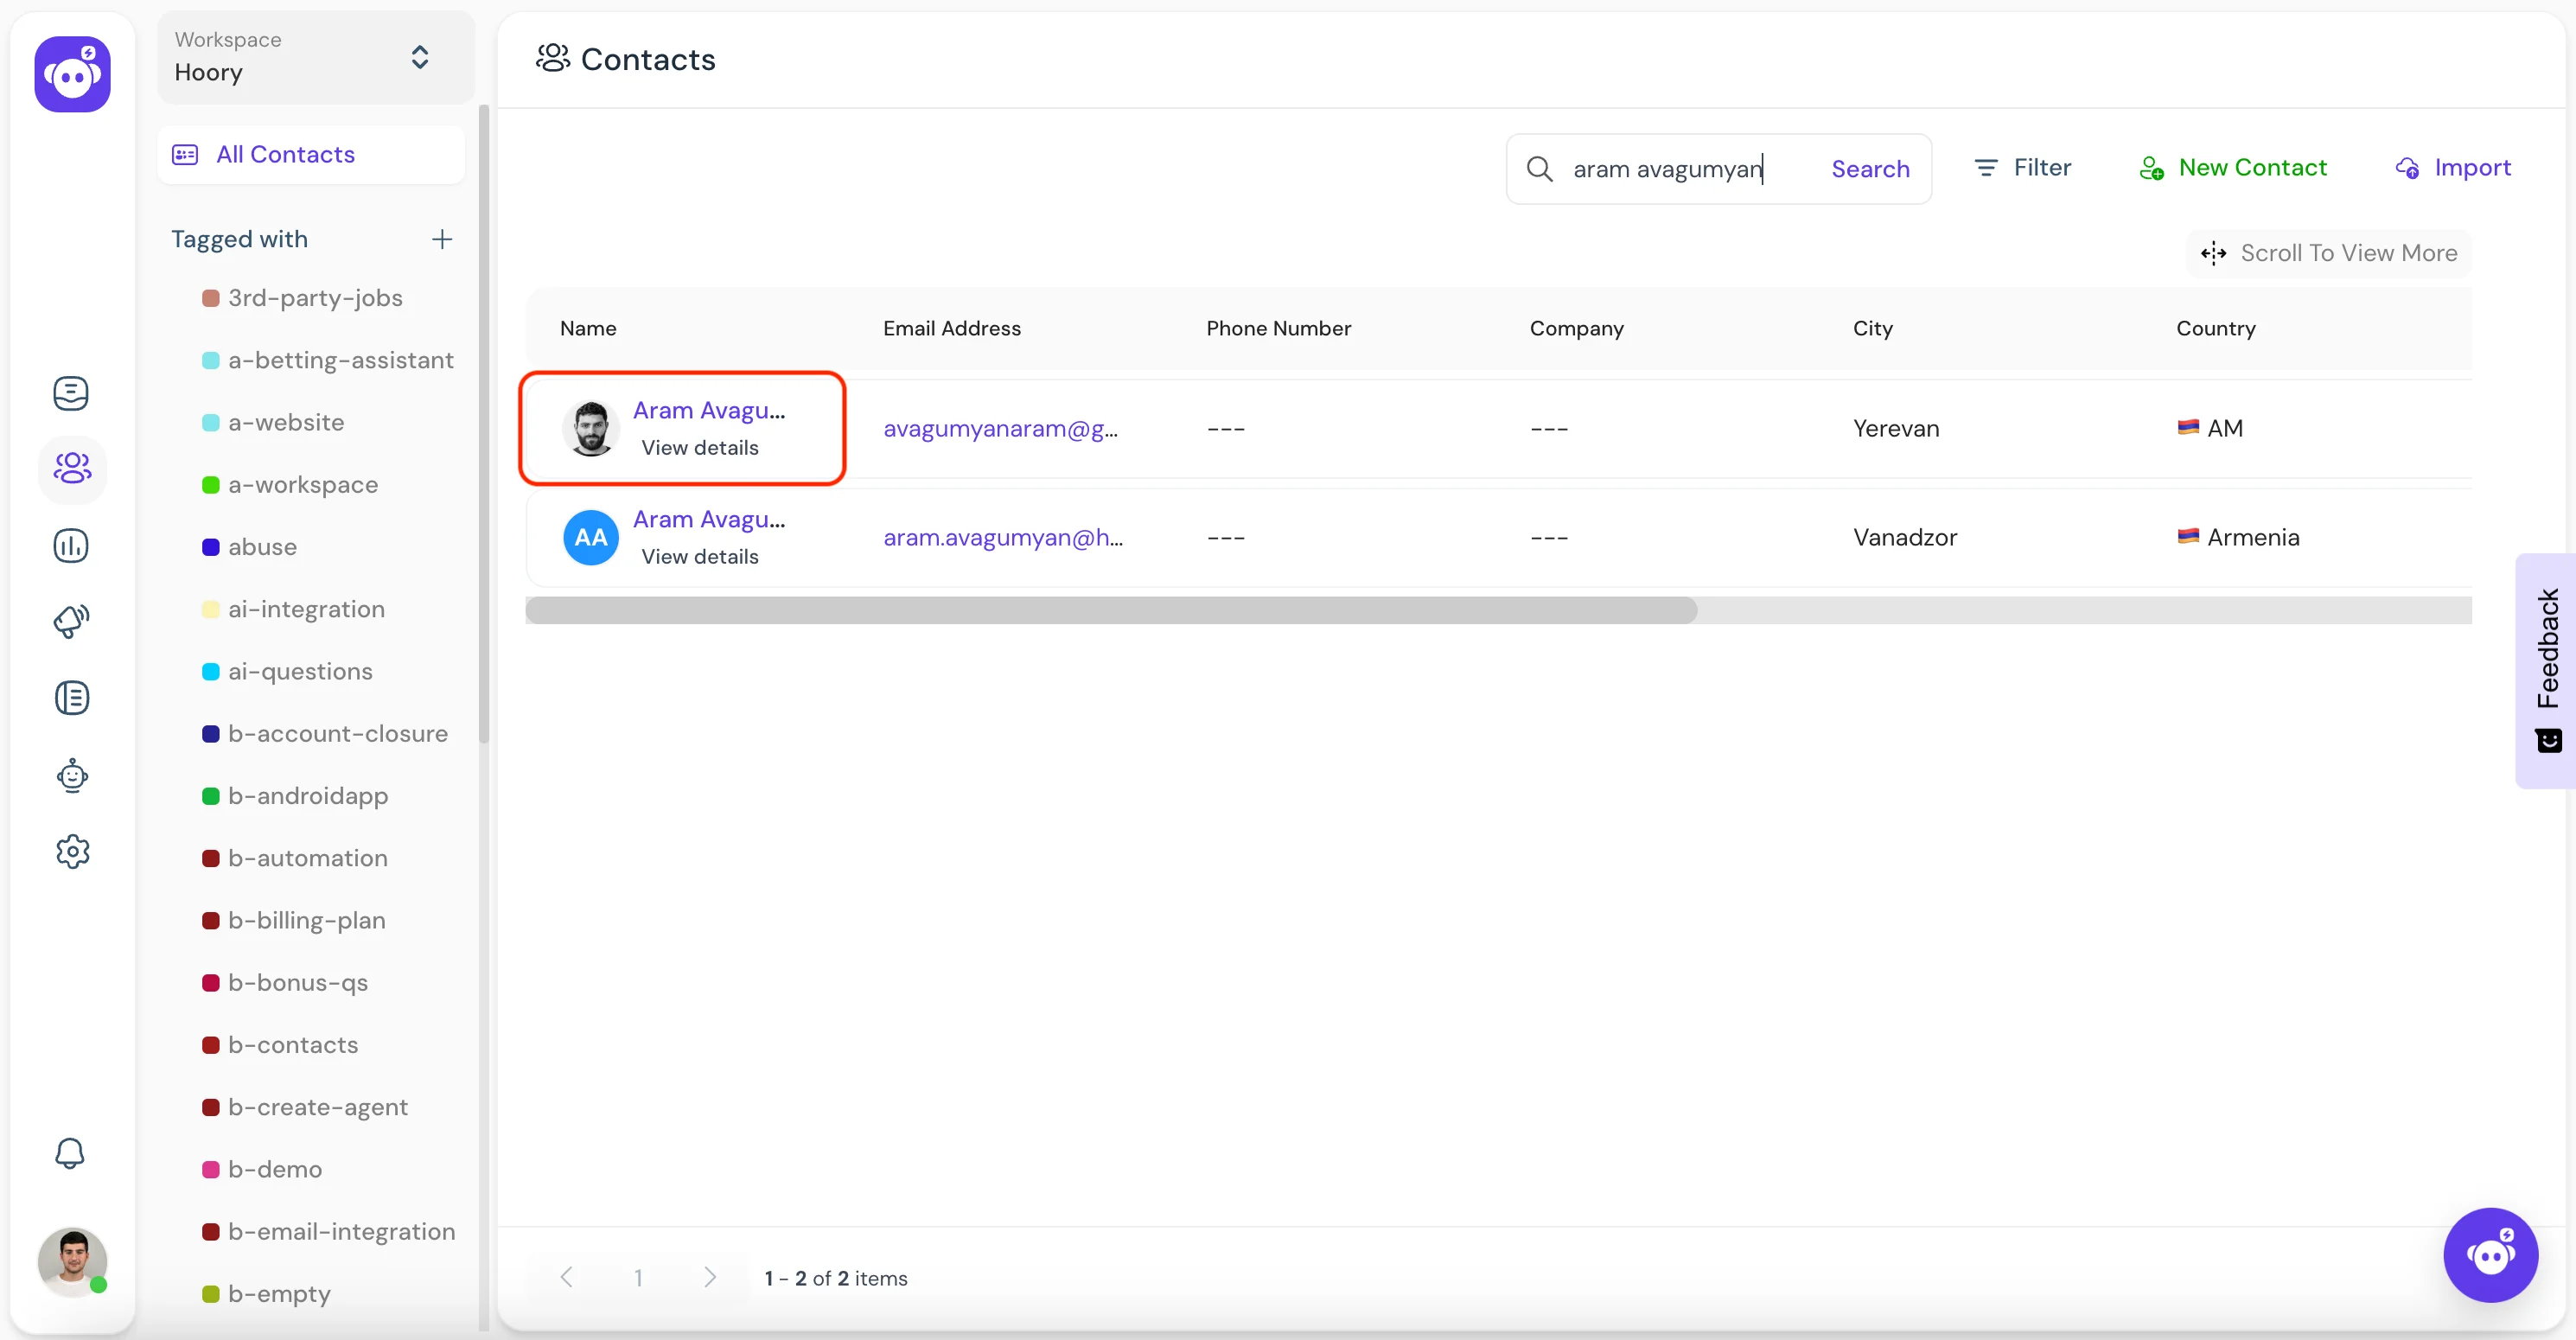
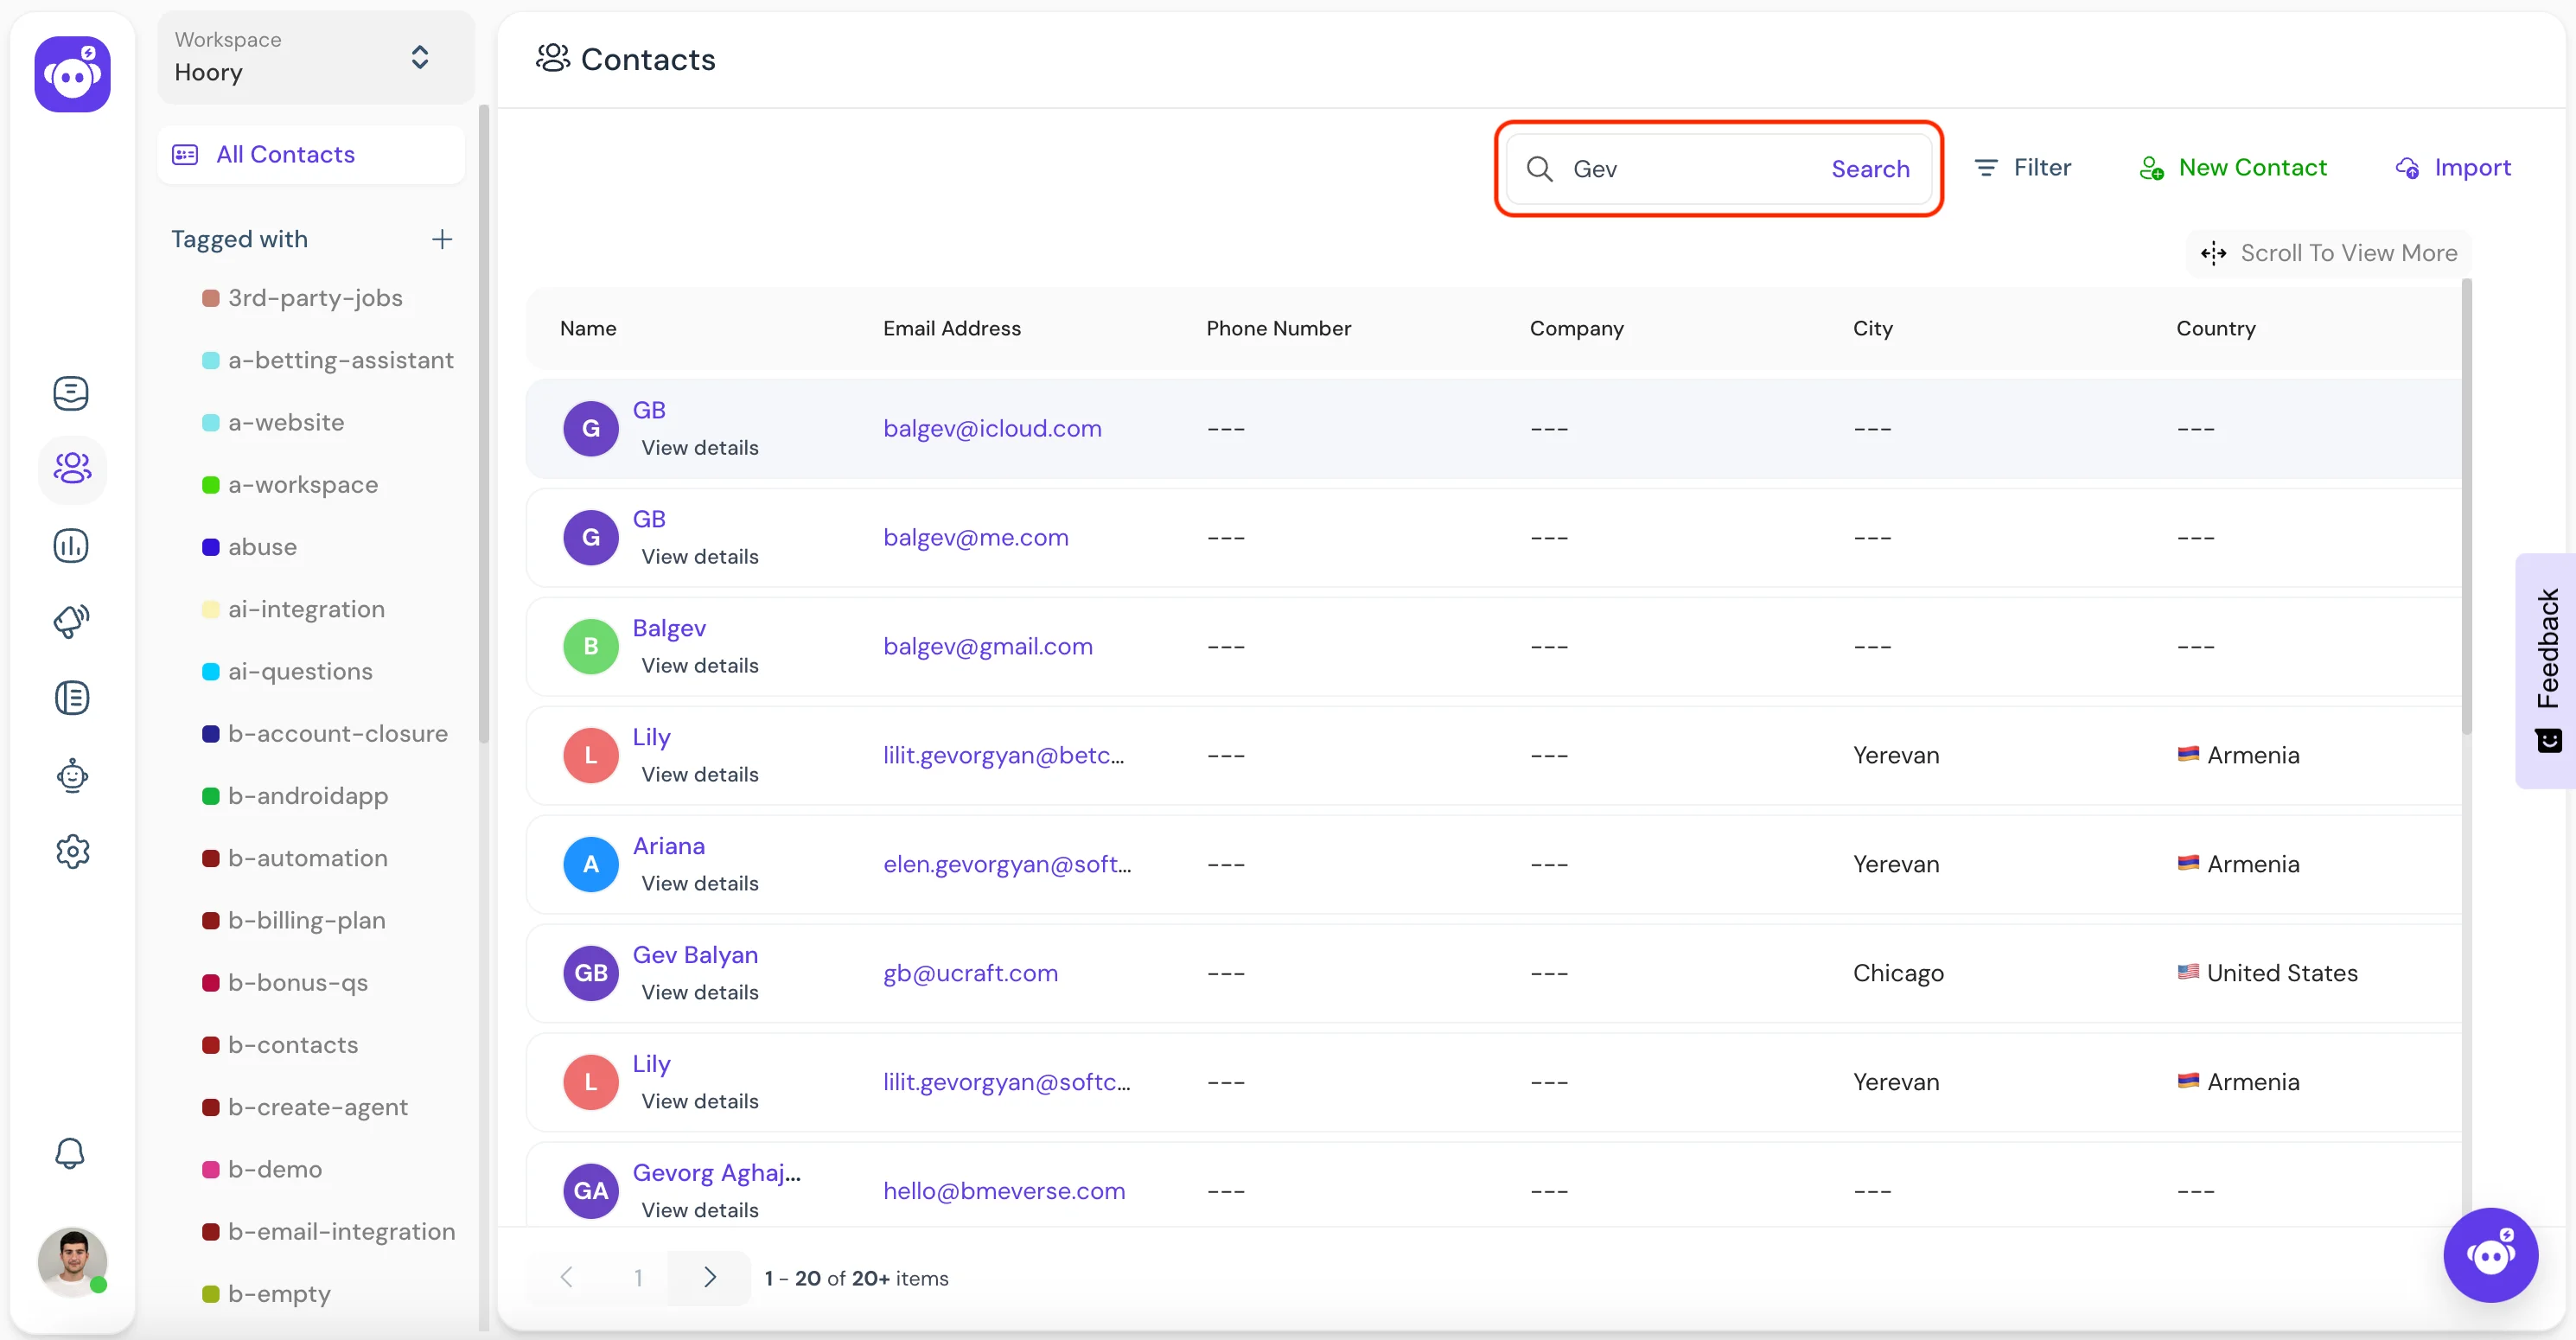
Search Contacts
You can search all contacts by entering the name, email ID or phone number in the search on top of Hoory AI contacts screen.
The searching system currently filters the contacts based on the name, email ID or phone number.
Filtering Contacts
Hoory AI lets you apply advanced filters for your contacts. You will have the ability to filter contacts with multiple attributes at once and even query them with AND/OR operators.
Hoory AI offers filtering contacts by the below attributes:
- Contact name
- Contact email
- Phone number
- Contact identifier
- Country
- City
To filter contacts, click the Filter button on the top right-hand corner of the Hoory AI contacts page.
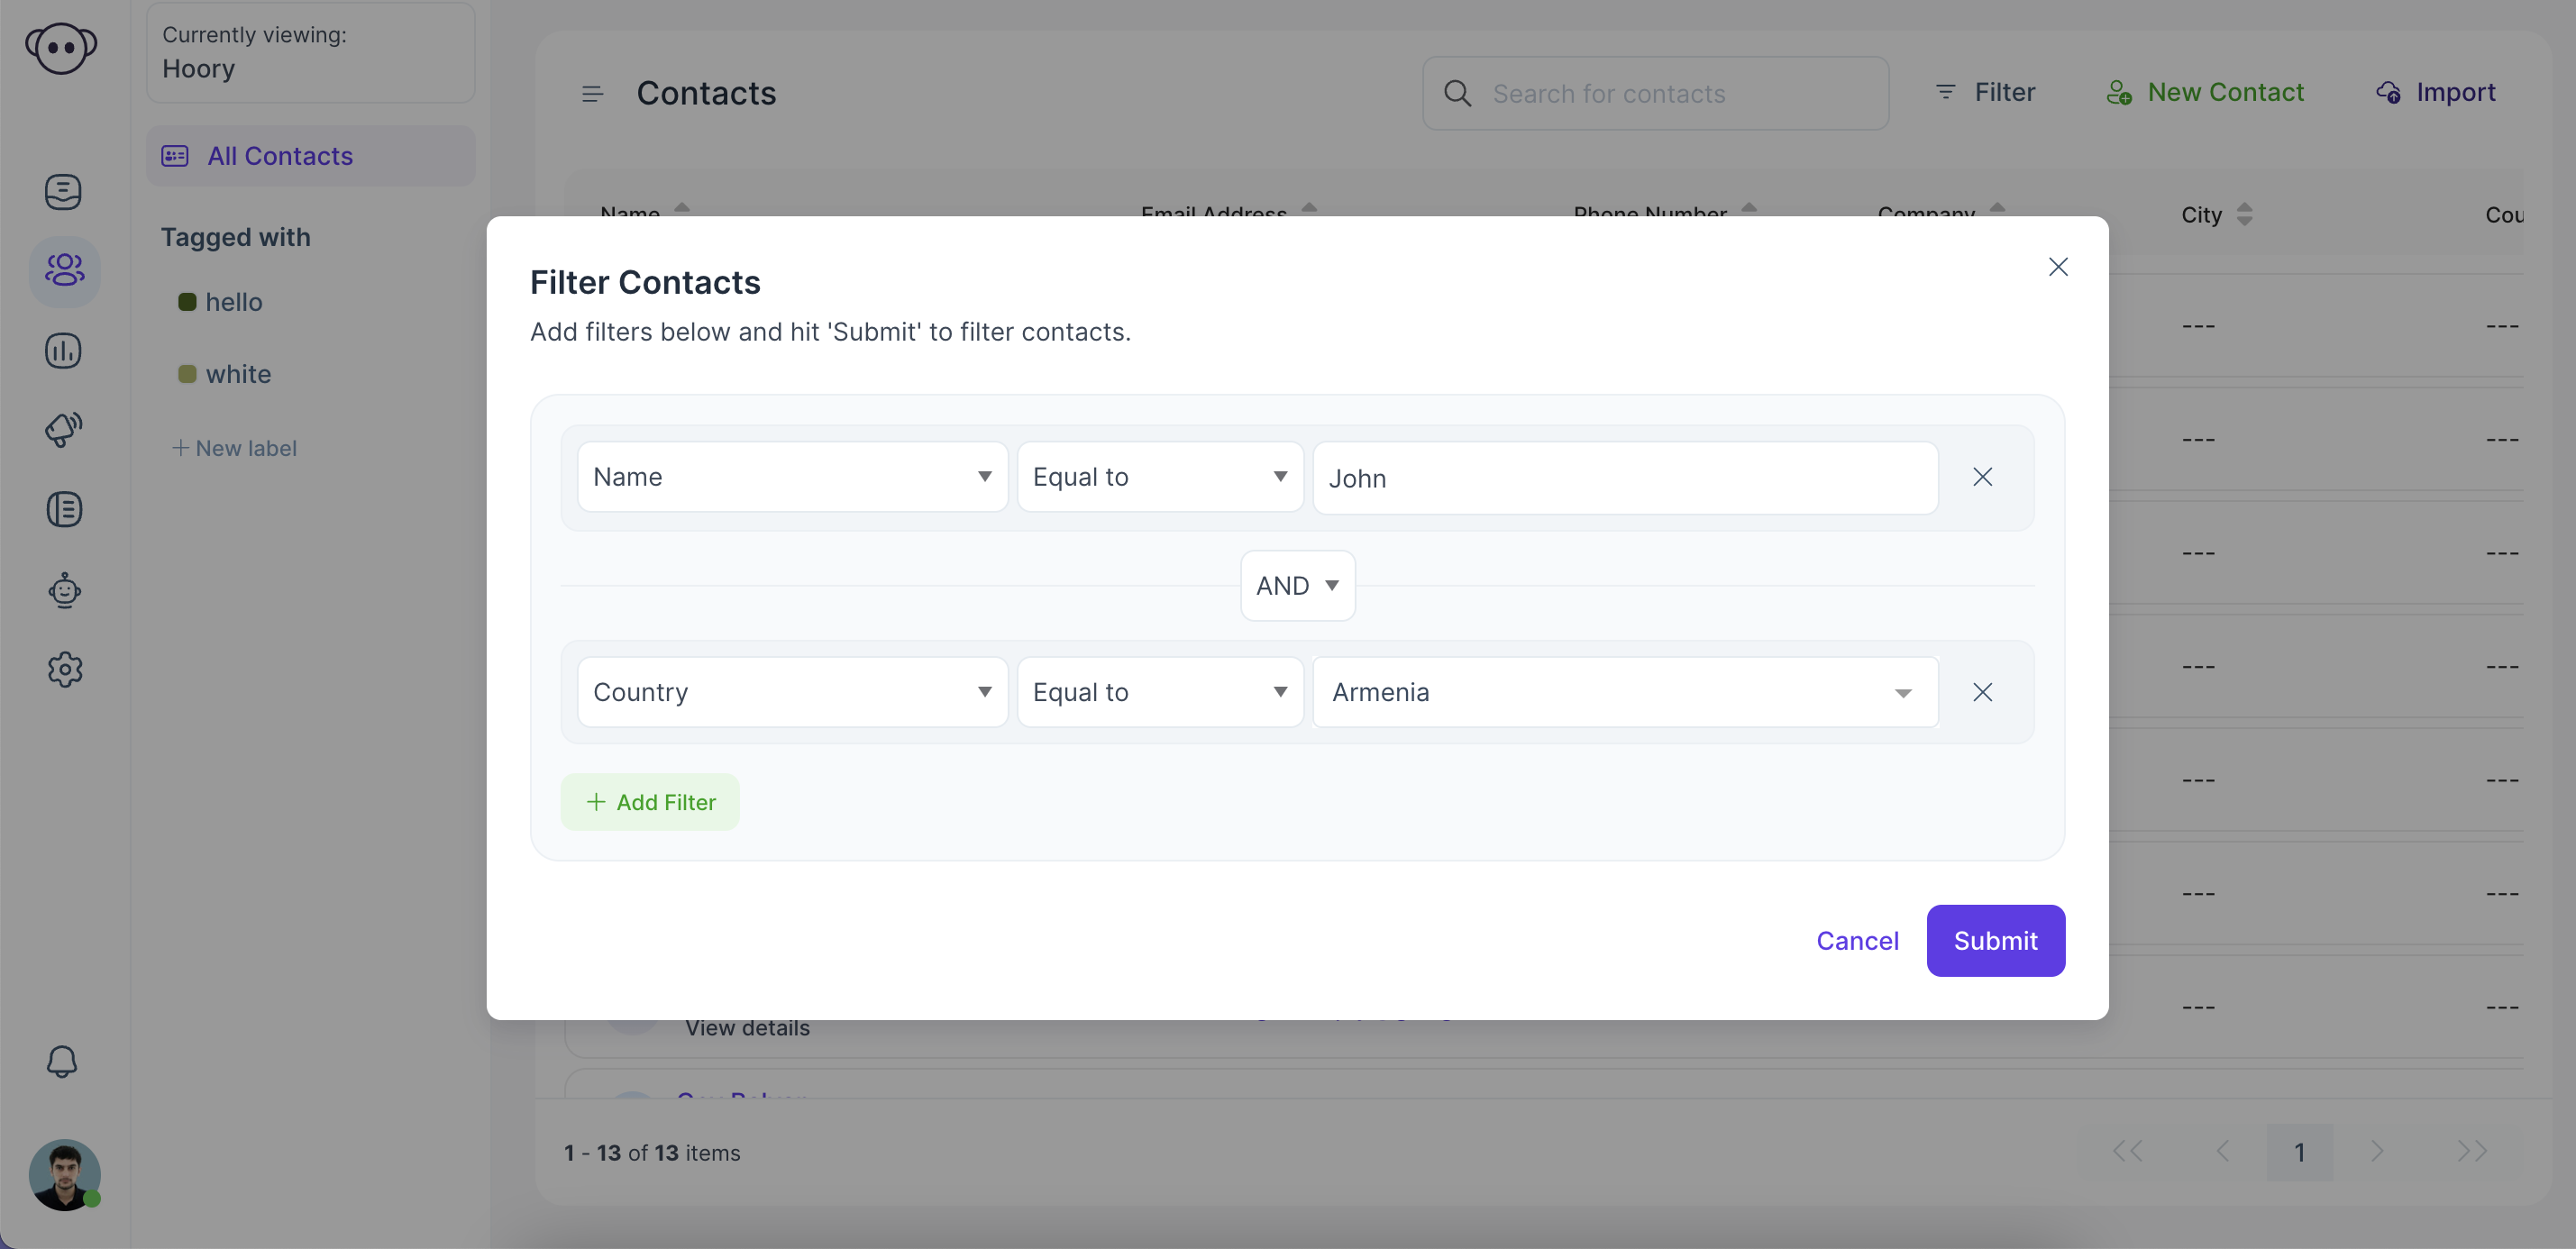
To get all the contacts that are not from "USA" and their full name contains "John".
- Set the 1st filter type as "Name", the operator as "Contains" and the value as "John"
- Click "Add Filter" button
- Set the 2nd filter type as "Country" as the filter type, "Not Equal To" as the operator and "United States of America" as the value.
- Hit Submit, and the contacts list will now be filtered by the above criteria.
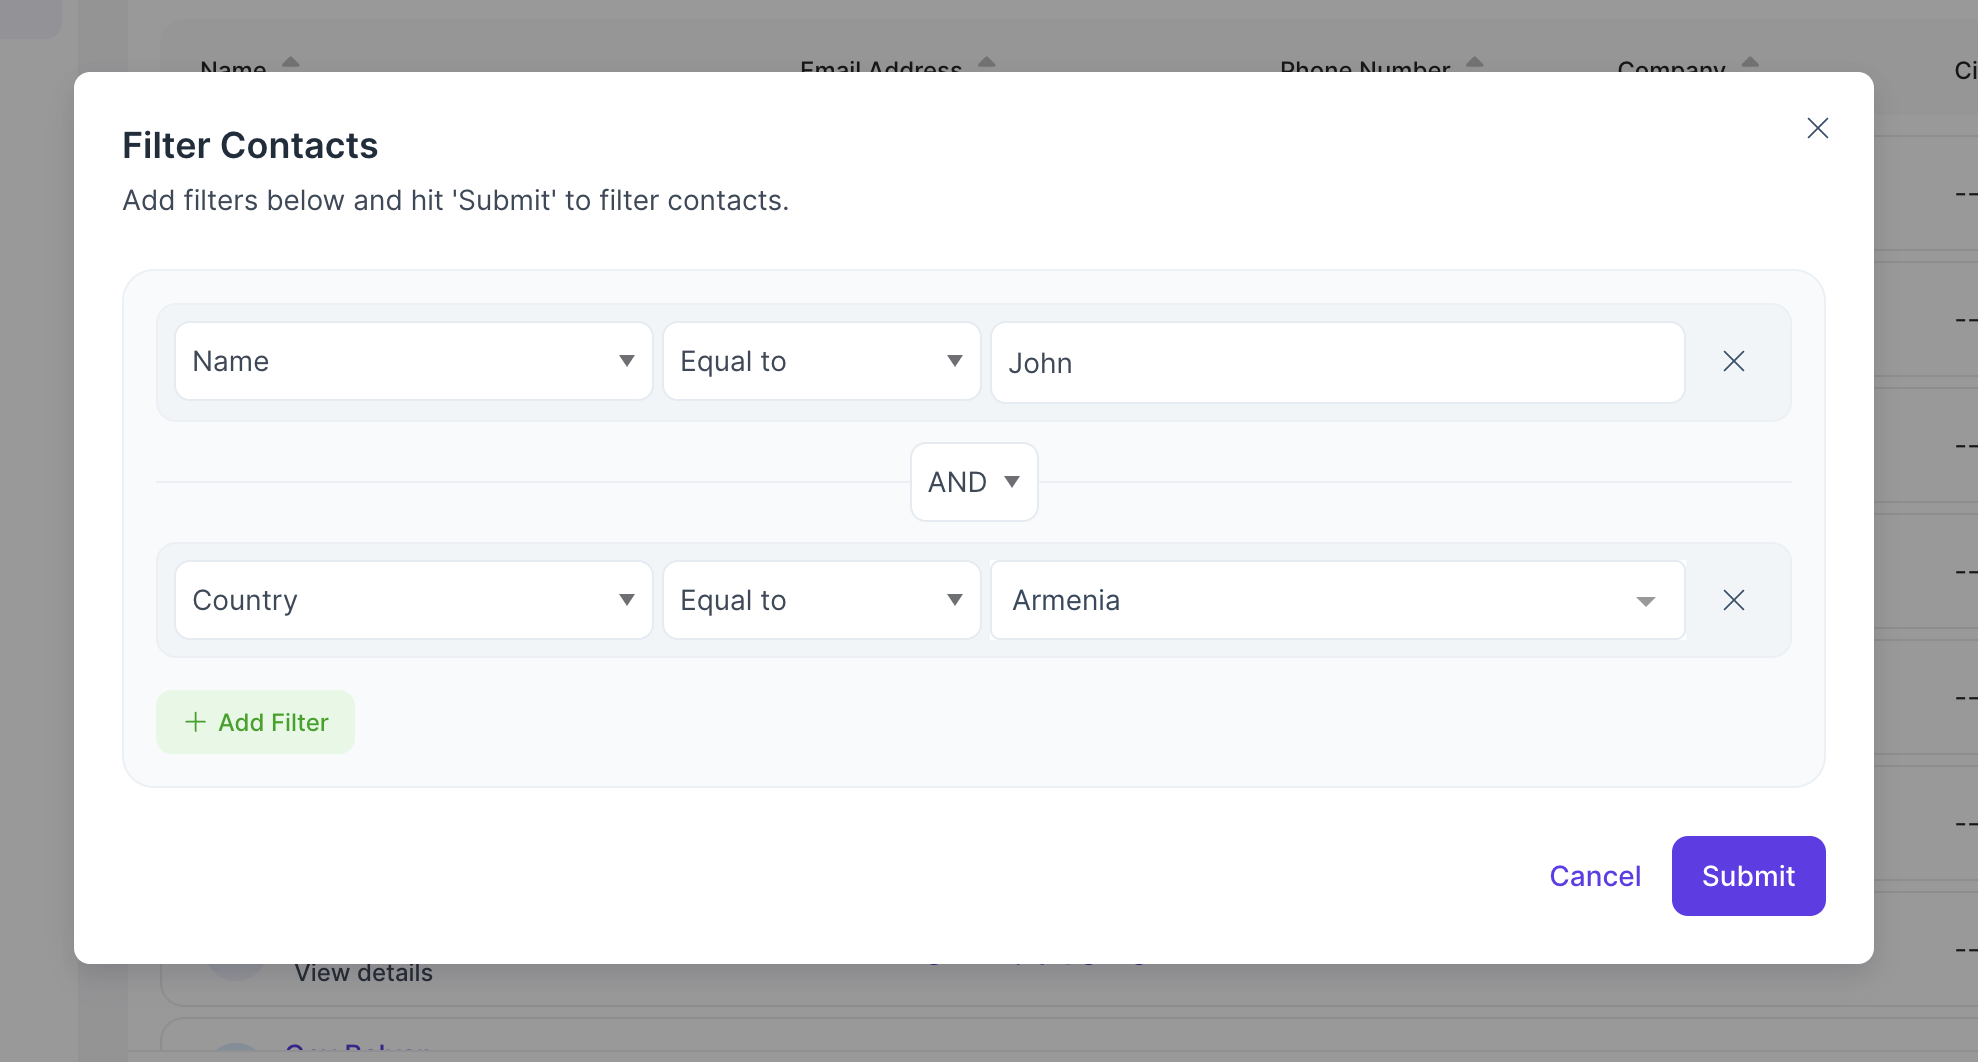
You can apply as many filters as you want, by combining them with AND/OR operators to create complex queries and funnel you a list specific to your needs.
To clear the filters and go back to the original list, simply click the "Clear Filters" button in the filters popup.