Set Up Your WhatsApp Channel with WhatsApp Cloud API
Hoory AI supports the official WhatsApp Business API. You can connect the phone number and start managing your WhatsApp customer queries from Hoory AI. Follow the steps given below to enable your WhatsApp channel with WhatsApp Cloud API.
Prerequisites
1. Configure your Facebook Developer App
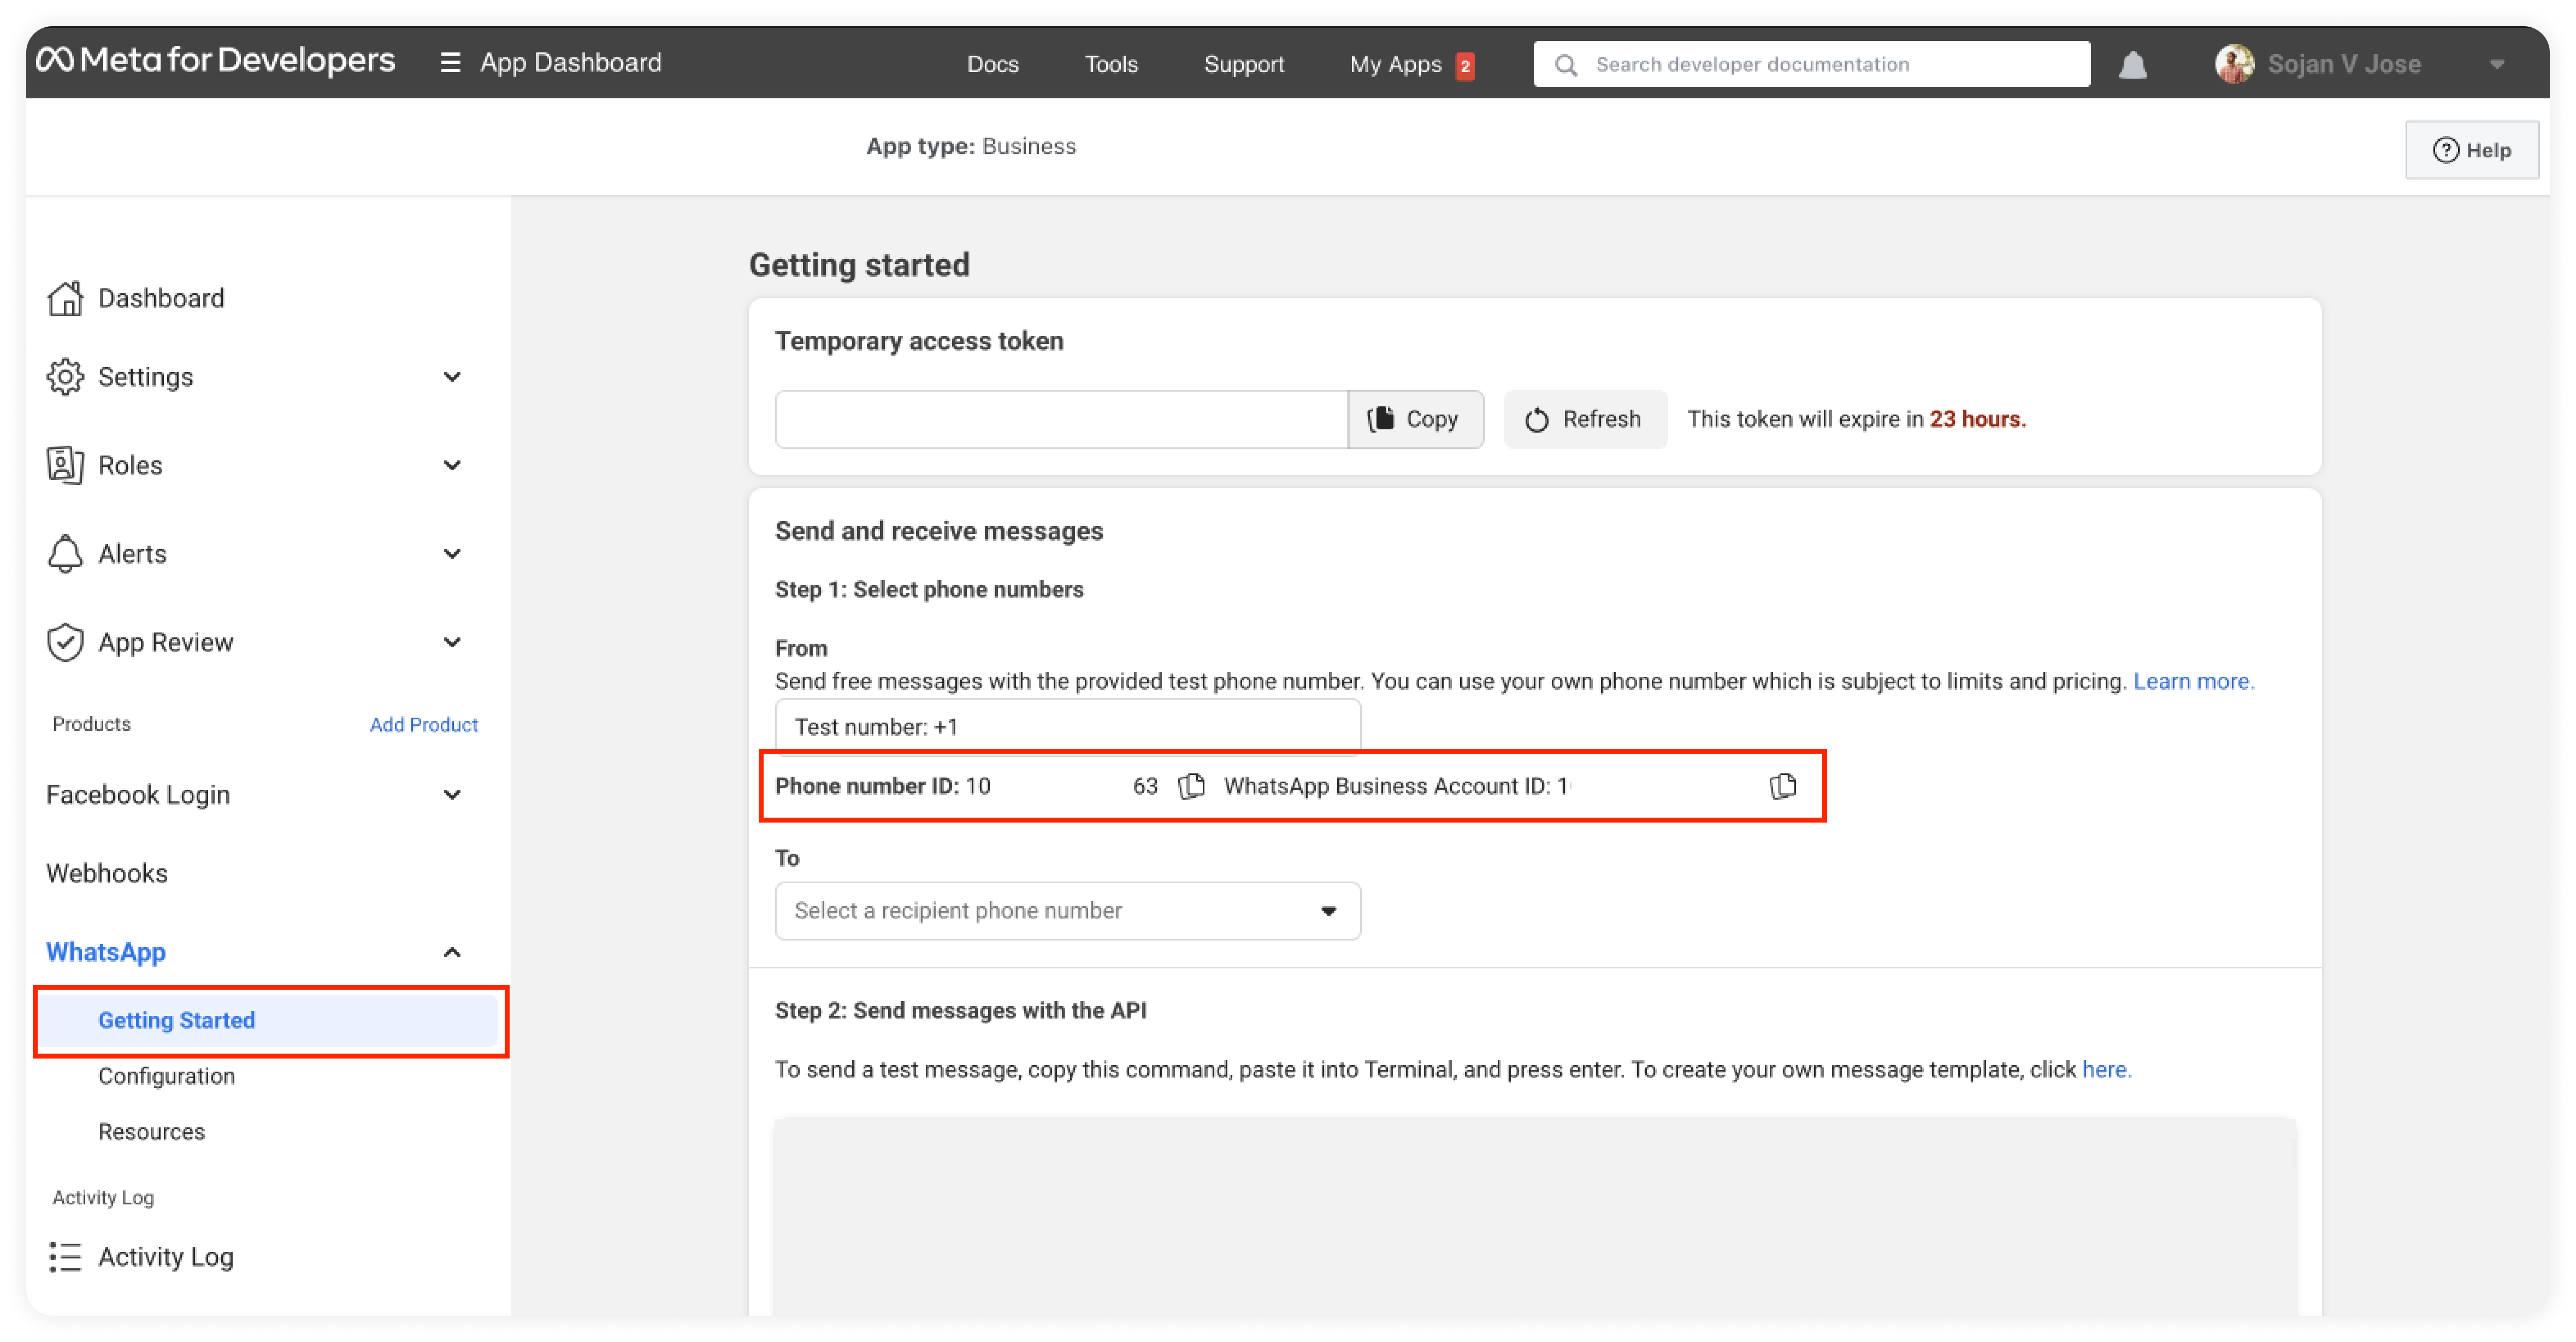
First, you need to create your Facebook Developer app, with WhatsApp Product enabled. Go to the WhatsApp Cloud API Guide and navigate to section called Set up Developer Assets and Platform Access and follow the steps.
Once you finish this step, you can now configure your phone numbers in the WhatsApp section of your Facebook developer app. If you complete the steps successfully, you should be able to obtain the Phone Number Id and Whatsapp Bussiness Account ID as shown in the below screenshot. Hoory AI will require these values for creating the WhatsApp channel.
2. Configure a System User for Your Facebook Business Manager
Create a system user in your Business Manager with access to the WhatsApp. Generate an access token for the user, which will be required as the API key for setting up an channel in Hoory AI.
When generating the access token, make sure the whatsapp_business_management, and whatsapp_business_messaging permissions are selected.
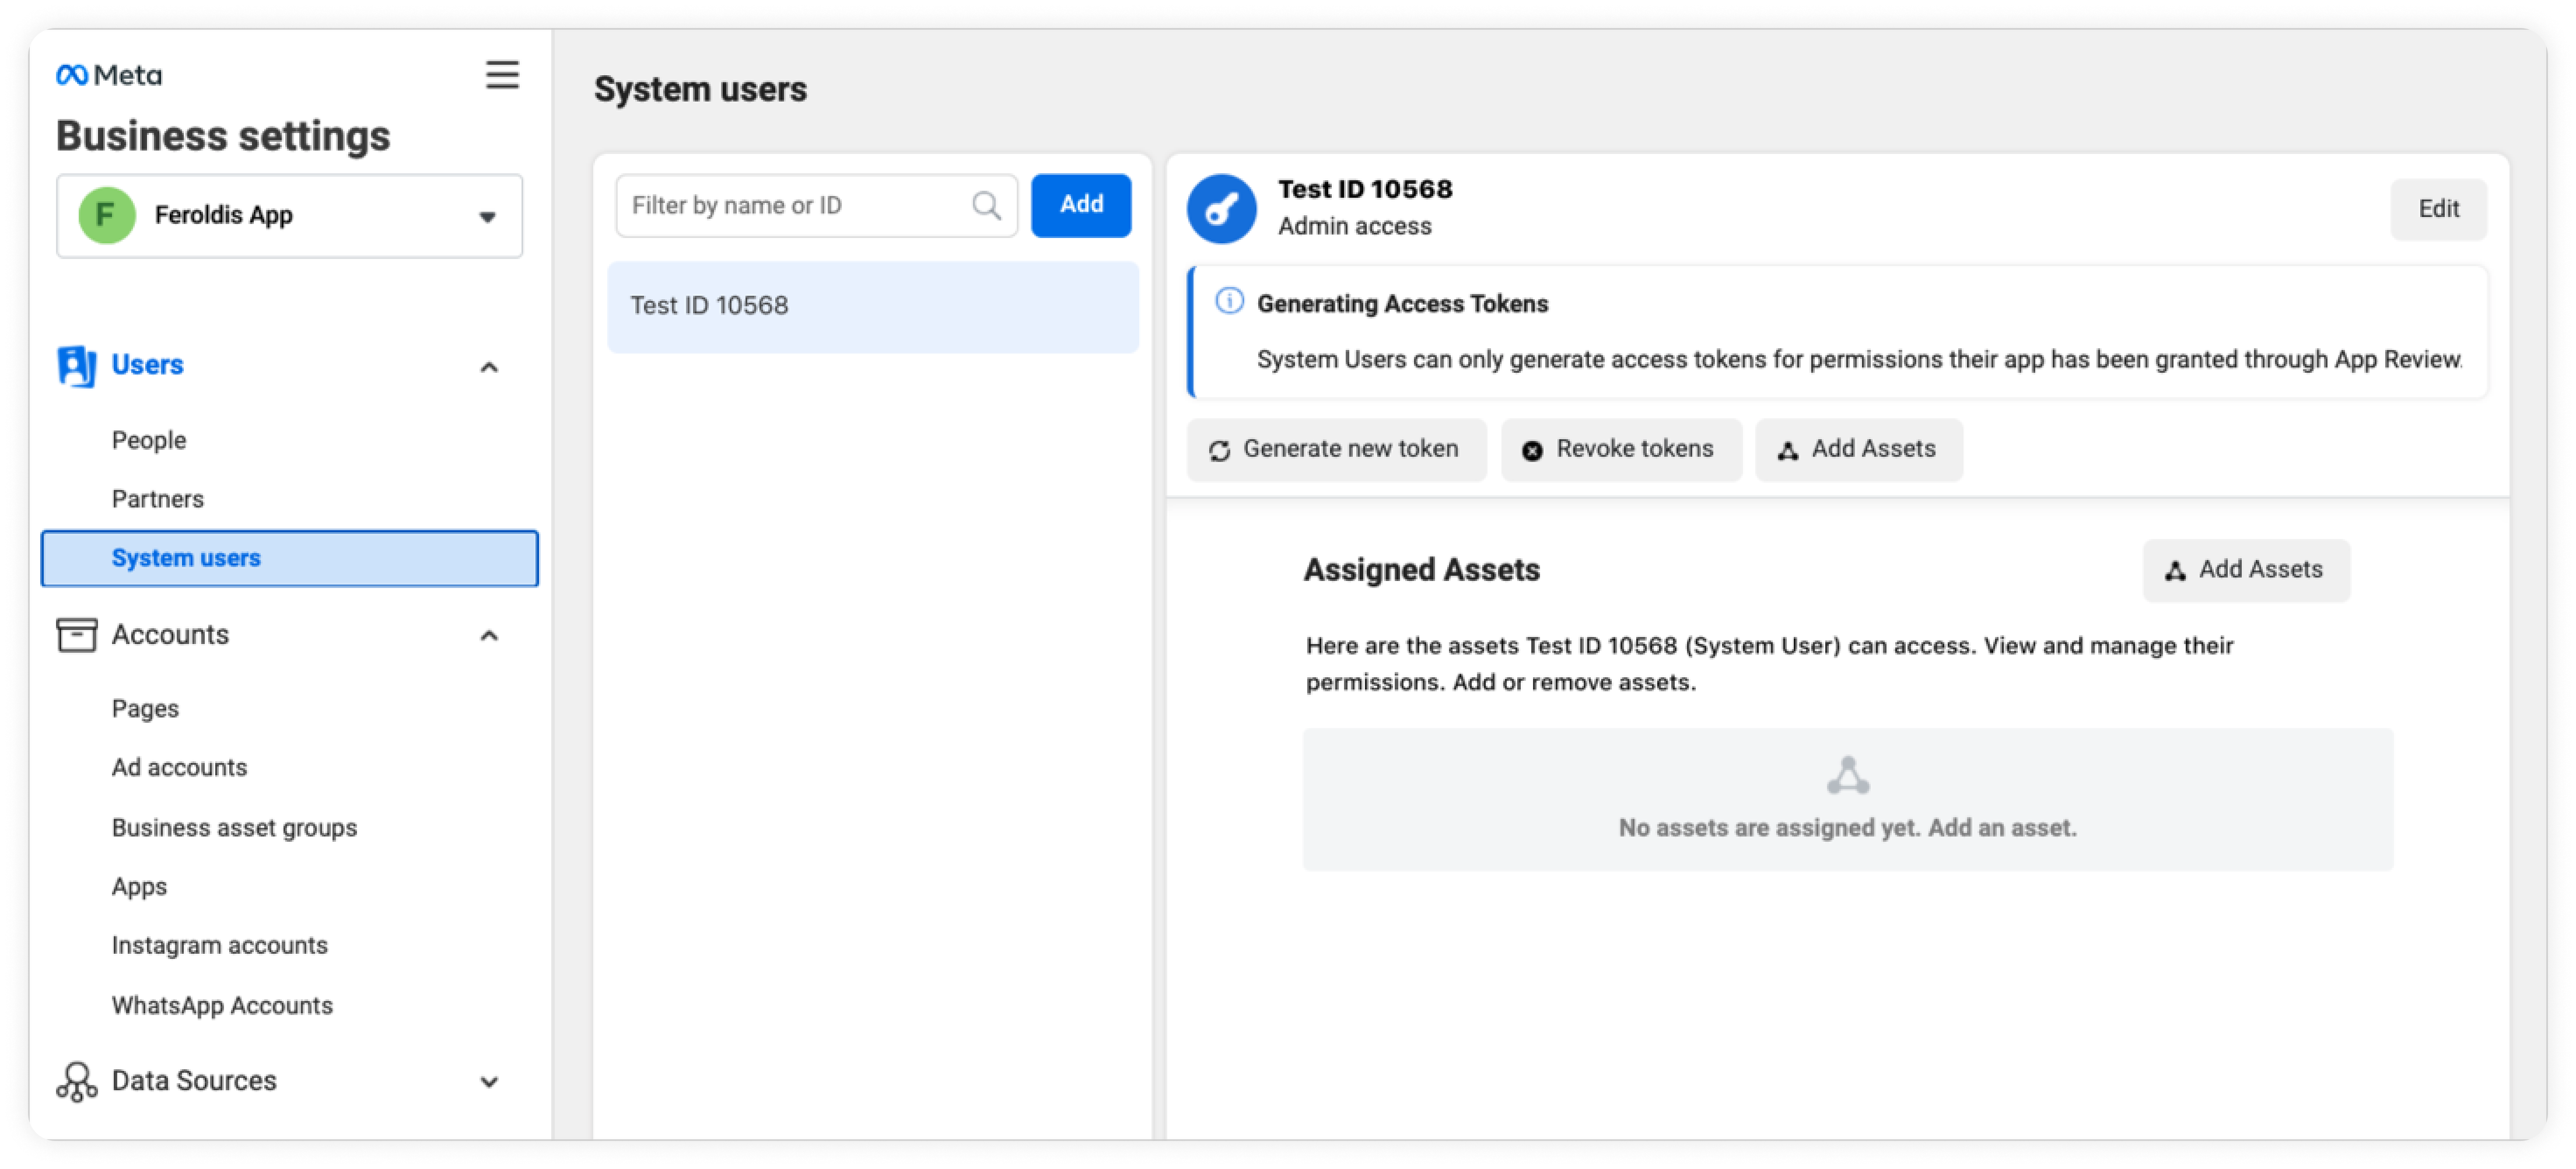
Step 1. Create a system user in the System Users tab of Business Manager.
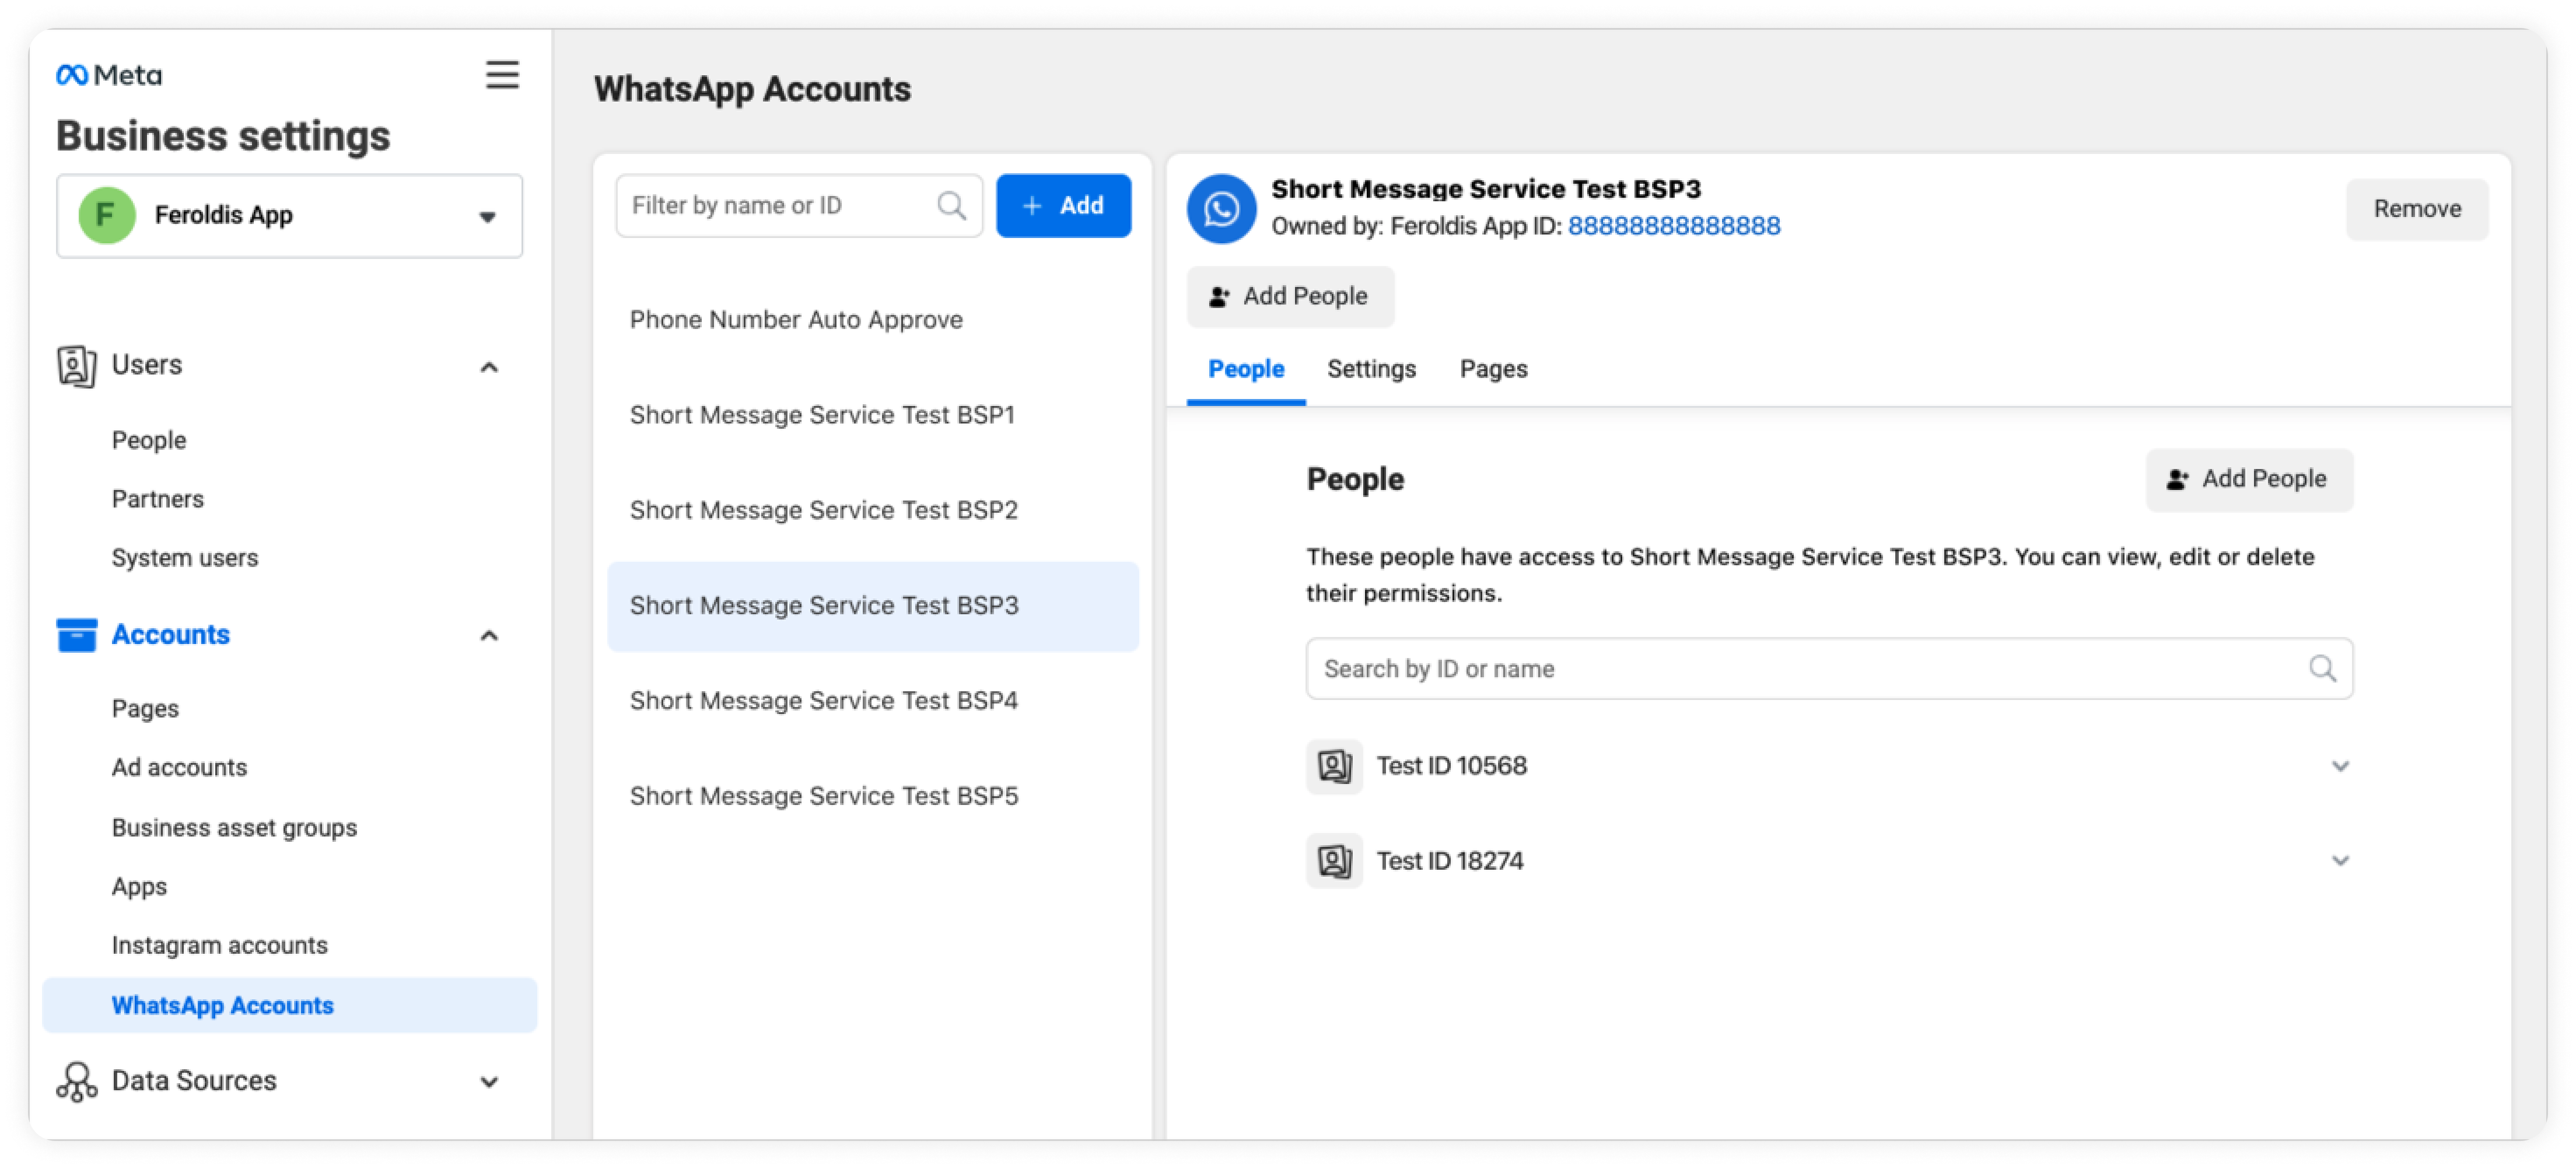
Step 2. Add the system user. Under the WhatsApp Accounts tab, select “Add People” and select the system user to grant access to the WhatsApp Business account.
Step 3. Generate the access token and request permissions.
Refer this video for detailed steps.
Setup WhatsApp Channel in Hoory AI
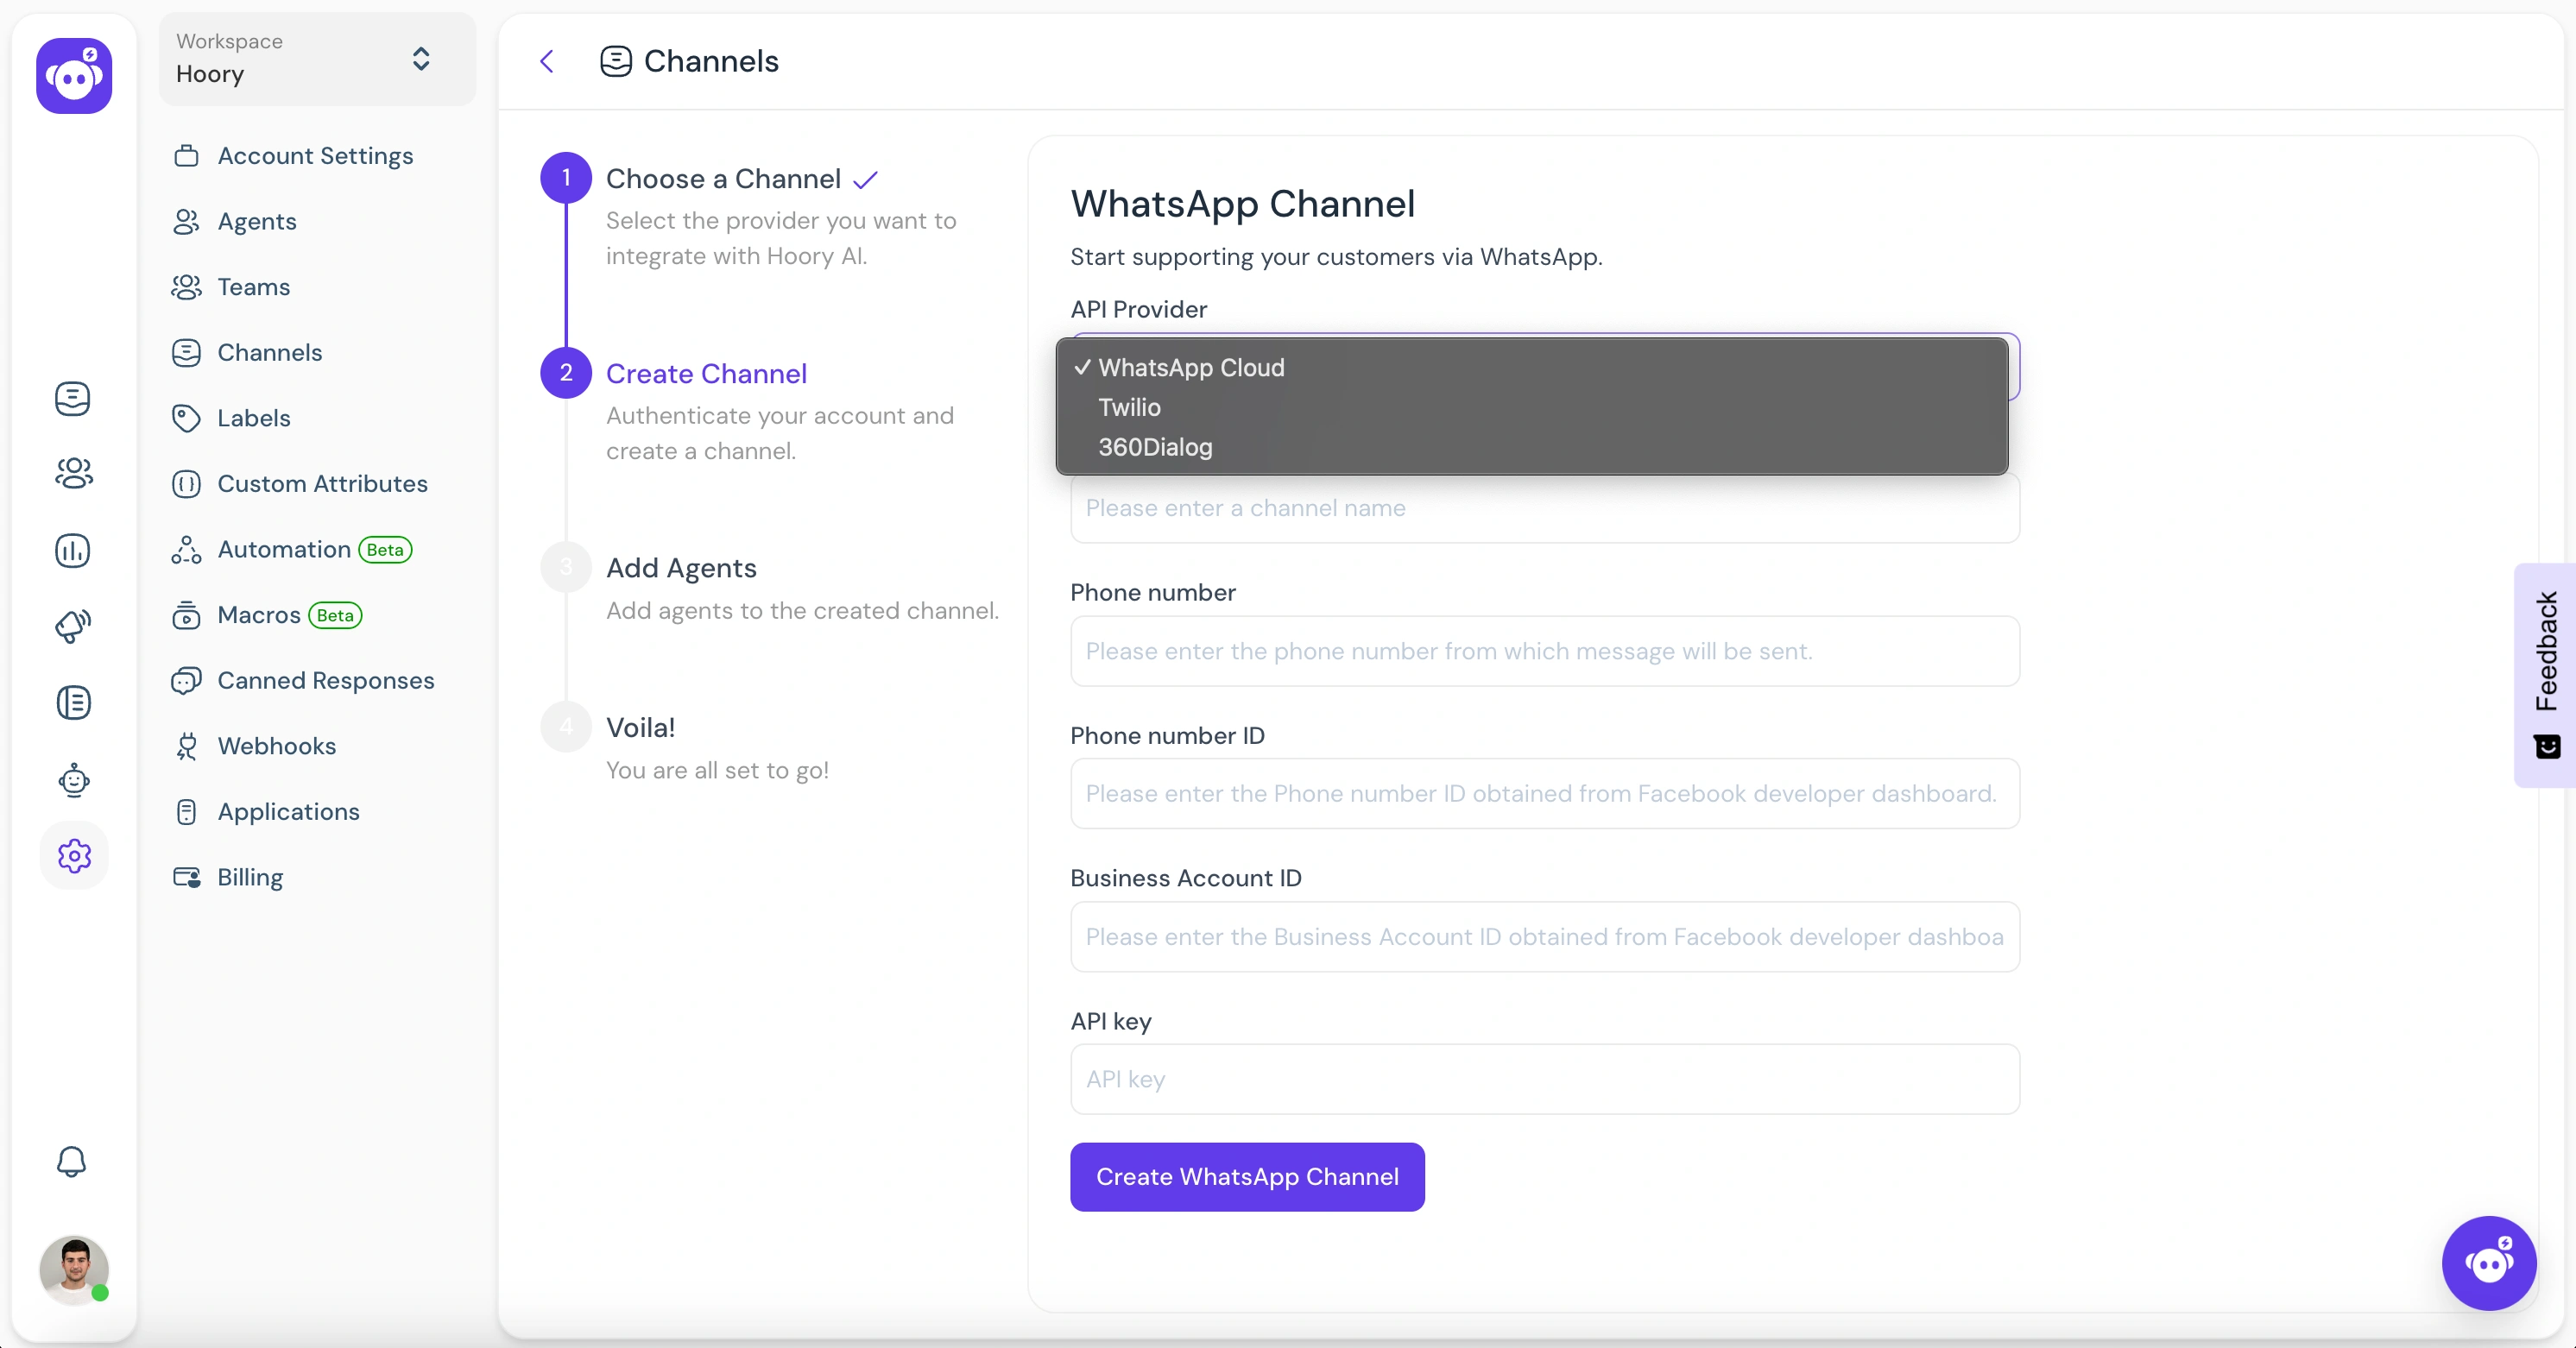
Step 1. Open your Hoory AI dashboard. Go to Settings → Channels → Add Channel.
Step 2. Click the "WhatsApp" icon.

Step 3. Choose "WhatsApp Cloud" as the API provider. Fill in the appropriate details.
| Values | Description |
|---|---|
| Name | Choose a name for your channel. E.g. Your Business Name. |
| Phone Number | Fill in the phone number you have configured in Facebook Developer App. |
| Phone Number ID | The phone number ID for the number as obtained in prerequisites |
| Bussiness Account ID | The Business Account ID for the number as obtained in prerequisites. |
| API Key | The Business Account User's access token for the number as obtained in prerequisites. |
| Webhook Verify Token | This token is required while configuring Webhook in Facebook Developer App. Fill in a secure alphanumeric string that you wish. |
Finish the steps to obtain your Whatsapp Webhook Callback URL.
Enable the Webhook
Configure the webhook in Facebook Developer App.
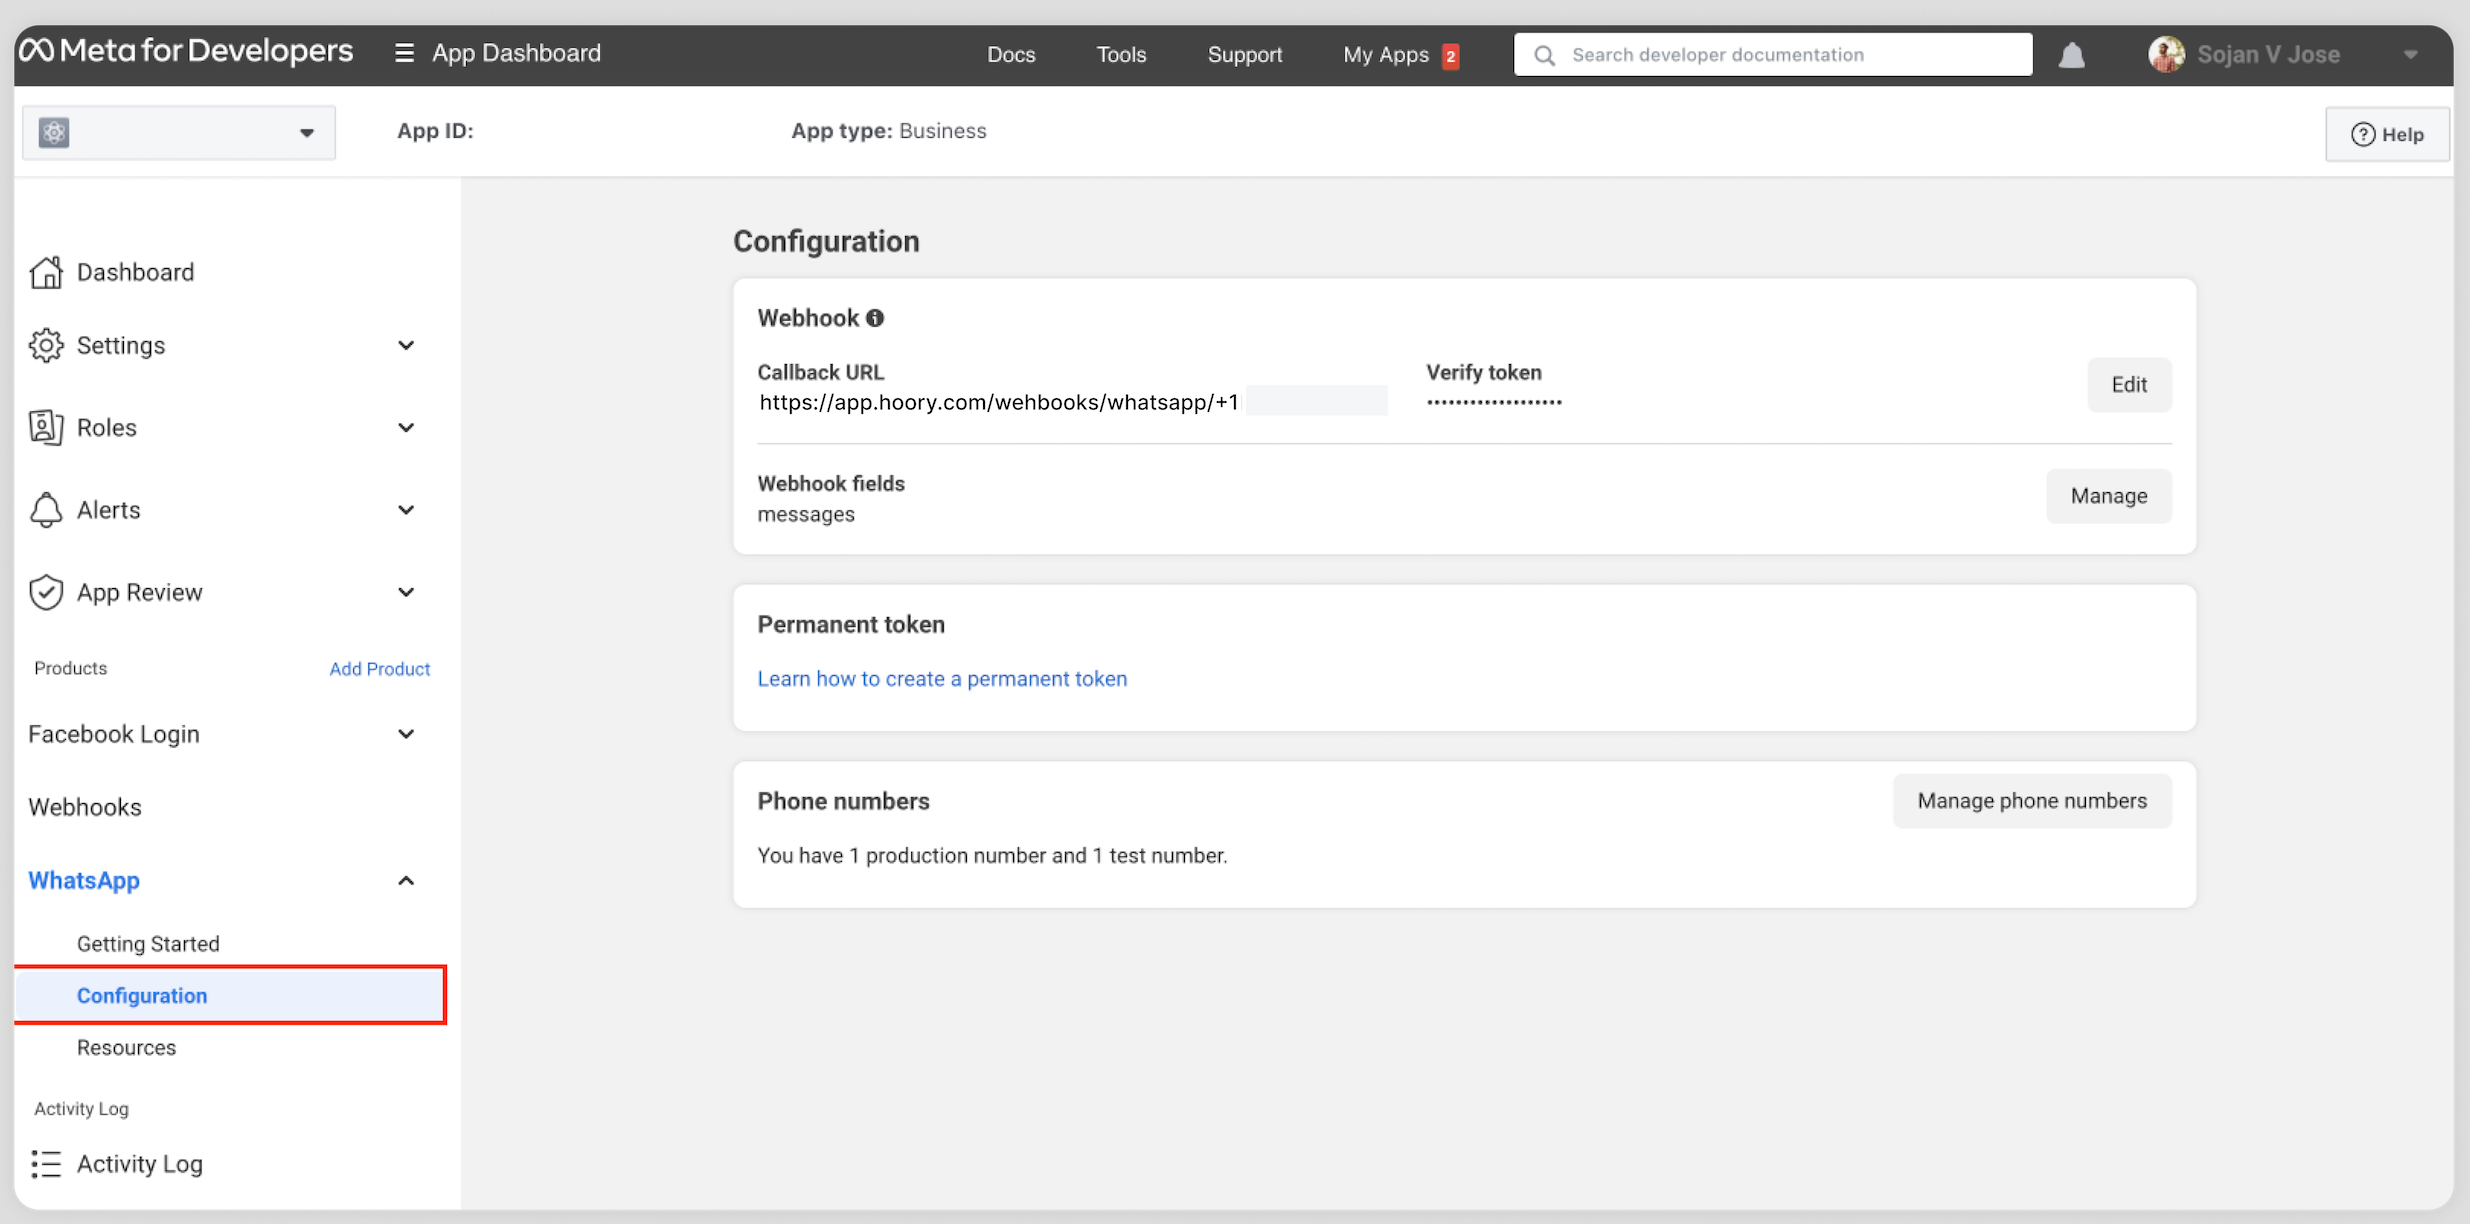
Head back to the WhatsApp section in the Facebook Developer App. Navigate to the Configuration subsection and set up the Callback URL.
- The value for the URL should be the same URL you obtained at the end of your Hoory AI channel creation and will look like
https://app.hoory.com/webhooks/whatsapp/+{phone_number}. - The value for the
verify tokenshould be the same value you configured for theWebhook Verify Tokenduring channel creation.
You should also subscribe to message fields events under Webhooks Fields on your Facebook Developer app.
Once you finish all the steps, the section should look like the following screenshot.
FAQ
How to configure multiple numbers under a single Facebook app?
Facebook App allows configuring only a single Webhook endpoint. So, create channels in Hoory AI for all the numbers, as required. You will need to configure the Webhook URL provided for only one of these channels in the Facebook app so that all the other channels work.
Additional Channel Settings
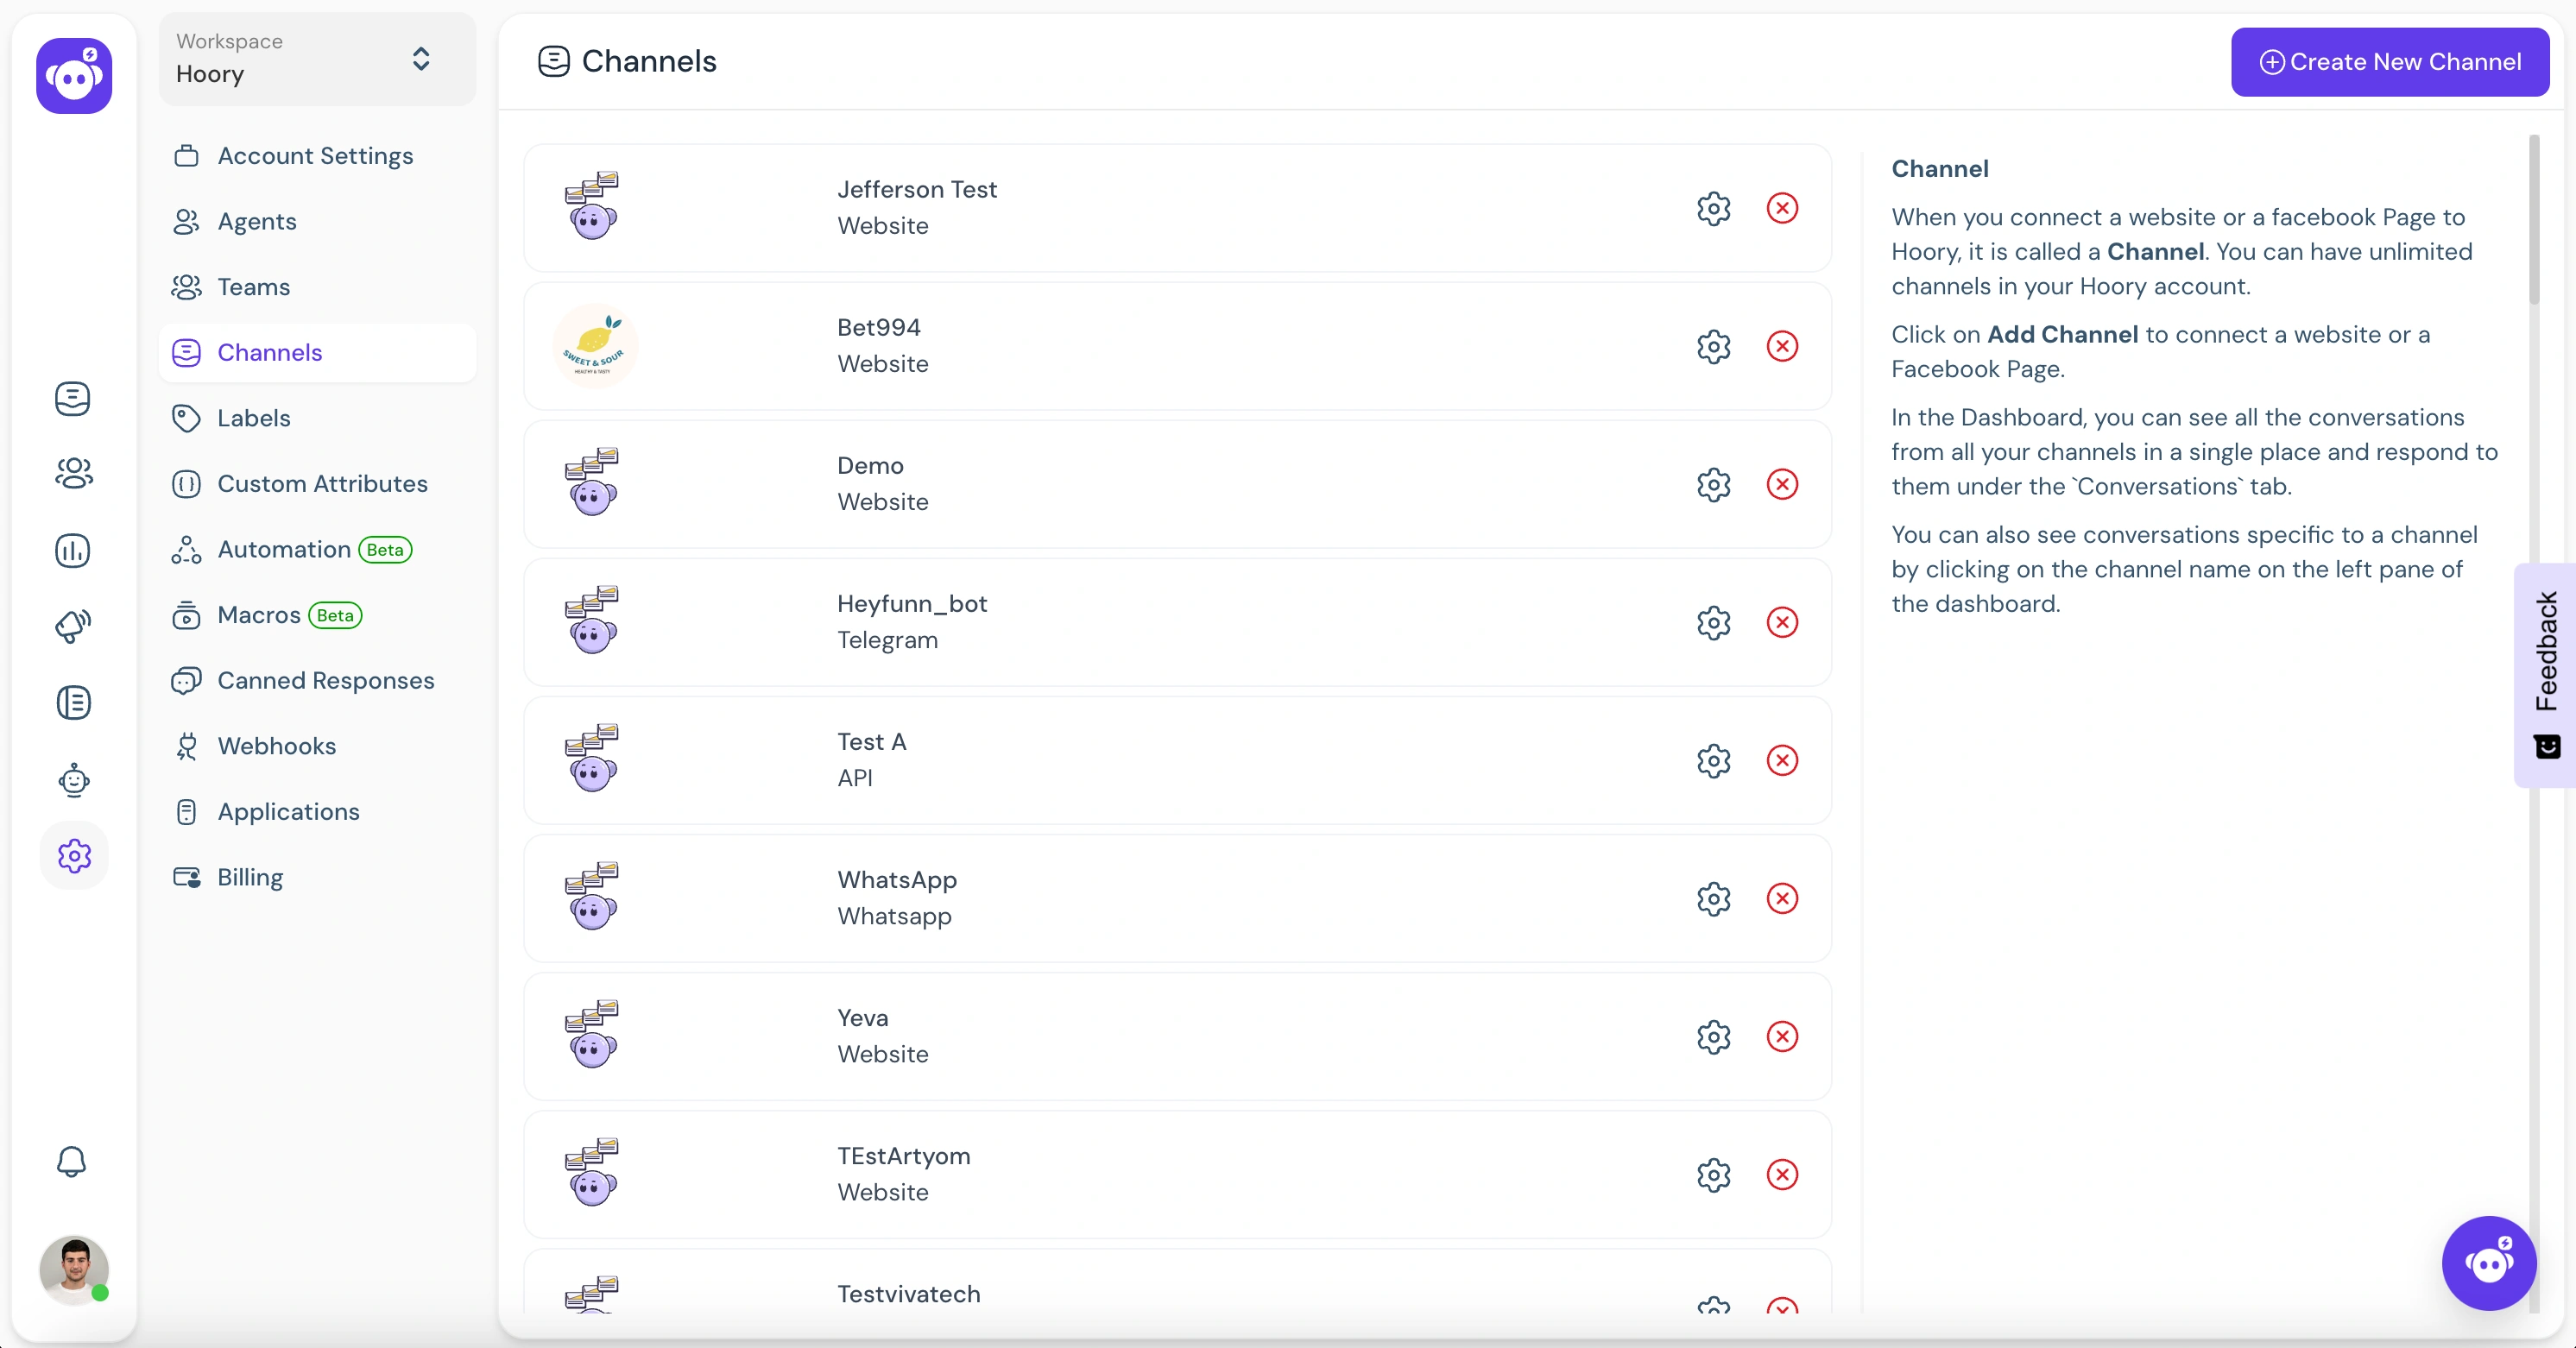
Your freshly configured WhatsApp channel should now appear in your list of channels. To see this and to make additional settings in your WhatsApp channel, go to Settings → Channels → click the gear icon on the associated WhatsApp channel.
All the Additional Settings available are the same as those in your Twitter channel. We recommend going through this link to understand the same.
Supported media types
| Supported extensions | End user | Agent Dashoard |
|---|---|---|
| Audio | ||
| audio/aac | Supported | Supported |
| audio/mp4 | Supported | Supported |
| audio/mpeg | Supported | Supported |
| audio/amr | Supported | Supported |
| audio/ogg | Supported | Supported |
| Document | ||
| text/plain | Supported | Supported |
| application/pdf | Supported | Supported |
| application/vnd.ms-powerpoint | Supported | Supported |
| application/msword | Supported | Supported |
| application/vnd.ms-excel | Supported | Supported |
| application/vnd.openxmlformats-officedocument.wordprocessingml.document | Supported | Supported |
| application/vnd.openxmlformats-officedocument.presentationml.presentation | Supported | Supported |
| application/vnd.openxmlformats-officedocument.spreadsheetml.sheet | Supported | Supported |
| Image | ||
| image/jpeg | Supported | Supported |
| image/png | Supported | Supported |
| Video | ||
| video/mp4 | Supported | Supported |
| video/3gp | Supported | Not Supported |
| Sticker | ||
| image/webp | Supported | Not Supported |