Extensions
AI assistant extensions, are tools or pieces of software that are designed to augment the functionality of an AI assistant. These extensions provide extra features and capabilities to enhance the overall user experience.
Available Extensions:
Swarm Betting
The Swarm Betting Assistant is a powerful AI assistant extension designed to elevate your sports betting experience. This intelligent extension seamlessly integrates with your sports betting platform to provide your users with a personalized betting experience. It is designed to enhance the betting experience with a unique blend of personalized guidance, up-to-date information, and friendly interaction.
How it works
┌──────────────────────────────┐
│  Hoory Widget (JS SDK)       │  end user chats: "Show me today's football odds"
│  passes site + user context  │
└──────────────┬───────────────┘
               │  message_created event (+ __assistant.context custom attributes)
               ▼
┌──────────────────────────────┐
│  Hoory AI Assistant          │  selects the Swarm Betting extension
│  + betting tools             │
└──────────────┬───────────────┘
               │  WebSocket commands (request_session → login → query)
               ▼
┌──────────────────────────────┐
│         Swarm API            │  games, odds, user profile, bonuses, bet slip…
└──────────────────────────────┘
The widget passes context (site ID, optional logged-in user tokens, odds format) to the assistant through the contact's custom attributes. The assistant uses that context to open an authenticated WebSocket session against the Swarm API and answer with live data.
A separate, server-to-server webhook lets Swarm push live match events to Hoory, which are then turned into personalized notifications and delivered to your users (see Push notifications).
Here's how to integrate the Swarm Betting Assistant into your sports betting platform:
<script async>
  // Load the Hoory SDK
  window.hoorySettings = {
    type: "expanded_bubble",
    launcherTitle: "Need Betting Tips? Tap Here!",
  };
  (function (d, t) {
    var BASE_URL = "https://<Hoory SDK URL>";
    var g = d.createElement(t),
      s = d.getElementsByTagName(t)[0];
    g.src = BASE_URL + "/packs/js/sdk.js";
    g.defer = true;
    g.async = true;
    s.parentNode.insertBefore(g, s);
    g.onload = function () {
      window.hoorySDK.run({
        websiteToken: "<Website Token>",
        baseUrl: BASE_URL,
      });
    };
  })(document, "script");

  // Submit site and user information to the AI Assistant
  window.addEventListener("hoory:ready", function () {
    // Partner site information (required)
    const site = {
      id: -1, // Required Partner Site ID
      url: window.origin, // Optional Website Site URL example: https://betboard.springbuilder.live
      swarm_url: "wss://<Swarm API URL>", // Optional Swarm API URL (default: wss://eu-swarm-springre.betconstruct.com)
    };

    // User information (optional)
    const user = {
      id: -1, // Required User ID
      email: "<Use Email>", // Required User Email
      name: "<User Name>", // Require User Name
      auth_token: "XXX", // Optional User Swarm Auth Token
      jwe_token: "XXX", // Optional User Swarm JWE Token
    };

    if (user) {
      // If user is logged in set user and site information

      console.info("Setting user information");

      window.$hoory.setUser(user.id, {
        identifier: user.id,
        email: user.email,
        name: user.name,
        custom_attributes: {
          __assistant: {
            context: {
              site_id: site.id,
              site_url: site.url,
              swarm_url: site.swarm_url,
              auth_token: user.auth_token,
              jwe_token: user.jwe_token,
            },
          },
        },
      });
    } else {
      // If user is not logged in only set site information

      console.info("Setting site information");

      window.$hoory.setCustomAttributes({
        __assistant: {
          context: {
            site_id: site.id,
            site_url: site.url,
            swarm_url: site.swarm_url,
          },
        },
      });
    }
  });

  // Handle messages from the AI Assistant
  window.addEventListener("hoory:on-message", function (message) {
    // Check if the message requires an action
    if (message.detail.content_type === "require_action") {
      try {
        // Parse the content of the message
        const content = JSON.parse(message.detail.content);
        // Switch based on the action specified in the message
        switch (content.action) {
          case "betslip":
            // Log information about adding an event to the betslip
            // Data schema: { event_id: number, game_id: number }
            console.info("Adding event to betslip: ", content.data);
            break;
          default:
            // Handle unknown actions
            console.warn("Received an unknown action: ", content.action);
            break;
        }
      } catch (error) {
        console.error("Error processing message: ", error);
      }
    }
  });
</script>
Ensure proper handling of links to games and markets directed to your website using the following format:
https://<your-website>/redirect-to-game/<game-id>?event=<event-id>
Context field reference
The Swarm extension reads its configuration from the contact's custom attributes, under the reserved key __assistant.context.
| Field | Type | Required | Default | Purpose |
|---|---|---|---|---|
site_id | integer | Yes* | Falls back to bot partner_id | Identifies your Swarm partner/site. |
swarm_url | string (wss) | No | wss://eu-swarm-springre.betconstruct.com | Swarm WebSocket endpoint. Override for non-EU regions. |
site_url | string (https) | No | Auto-filled from HTTP referer | Base URL used to build "open this game" deep links. |
jwe_token | string | No | — | Encrypted user token. Required for personalized/account tools. |
auth_token | string | No | — | User auth token. Required for personalized/account tools. |
odds_format | string | No | decimal | decimal or fractional. See Odds format. |
tools | object | No | all enabled | Per-tool on/off map, e.g. { "user_bet_history": false }. See Deactivating AI Assistant Capabilities. |
additional_instructions | string | No | Agent Bot description | Extra runtime instructions appended to the assistant. See Additional instructions. |
* Required either in the context or via the bot's partner_id.
Note on
site_id. If you do not passsite_idin the context, the assistant falls back to thepartner_idconfigured on the Agent Bot. Set it in one place — either the bot configuration (recommended for a single site) or per session in the context (for multi-site deployments).
Note on
site_url. If omitted, the assistant auto-derives it from the request's HTTPreferer(scheme + host). Set it explicitly when the widget is embedded on a domain different from the public sportsbook (e.g. an app shell or staging host).
Capabilities (tools)
The assistant has a set of built-in betting tools. It chooses which to call based on the user's message; you do not call these directly. The tool name is the identifier used when deactivating a tool.
Discovery & odds
| Tool name | What it does |
|---|---|
betting_search | Searches live, pre-match and upcoming events by sport, team, competition, region, market and time. Returns games with markets and odds (default 5, max 10). |
match_results_search | Returns historical/finished match results. |
get_game_count | Counts available games by game type and sport. |
Stats & insight
| Tool name | What it does |
|---|---|
get_standings | League/competition standings. |
get_team_or_player_statistics | Team or player statistics, optionally head-to-head. |
get_match_predictions | Prediction for an upcoming match. |
search_betting_trends | Latest betting trends/news. |
scrape_soccer_bet_prediction | Soccer-specific prediction content. |
User account (require jwe_token + auth_token)
| Tool name | What it does |
|---|---|
fetch_user_profile | Logged-in user's profile/account info (never cached). |
user_bet_history | The user's past bets — used to personalize answers. |
site_all_bonuses_details | The user's available bonuses. |
site_adding_event_to_betslip | Adds a selected event to the user's bet slip. |
Notifications
| Tool name | What it does |
|---|---|
subscribe_for_push_notifications | Subscribes the user to live updates (only on explicit user consent). |
unsubscribe_from_push_notifications | Removes a subscription. |
get_active_subscriptions | Lists the user's current subscriptions. |
Anonymous vs. logged-in users
The assistant works for anonymous visitors and signed-in users alike:
- Anonymous — can use all discovery, odds, stats and prediction tools. No user tokens required.
- Logged-in — to use the account tools (
fetch_user_profile,user_bet_history,site_all_bonuses_details,site_adding_event_to_betslip, and the notification tools), you must pass validjwe_tokenandauth_tokenin the context. Refresh these in the custom attributes whenever the user logs in or their session is renewed.
Internal identifiers (game_id, event_id, market_id) are never exposed to end users — they are used only to build deep links back into your sportsbook.
Odds format
You can change the odds format that Betting Assistant uses during the conversation with the user. Odds format can be provided as odds_format attribute in custom attributes. Available odds formats:
- decimal (used by default)
- fractional
Here is an example of how to set the fractional odds format, instead of decimal:
...
__assistant: {
  context: {
    site_id: site.id,
    site_url: site.url,
    swarm_url: site.swarm_url,
    ...,
    odds_format: "fractional", // Set the odds format (if not provided, "decimal" will be used as default one)
  },
},
...
Note: fractional odds are calculated from decimal odds using the ladder provided by Swarm command
get_permissible_odds.
Push notifications
Swarm can push live match events to Hoory over a server-to-server webhook. Hoory turns each event into a short, personalized, multilingual notification and delivers it to the matched contact over the web widget and email channels.
Endpoint
POST https://app.hoory.com/svc/bot/v1/events/swarm
Authorization: Bearer <SWARM_WEBHOOK_TOKEN>
Content-Type: application/json
Request body
{
  "events": [
    {
      "EventName": "GoalScored",
      "ClientId": "user-123",
      "PartnerId": 1234,
      "Email": "[email protected]",
      "PhoneNumber": "+10000000000",
      "FirstName": "Alex",
      "Language": "en"
    }
  ]
}
ClientIdis your user identifier (matched to a Hoory contact),PartnerIdis yoursite_id, andLanguageis an ISO 639-1 code that controls the notification language.EventName,ClientIdandPartnerIdare required. Additional event-specific fields are allowed and may be used to enrich the notification text.- Notifications are generated and capped for brevity, and localized using the
Languagefield. - Delivery channels are email and web widget (SMS is not used for these events).
Troubleshooting
| Symptom | Likely cause / fix |
|---|---|
| "I can't access your account" / personalized tools fail | jwe_token / auth_token missing or expired. Re-set them in the context after login. |
| Game links point to the wrong domain | site_url not set and referer resolved to the embedding host. Set site_url explicitly. |
| No data / wrong region | Wrong or default swarm_url. Set the correct regional WebSocket endpoint. |
| Push notifications never arrive | Verify the Bearer token, that ClientId matches a Hoory contact, and that the events aren't being dropped by configuration. |
Deactivating AI Assistant Capabilities
You can optionally deactivate certain built-in capabilities of AI Assistant Extensions by modifying the tools property in custom attributes.
Here is an example of how to deactivate the connect_to_support capability and prevent AI Assistant from connecting users to an agent:
...
__assistant: {
  context: {
    site_id: site.id,
    site_url: site.url,
    swarm_url: site.swarm_url,
    auth_token: user.auth_token,
    jwe_token: user.jwe_token,
    tools: {
      connect_to_support: false // Deactivate the capability
    }
  },
},
...
You can also disable any individual betting tool the same way — set its name to false in the tools map. The key is the tool's name from Capabilities (tools):
...
__assistant: {
  context: {
    site_id: site.id,
    tools: {
      user_bet_history: false,                 // don't read the user's bet history
      subscribe_for_push_notifications: false  // disable subscriptions
    }
  },
},
...
Capabilities that can be deactivated
Any of the betting tools can be deactivated by name. In addition, these platform-wide capabilities can be toggled:
- Connect to Support Tool (
connect_to_support): Connects the user to an agent. - Fasttoken Price Tool (
get_fasttoken_price): Checks the current price of FastToken (FTN) cryptocurrency.
Custom Extensions
Custom extensions are a set of tools defined by you that the AI assistant can use to provide a more personalized experience for your users. These extensions can be used to provide additional features and capabilities to the AI assistant, such as custom integrations, data sources, and more.
Create or Update Custom Extension
To create or update a custom extension, you need to use the following API. This endpoint creates a new custom extension or updates an existing one based on the provided ID.
URL: https://app.hoory.com/svc/bot/v1/agentbots/accounts/{account_id}/assistants/{assistant_id}
Method: PUT
Headers:
Authorization: Bearer <access token>
Parameters:
account_id(integer, required): Your account IDassistant_id(integer, required): Your assistant ID. You can pick a unique number
Body:
{
  "name": "string", // The name of the custom extension (required)
  "description": "string", // A brief description of the custom extension (optional)
  "instructions": "string", // Detailed instructions for the custom extension (required)
  "secret": "string", // A secret key to authenticate the webhook requests (optional)
  "tools": [
    // A list of tools that the custom extension provides (optional)
    {
      "type": "string", // The type of the tool (required-enum)
      "spec": {} // The specification of the tool. See Supported Tools below for more information (required)
    }
  ]
}
Docs:
API Documentation
Example
Here's how you can create or update a custom extension using the above endpoint:
curl -X PUT "https://app.hoory.com/svc/bot/v1/agentbots/accounts/100/assistants/100" \
     -H "Authorization: Bearer secret" \
     -H "Content-Type: application/json" \
     -d '{
           "name": "My Custom Extension",
           "description": "This is a custom extension.",
           "instructions": "Follow these steps to use the custom extension.",
           "tools": [
             {
               "type": "webhook",
               "spec": {
                 "name": "My Webhook Tool",
                 "description": "This tool calls a webhook.",
                 "url": "https://example.com/webhook",
                 "args_schema": {
                    "type": "object",
                    "properties": {
                      "arg1": {
                        "type": "string"
                      },
                      "arg2": {
                        "type": "number"
                      }
                    },
                    "required": ["arg1", "arg2"]
                 }
               }
             }
           ]
         }'
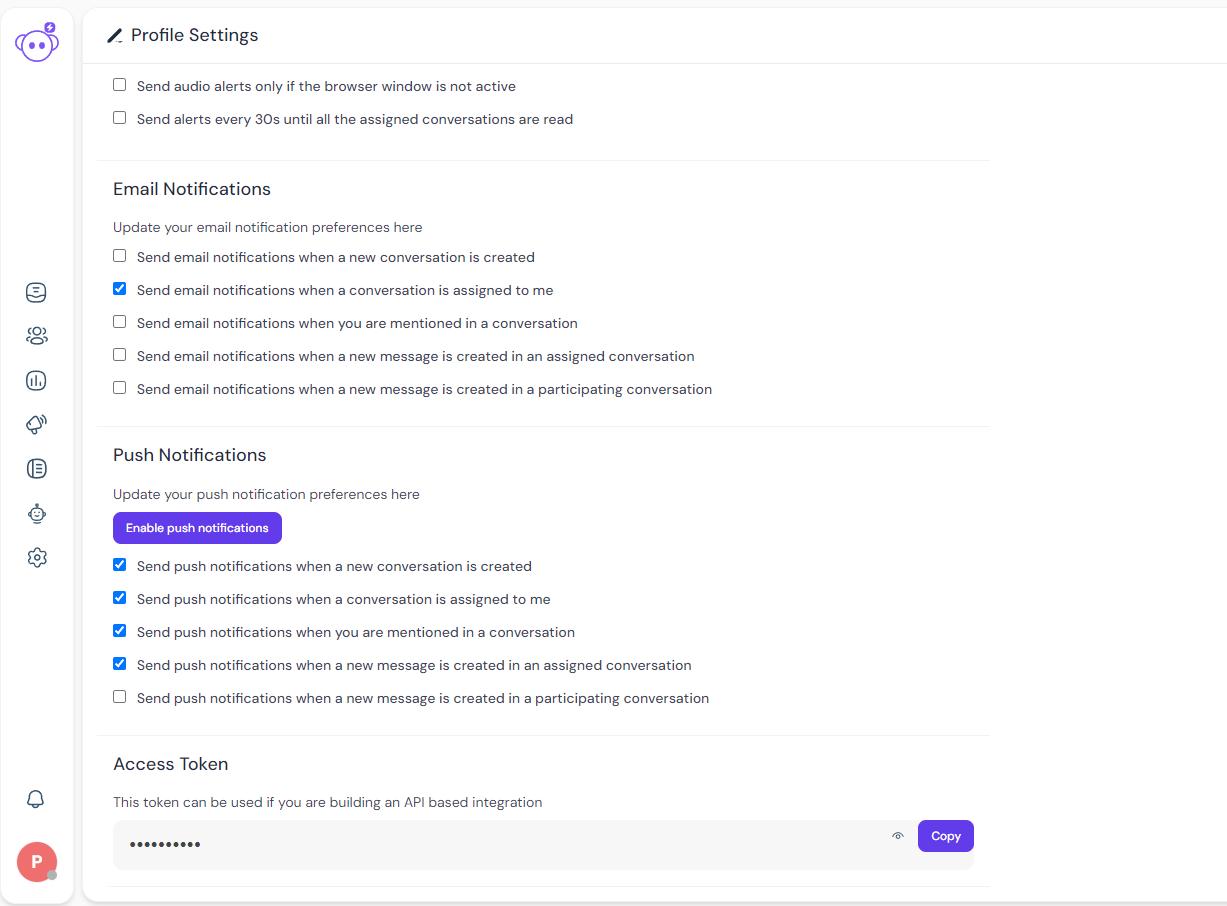
An access token can be obtained from your profile settings page (https://app.hoory.com/app/accounts/{your_account_id}/profile/settings) in your Hoory account. You must have the admin role to be able to create or update custom extensions for your account:
Once the custom tool is created, you can select it for the knowledge base assistant on the assistant train page (https://app.hoory.com/app/accounts/{your_account_id}/agent-bots/webhook/{your_agentbot_id}/train):

Supported Tools
Webhook
The webhook tool allows you to define a webhook endpoint that the AI assistant can call when the tool is triggered. The webhook tool must be defined with the following fields:
{
  "type": "webhook", // The type of the tool (required-enum)
  "spec": {
    "name": string, // The name of the tool (required)
    "description": string, // Detailed description of the tool (required)
    "using_tool_message": string, // Message to show when triggering the tool (optional)
    "url": string, // The URL of the webhook (required)
    "secret" : string, // A secret key to authenticate the webhook requests (optional)
    "args_schema": {}, // The payload schema of the webhook request (required) (JSON Schema) https://json-schema.org/specification
  }
}
When you define a webhook tool in your custom extension, you need to provide a URL that the AI assistant will call when the tool is triggered. The webhook handler should be able to handle the incoming request and provide a response based on the provided payload.
The webhook handler is a POST endpoint that receives a JSON payload and returns a JSON response. The payload schema is defined in the args_schema field of the tool definition, and the request contains some additional fields to help you identify the context of the request.
The following is the request schema that the webhook handler should expect:
{
  "args": {}, // The arguments for the webhook tool
  "ctx": {
    // The context of the request
    "conversation": {
      "channel": "Channel::WebWidget",
      "meta": {
        "sender": {
          "account": null,
          "additional_attributes": {
            "city": null,
            "country": "",
            "country_code": null,
            "created_at_ip": "::1"
          },
          "custom_attributes": {},
          "identifier": "2",
          "name": "",
          "type": "contact",
          "email": ""
        }
      },
      "id": 24,
      "status": "pending"
    },
    "contact_lang": "en"
  }
}
After processing the request, the webhook handler should return a JSON response instructing the AI assistant on how to proceed. The response schema should look like this:
{
  "success": boolean, // A boolean value indicating the status of the response (required)
  "message": string, // A message indicating the status of the processing. The AI assistant will use this message to inform the user. (optional)
  "actions": [ // A list of actions that the AI assistant should take based on the response (optional)
    {
      "type": string, // The type of the action (required-enum)
      "spec": {} // The specification of the action. See **Supported Actions** below for more information (required)
    }
  ]
}
To authenticate the webhook requests, you can use the secret field in the webhook tool. The AI assistant will include the Authorization header in the request which contains the Bearer token with the value of the secret field.
Authorization: Bearer <secret>
Supported Actions
Emit to Browser Window
This action allows you to emit a message to the browser window that hosts the Hoory AI widget, which you can listen to and handle in your application. This action is useful when you want to trigger some action in your application based on the response from the webhook handler.
{
  "type": "emit_to_window", // The type of the action (required-enum)
  "spec": {
    "action": string, // The action to emit (required)
    "data": {} // The data to emit with the event (required)
  }
}
Listening to the emitted event in your application:
window.addEventListener("hoory:on-message", function (message) {
  // Check if the message requires an action
  if (message.detail.content_type === "require_action") {
    try {
      // Parse the content of the message
      const content = JSON.parse(message.detail.content);
      // Switch based on the action specified in the message
      switch (content.action) {
        case "my_custom_action":
          // Log information about the custom action
          console.info("Received custom action: ", content.data);
          break;
        default:
          // Handle unknown actions
          console.warn("Received an unknown action: ", content.action);
          break;
      }
    } catch (error) {
      console.error("Error processing message: ", error);
    }
  }
});
Additional instructions
Sometimes, you may want to change the behavior of the AI assistant dynamically during the conversation. For that purpose, you can use the additional_instructions attribute. When provided, it appends additional instructions at the end of the existing instructions before generating a response.
...
__assistant: {
  context: {
    ...,
    additional_instructions: "Use emojis in your repsonses to make the conversation more engaging.", // Set additional instructions
  },
},
...
Example Use Case
Let's say you want to create a custom extension that allows the AI assistant to call a webhook to get the current weather information for a specific location. You can define a webhook tool in your custom extension that calls a weather API and returns the weather information.
We're start by creating the custom extension with the webhook tool:
curl -X PUT "https://app.hoory.com/svc/bot/v1/agentbots/accounts/100/assistants/100" \
     -H "Authorization: Bearer <API_TOKEN_OBTAINED_FROM_YOUR_PROFILE>" \
     -H "Content-Type: application/json" \
     -d @- <<EOF
{
  "name": "Weather Extension",
  "description": "Get the current weather information for a specific location.",
  "instructions": "To get the weather information, provide the location and the date.",
  "tools": [
    {
      "type": "webhook",
      "spec": {
        "name": "weather_webhook",
        "description": "Get the current weather information for a specific location.",
        "using_tool_message": "Getting the weather information for you...",
        "url": "https://example.com/weather",
        "secret": "<WEBHOOK_SECRET>",
        "args_schema": {
          "type": "object",
          "properties": {
            "location": {
              "type": "string"
            }
          },
          "required": ["location"]
        }
      }
    }
  ]
}
EOF
Next, you need to create a webhook handler that will handle the incoming requests and return the weather information. The webhook handler should be able to handle the incoming request and provide a response based on the provided payload.
Here's an example of a webhook handler in Node.js that calls a weather API and returns the weather information:
const express = require("express");
const bodyParser = require("body-parser");
const axios = require("axios");

const app = express();
app.use(bodyParser.json());

const secret = process.env.WEBHOOK_SECRET;

app.post("/weather", async (req, res) => {
  const { location } = req.body.args;

  // Check the webhook secret
  if (req.headers.authorization !== `Bearer ${secret}`) {
    return res.status(401).json({
      success: false,
      message: "Unauthorized",
    });
  }

  try {
    const response = await axios.get(
      `https://api.openweathermap.org/data/2.5/weather?q=${location}&appid=<API_KEY>`
    );

    const weather = response.data.weather[0].description;
    res.json({
      success: true, // Indicates the status of the response
      message: `The weather in ${location} is ${weather}.`, // Optional message to show to the user
      actions: [
        // actions to take based on the response
        {
          type: "emit_to_window",
          spec: {
            action: "weather_info",
            data: {
              location,
              weather,
            },
          },
        },
      ],
    });
  } catch (error) {
    res.json({
      success: false,
      message: "Failed to get weather information.",
    });
  }
});
In this example, the webhook handler receives the location from the request payload, calls the OpenWeatherMap API to get the weather information for that location, and returns the weather information in the response.
Finally, you need to listen to the emitted event in your application and display the weather information to the user:
<html>
<head>
<title>Weather Information</title>
</head>
<body>
<h1>Weather Information</h1>
<div id="weather-info"></div>
</body>
<script>
window.addEventListener("hoory:on-message", function (message) {
if (message.detail.content_type === "require_action") {
try {
const content = JSON.parse(message.detail.content);
switch (content.action) {
case "weather_info":
console.info("Received weather information: ", content.data);
const weatherInfo = document.getElementById("weather-info");
weatherInfo.innerHTML = ``;
break;
default:
console.warn("Received an unknown action: ", content.action);
break;
}
} catch (error) {
console.error("Error processing message: ", error);
}
}
});
</script>
</html>
Now if you trigger the webhook tool in the AI assistant, it will call the webhook handler, get the weather information, and display it to the user:
AI: Hey there! How can I help you today?
User: Can you tell me the weather in New York?
AI: Sure! Let me check that for you...
AI: The weather in New York is cloudy, with a temperature of 20°C, and a chance of rain.