How to Configure DNS for Email Channel?
To verify domain ownership and enable email functionality, we've provided the required DNS records. Add them to your domain's DNS settings for a seamless email experience. Contact our support team for assistance.
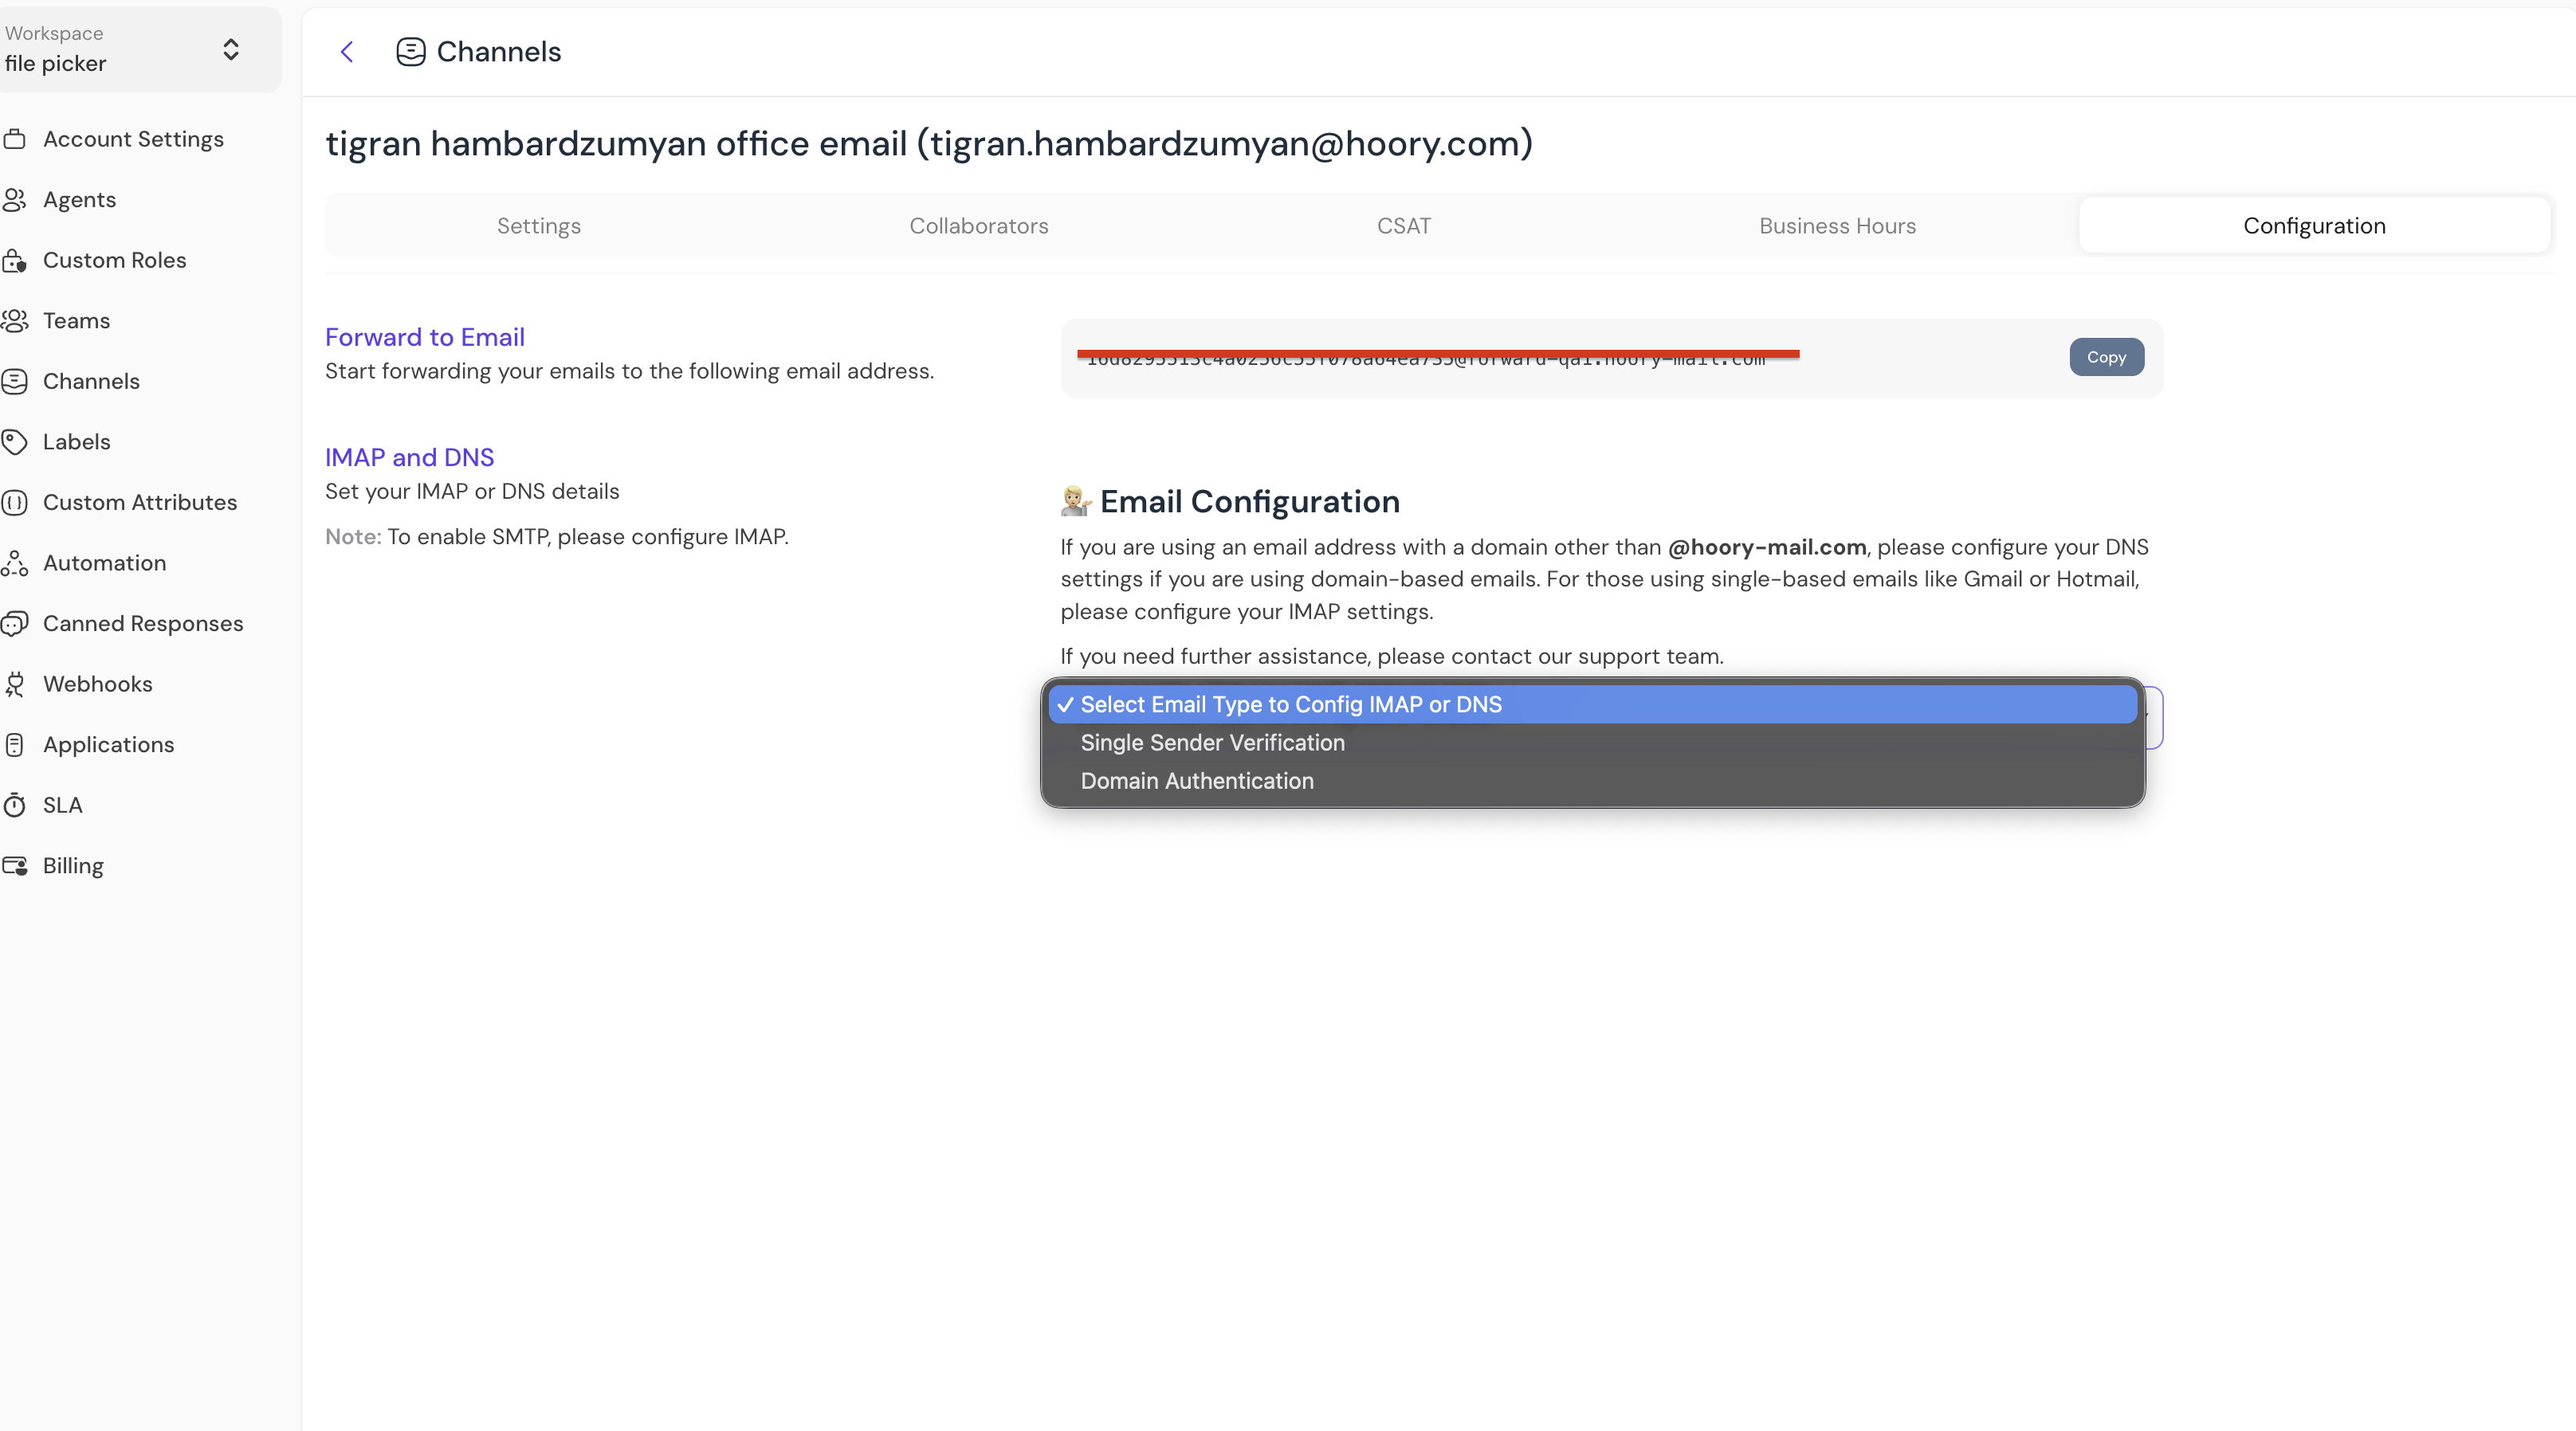
Step 1. Go to Settings → Channels → Email Channel Settings → Configuration Tab.
Step 2. In the IMAP and DNS section, open the Select Email Type to Config IMAP or DNS dropdown and choose Domain Authentication.
Step 3. Add the following DNS records to your domain and verify that the records have been added.
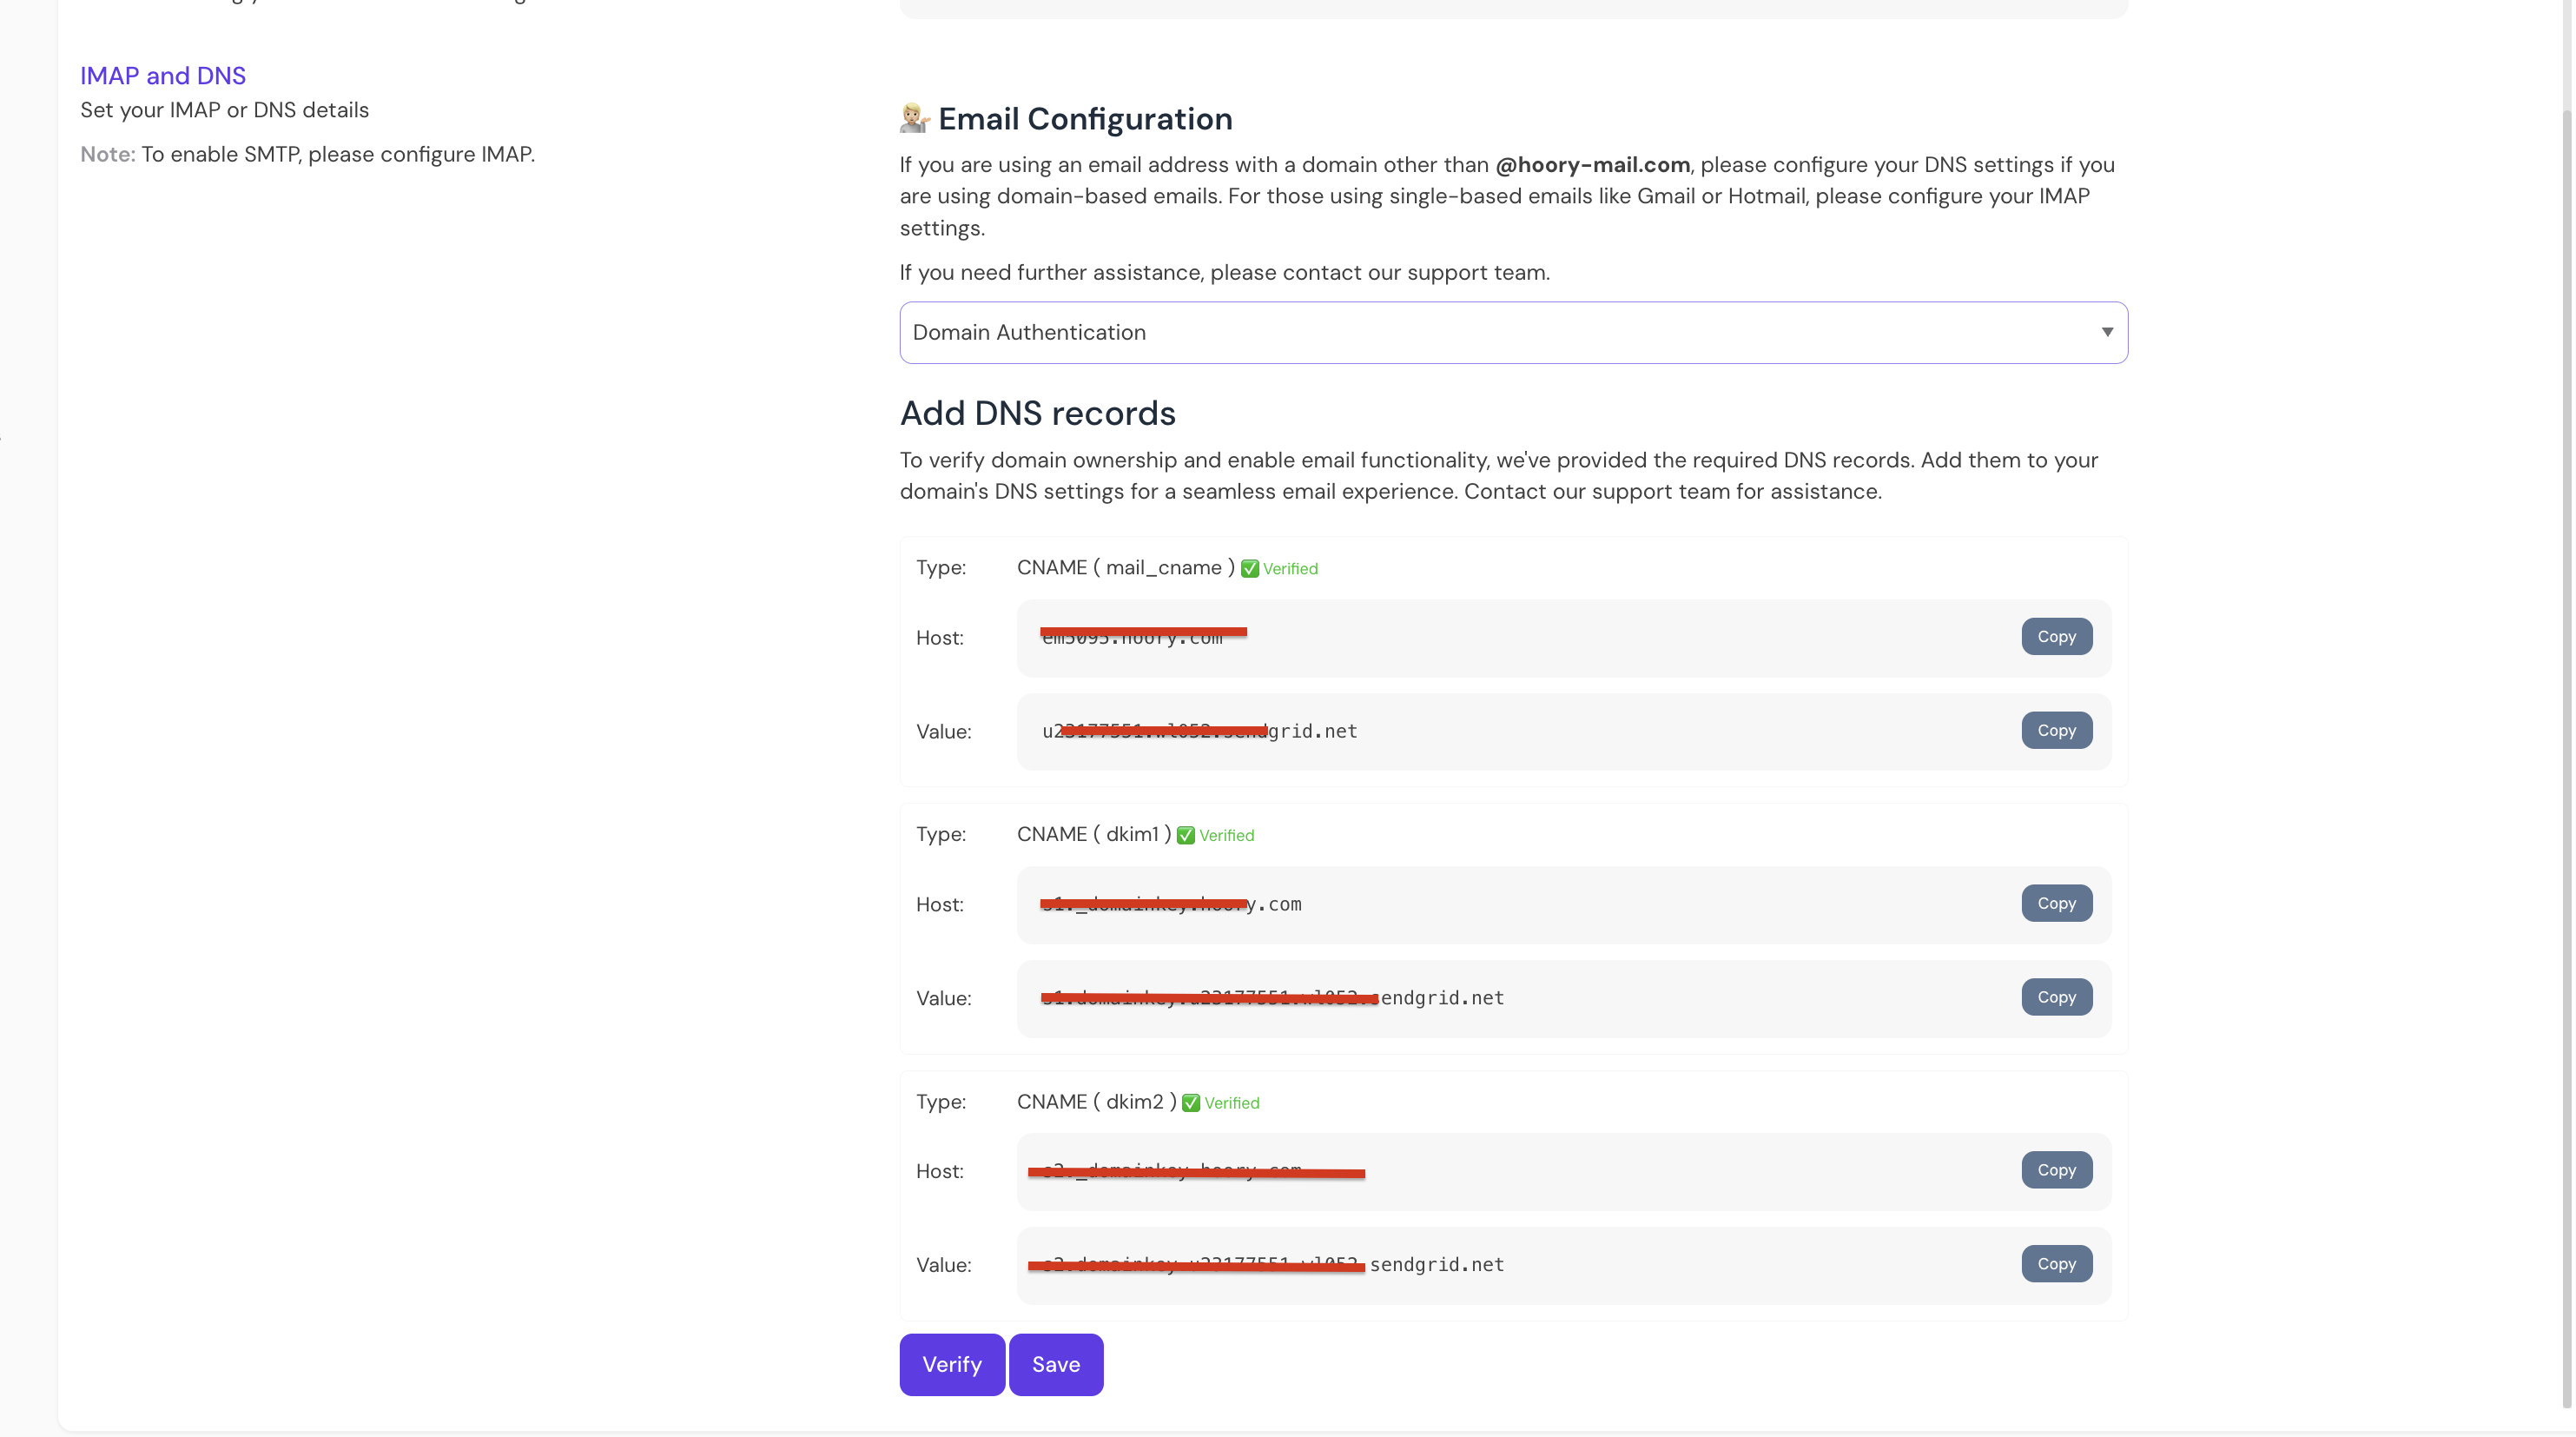
Step 4. Once the records have been added at your domain provider, click the Verify button to confirm domain ownership.