Install Hoory Live-Chat Using Google Tag Manager
If you are using Google Tag Manager on your website, you can install Hoory from Google Tag Manager’s dashboard by creating a new tag for Hoory. To install the Hoory live-chat widget, please follow the steps below:
1. Access the tag manager console
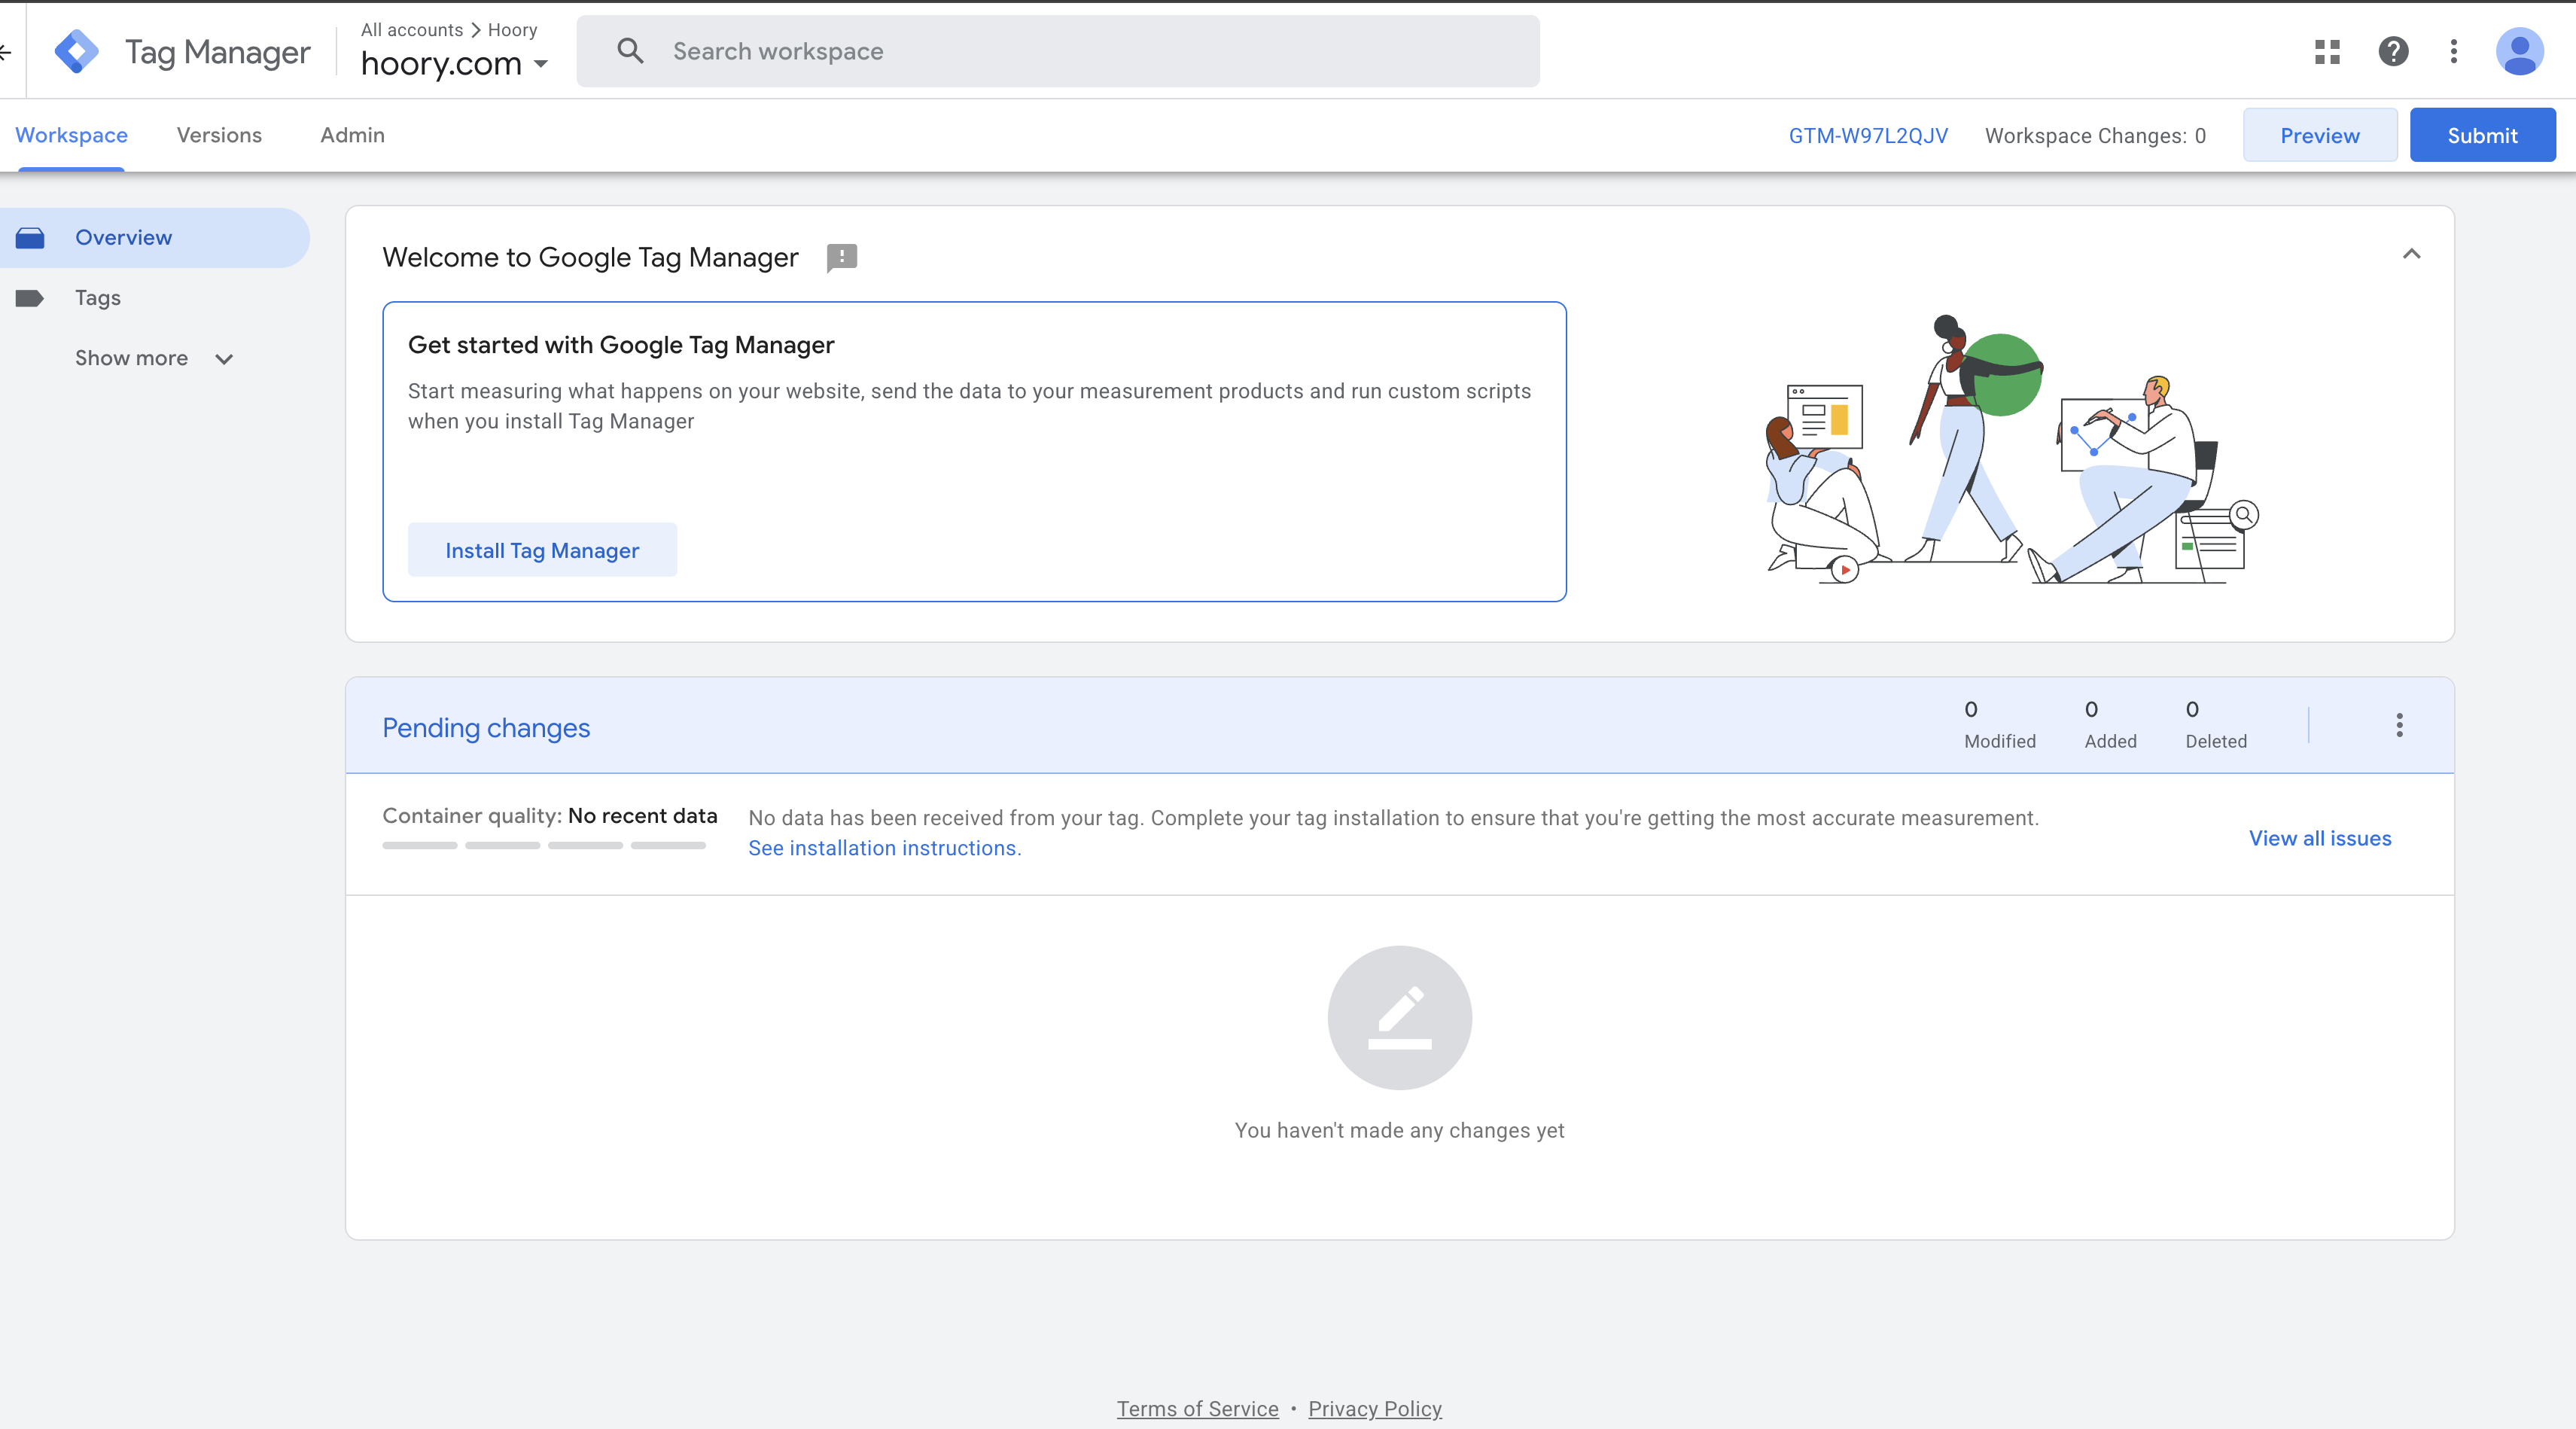
Login to the Tag Manager workspace with your Google account. You will see a workspace overview similar to the one shown below. If the Install Google Tag Manager modal popup appears, close it by clicking the X icon in the upper right corner of the modal.
2. Create a new tag
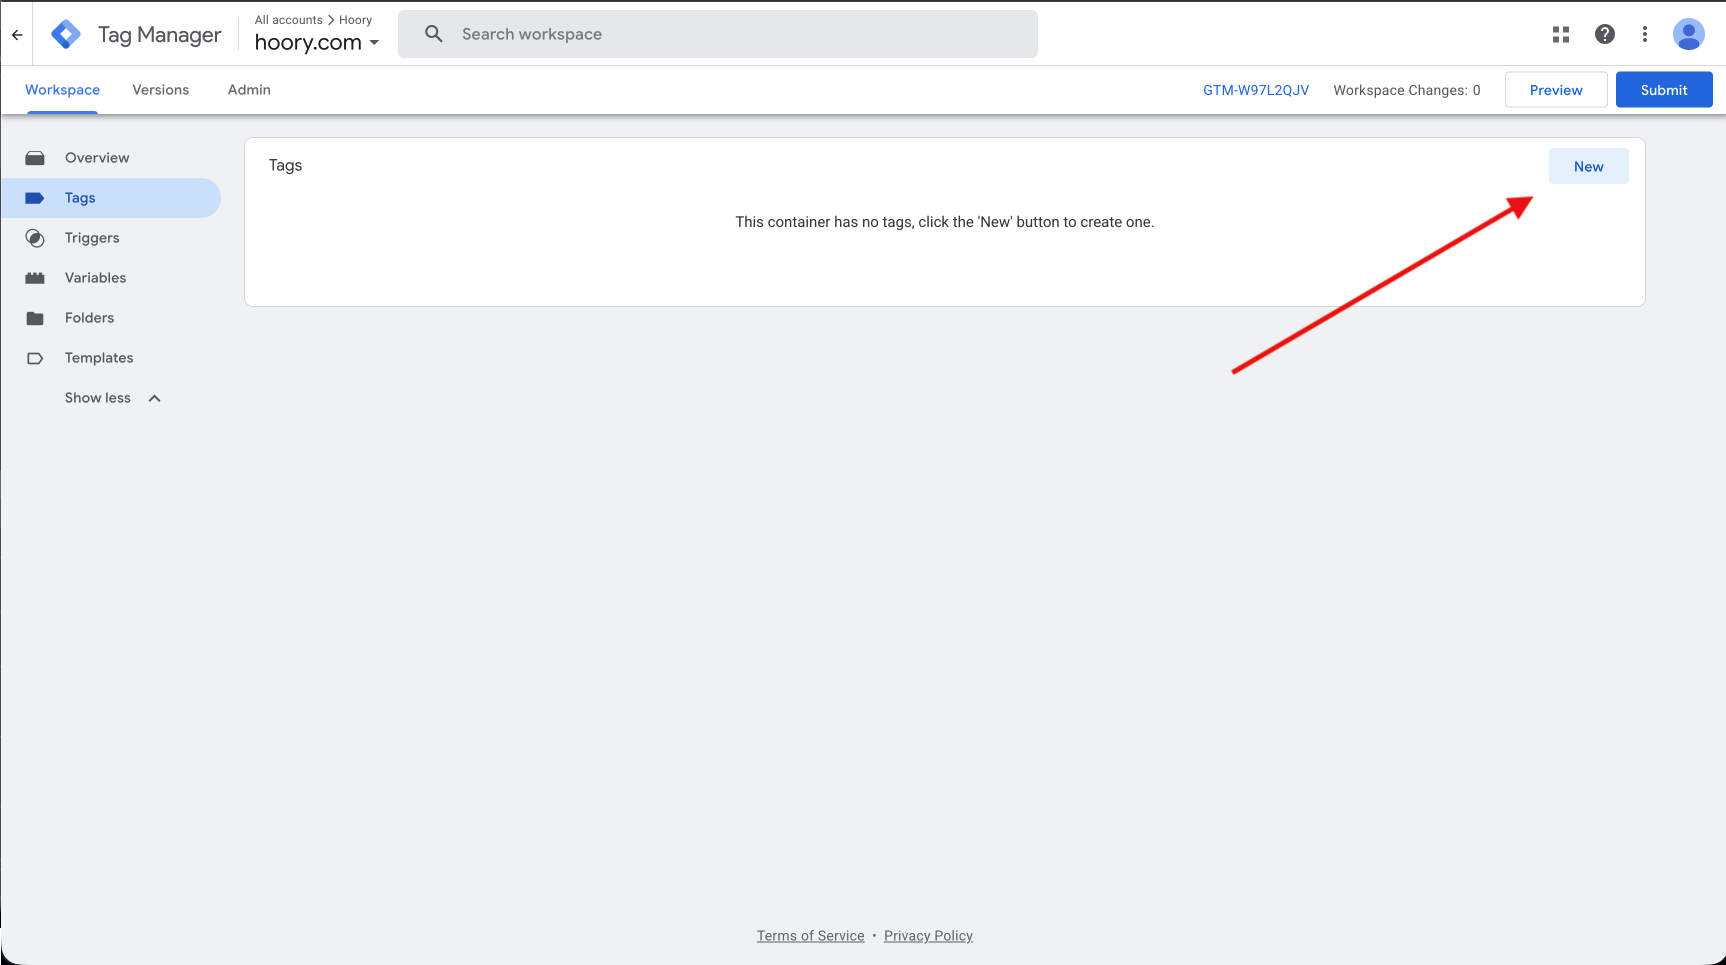
Click Tags in the left sidebar menu, then click the New button in the upper right corner. You will be presented with a popup to create a tag. Change the name from "Untitled Tag" to "Hoory" or something that makes sense to you.
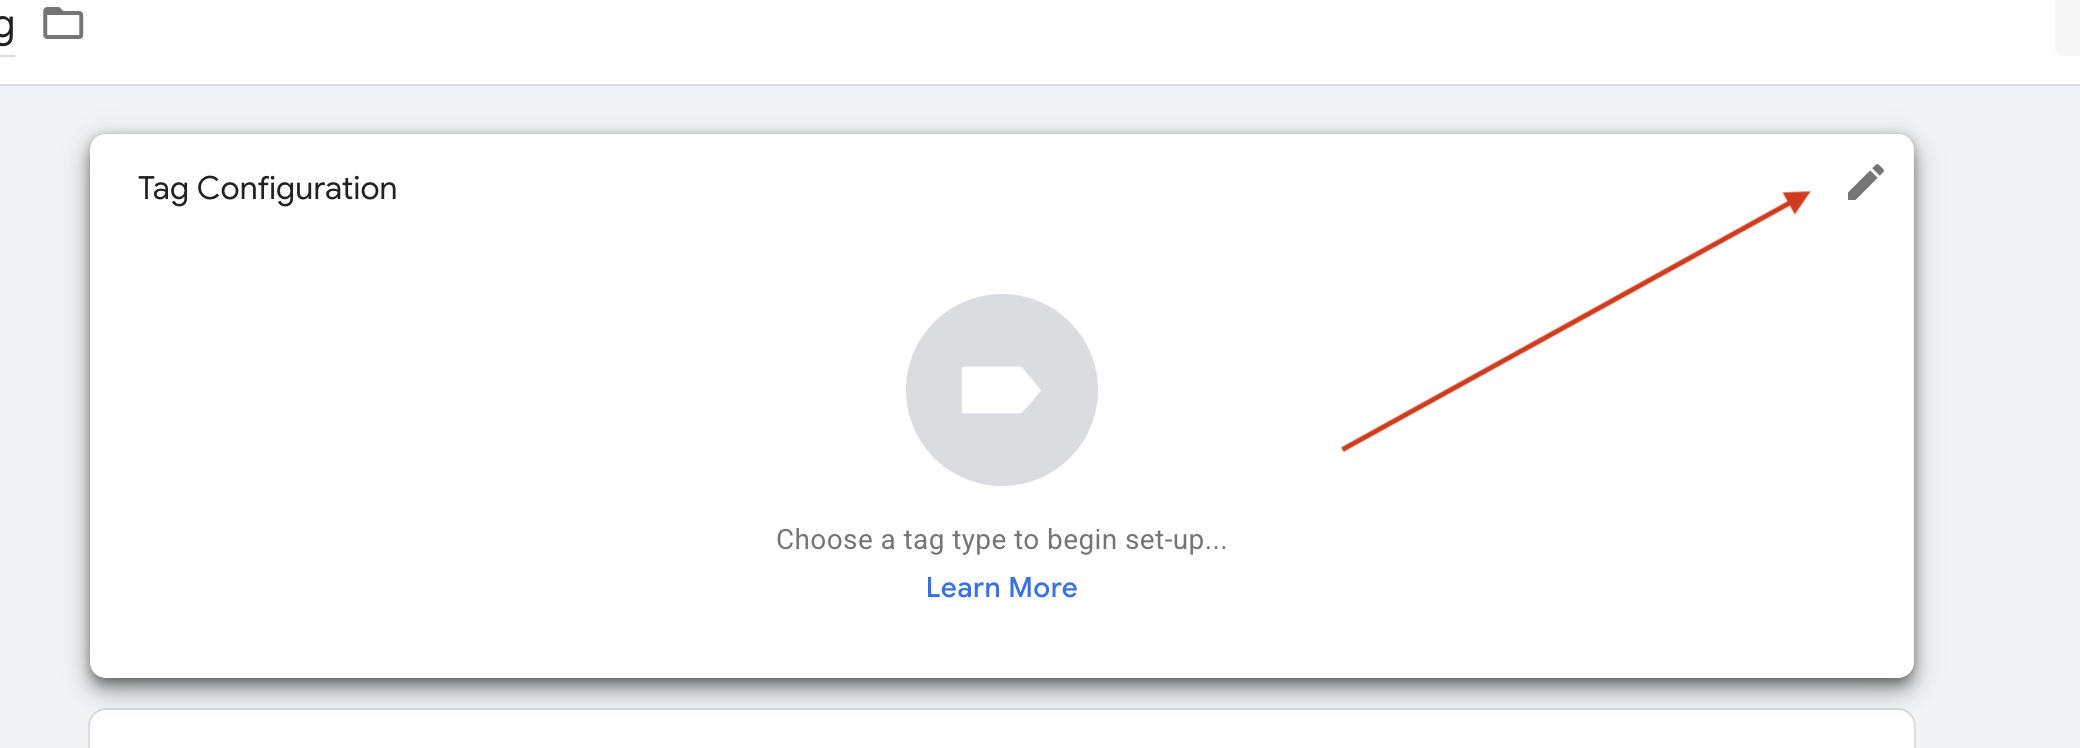
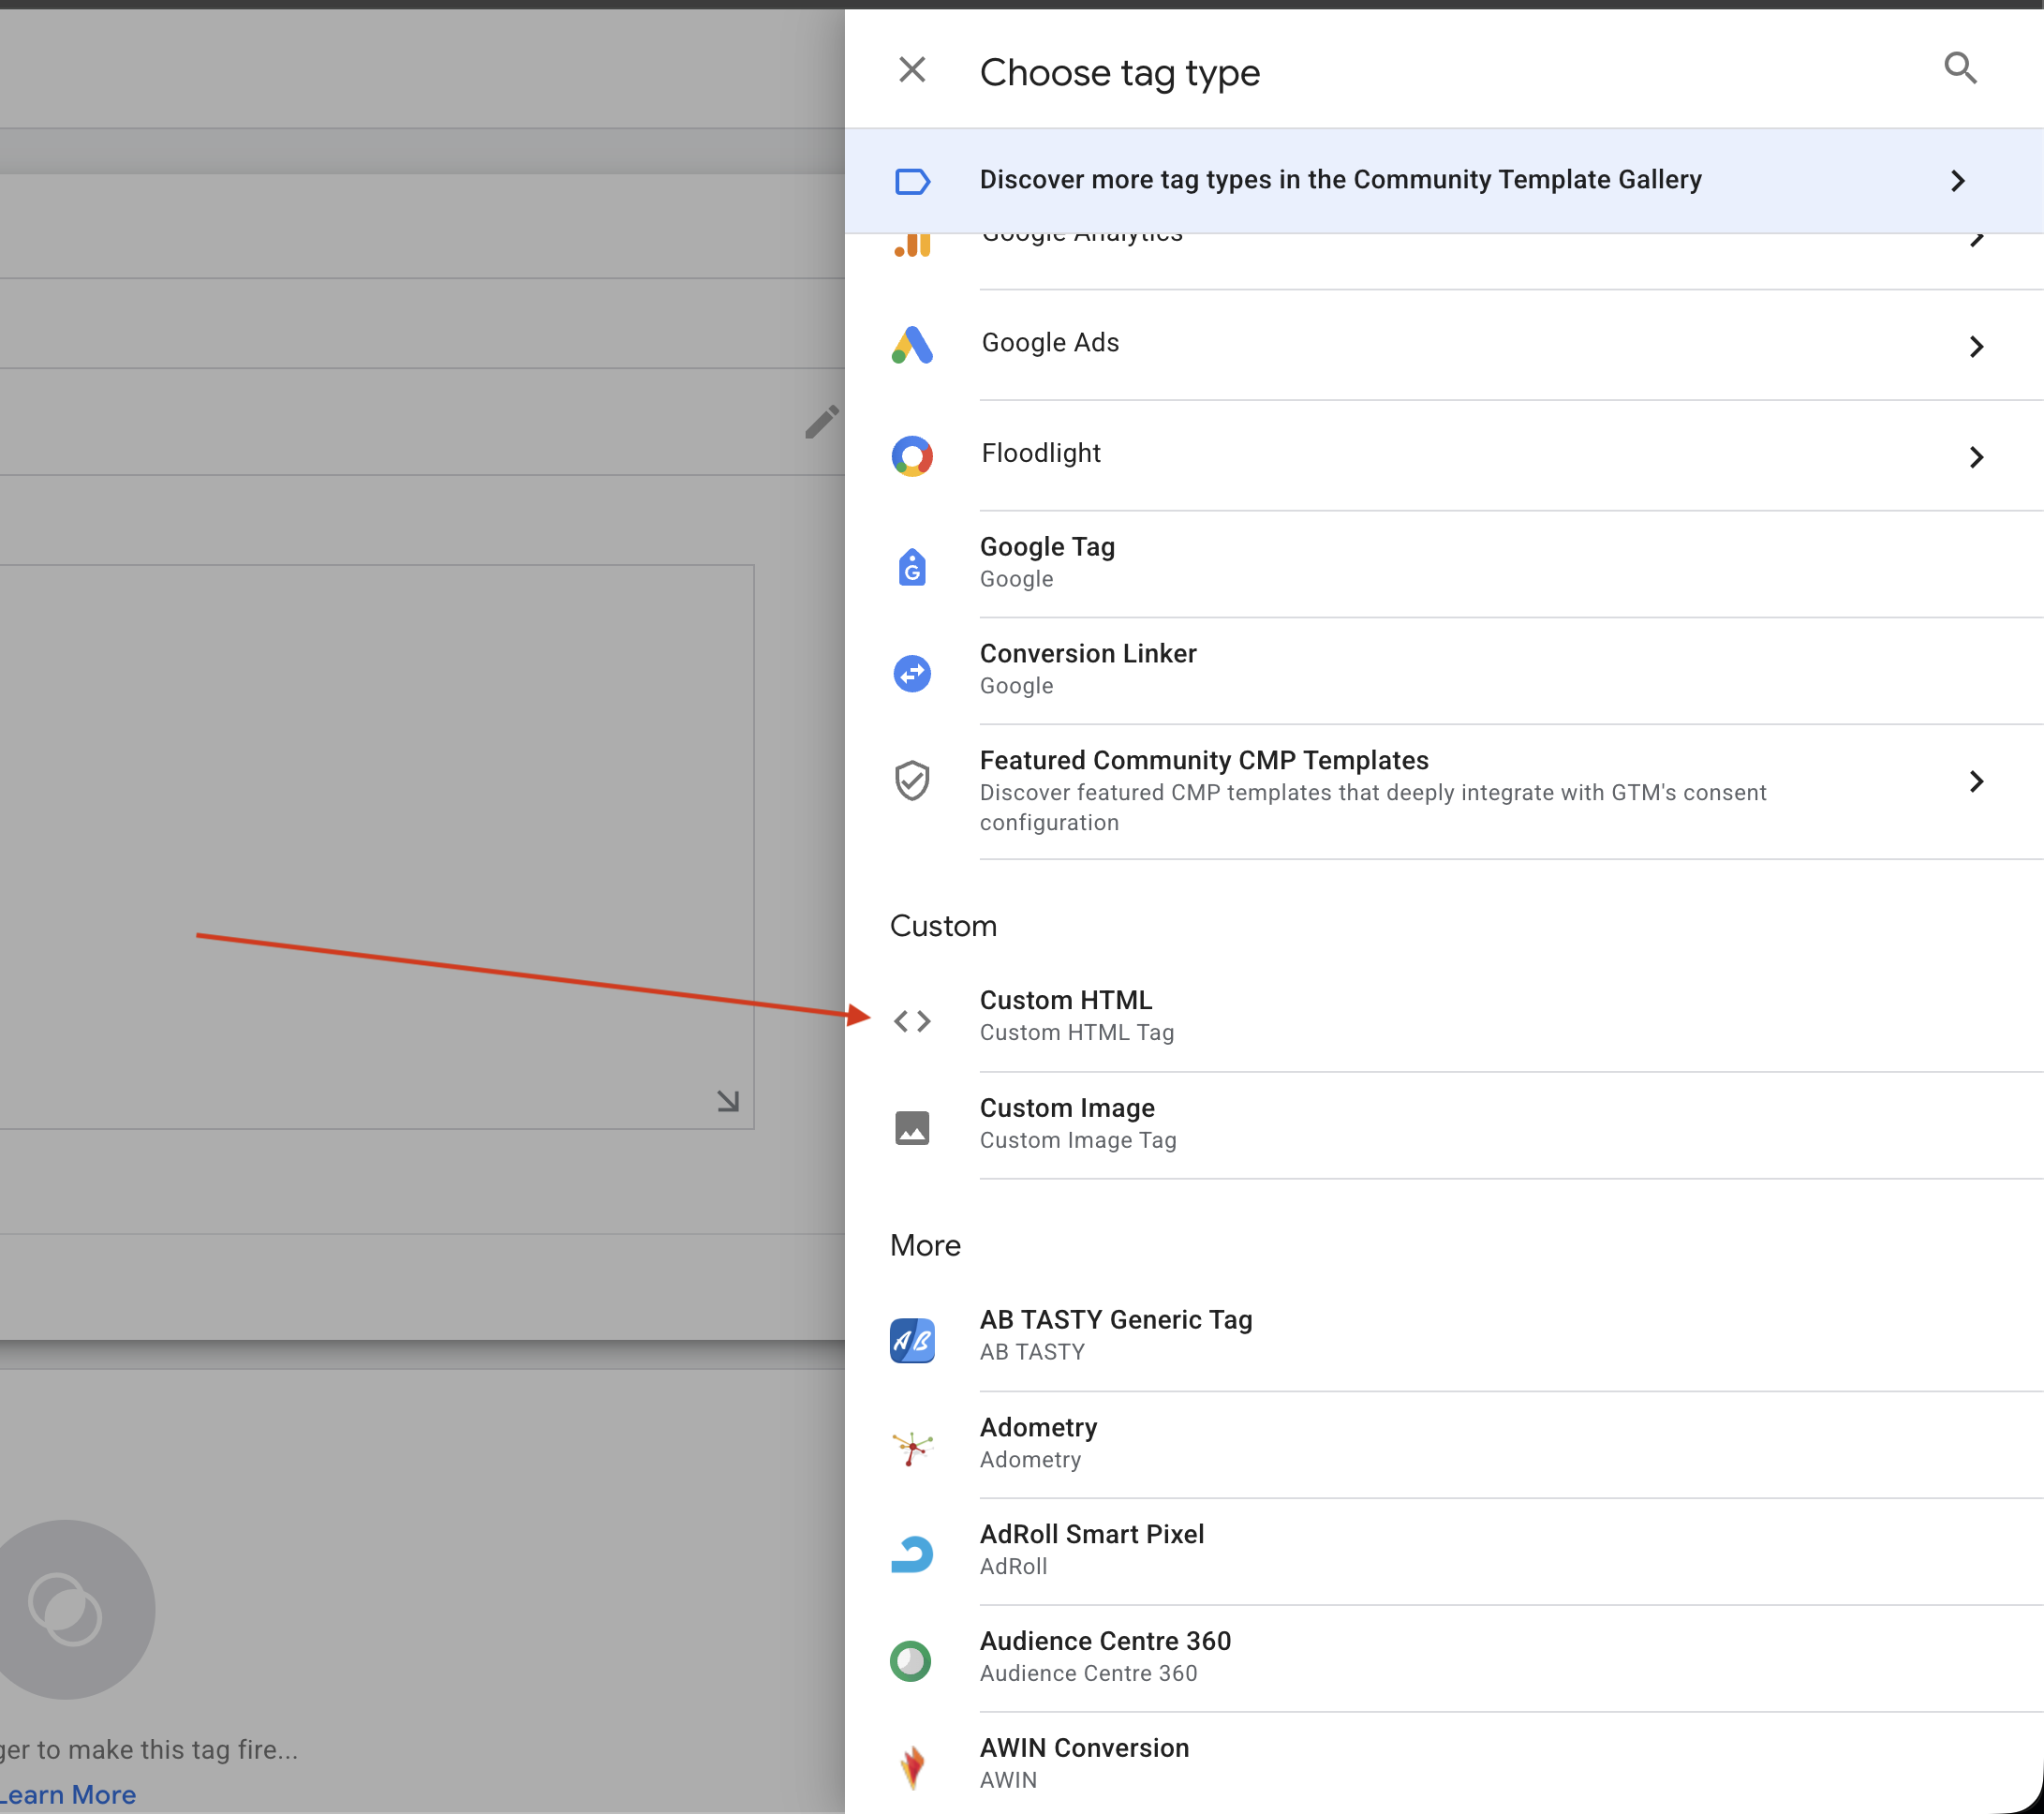
Click tag configuration, select "Custom HTML" tag type from the list as shown below.
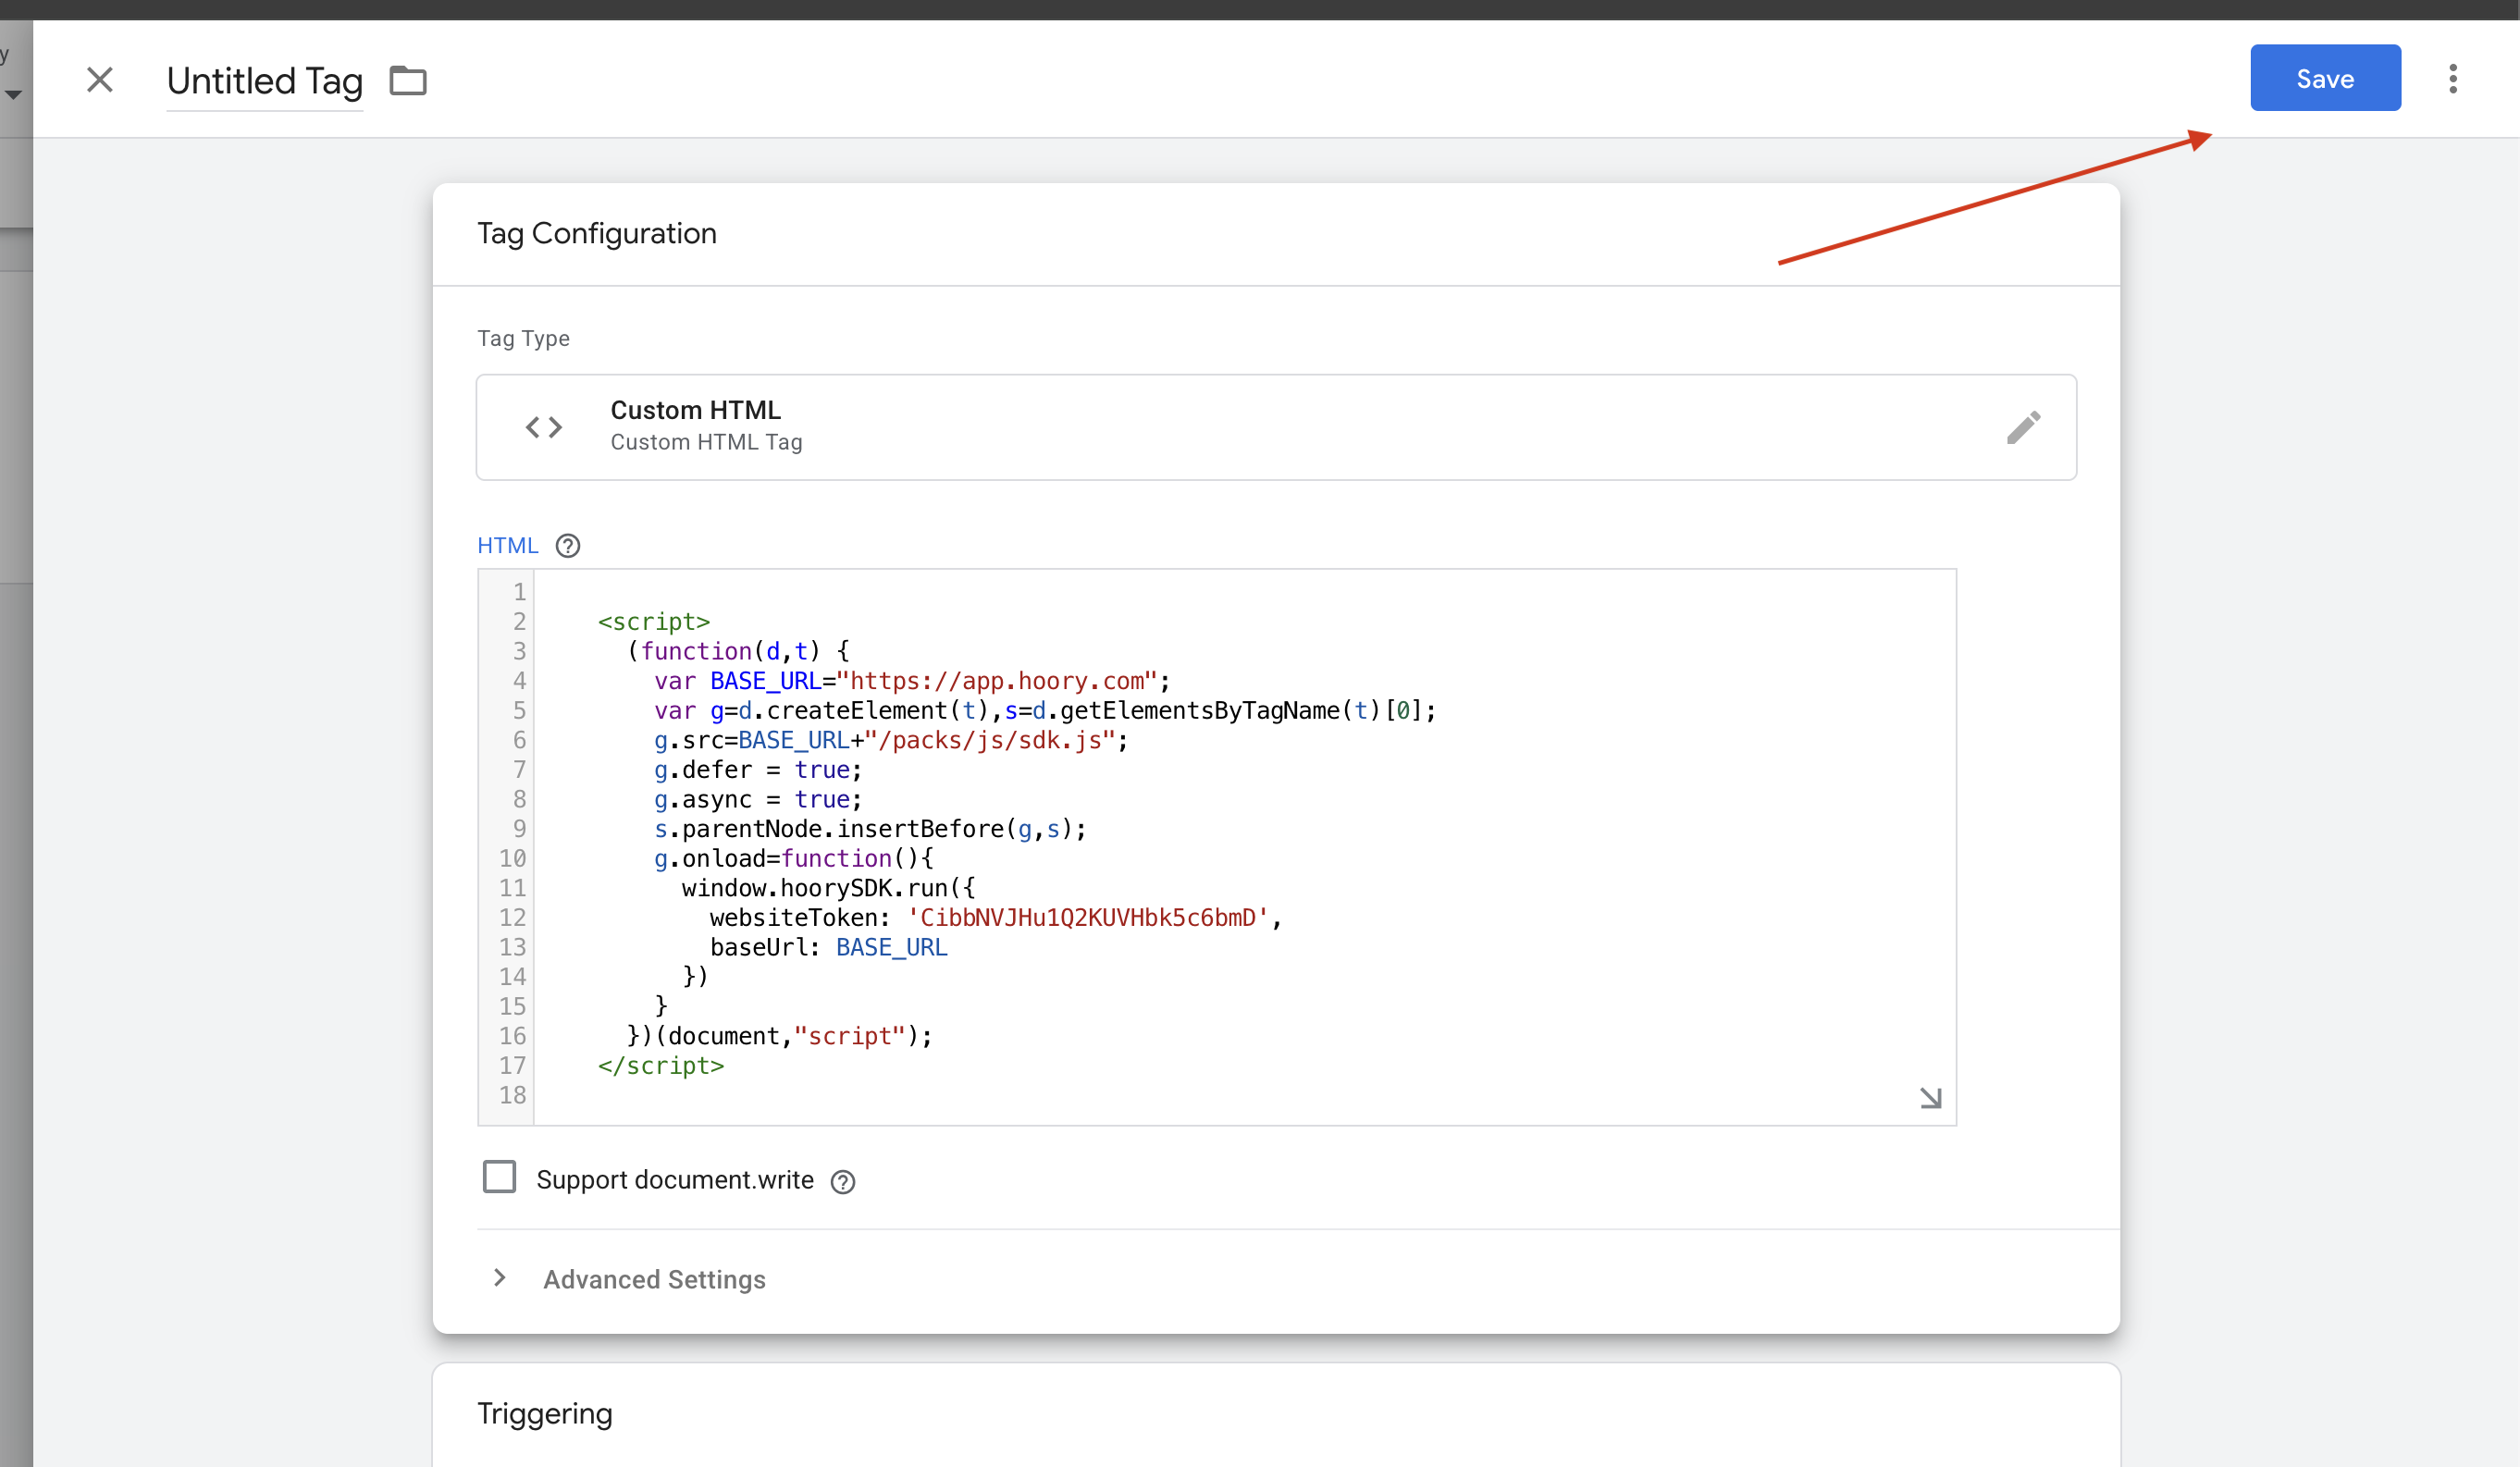
 Copy the script from the inbox configuration in Hoory to the HTML script textarea as shown below. Select "Support document.write" checkbox.
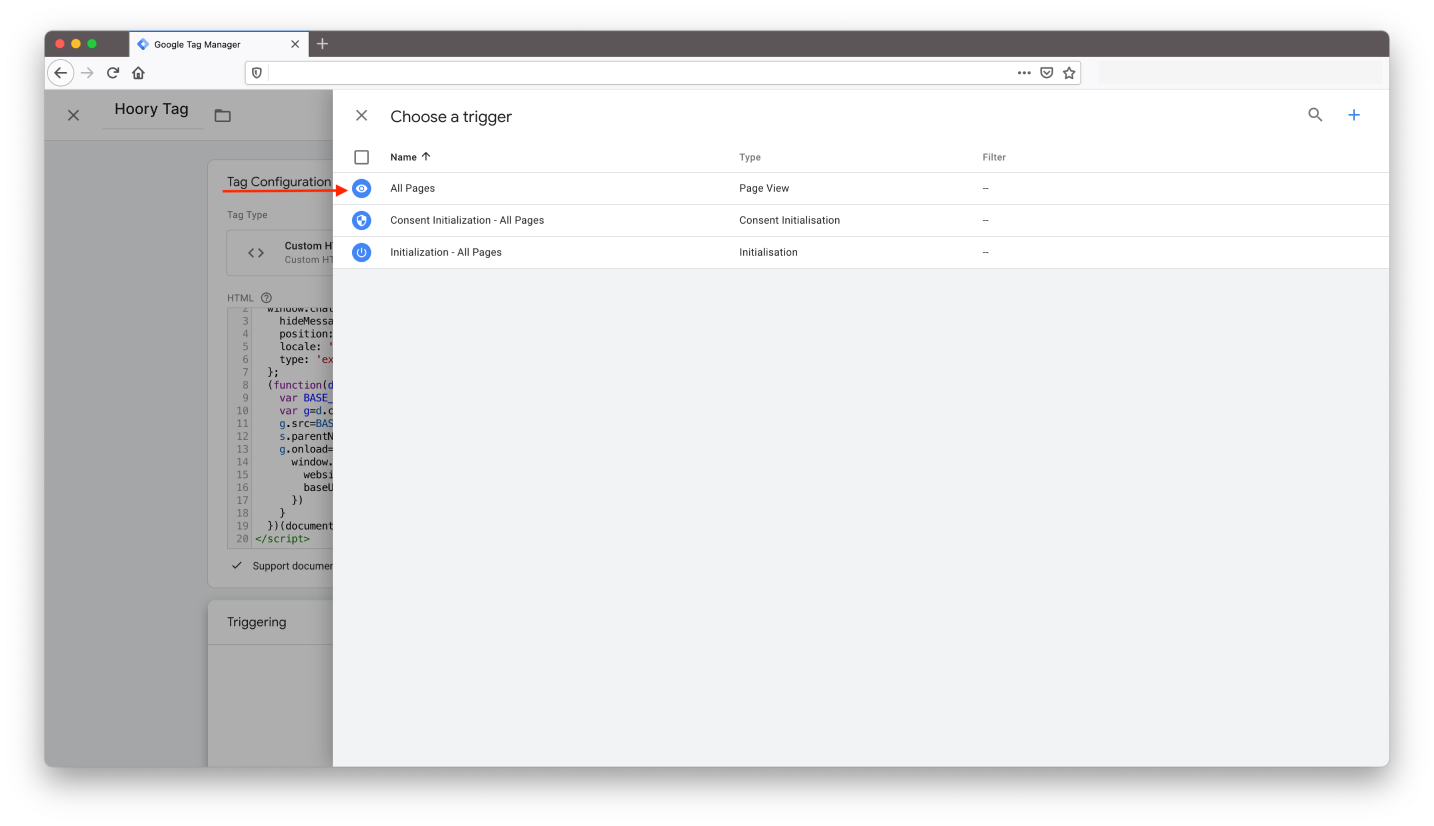
Click triggering and select "All pages" from the list.
Click "Save" to save the tag. You will be able to see tag listed under Workspace changes.
Click Submit to deploy the tag. Provide a version name and deploy the changes by click "Publish".
You have successfully deployed the Hoory live-chat widget to your website using Google Tag Manager. Refresh your website to see the live chat widget appear on all pages.